A Warrior can have a perfectly respectable weapon and still train badly.
Usually, the problem is not mysterious. The monsters are too evasive, the platforms are awkward, or every kill takes one attack more than it should. Add a few potion trips, and the supposedly “best” map becomes a fairly expensive place to stand.
My view is simple: build your Warrior around reliable kills, not impressive-looking stats. That principle matters from your first advancement through level 70—and it matters even more in Classic World, where historical MapleStory advice does not always match the revised game.
This guide explains how to make those decisions. It also separates confirmed announcements from test data and provisional training recommendations. There is no honest way to publish launch-tested EXP figures before launch.
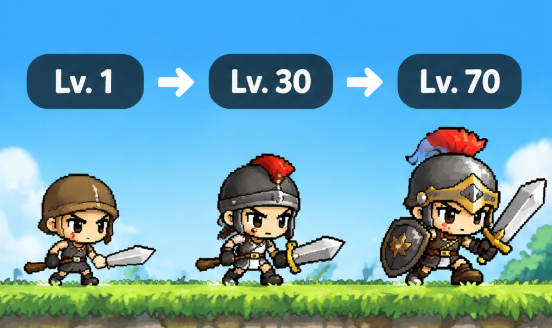
The Warrior Roadmap: What to Prioritize at Each Stage
Your immediate problem changes as you level. Early on, almost any reasonable weapon can work. Later, accuracy, skill investment, and map geometry start deciding whether an upgrade is useful.
| Level range | Main priority | Reason for the choice |
|---|---|---|
| 1–10 | Complete useful beginner progression and prepare for advancement | Avoid unnecessary travel and arrive with supplies |
| 10–20 | Establish reliable attacks and manageable potion use | Consistency matters more than chasing difficult monsters |
| 20–30 | Evaluate hit rate and solo versus party content | Misses and waiting time can erase apparent EXP advantages |
| 30–40 | Commit to a second-job weapon path | Splitting investment can delay useful skill progression |
| 40–50 | Improve damage consistency and map coverage | A better kill threshold often beats a higher-level target |
| 50–60 | Compare sustainable training routes | Potion costs and downtime become harder to ignore |
| 60–70 | Refine your route and prepare for available endgame content | Do not buy equipment for an advancement that is not yet accessible |
These are decision windows, not mandatory map-switching levels. Your equipment, party, and target monsters can move the transition earlier or later.
Levels 1–10: Reach First Advancement Without Making Life Harder
Nexon’s closed-test notes established Warrior first advancement at level 10, with Perion as the associated town. Those notes are useful historical confirmation, but any additional launch requirements should be checked in the live client.
Before leaving the beginner area, finish nearby quests when their rewards justify the detour. You are not trying to clear every quest in the game. You are trying to leave with enough resources that your first mainland session does not end at a potion shop.
Keep a usable weapon. Keep travel money. Leave some inventory space.
None of that is glamorous. All of it helps.
Beginner AP: Do Not Import an Old Build Blindly
Historical guides often assume specific character-creation rules, stat rolls, and equipment requirements. Classic World needs its own verification.
Before committing AP, check the current advancement requirements and the gear you expect to use. For a Warrior, STR is central to damage, but a damage stat cannot compensate for attacks that fail to connect.
The useful question is not “How little DEX can I get away with forever?”
It is: “What is the cheapest reliable way to hit the monsters I should be training on next?”
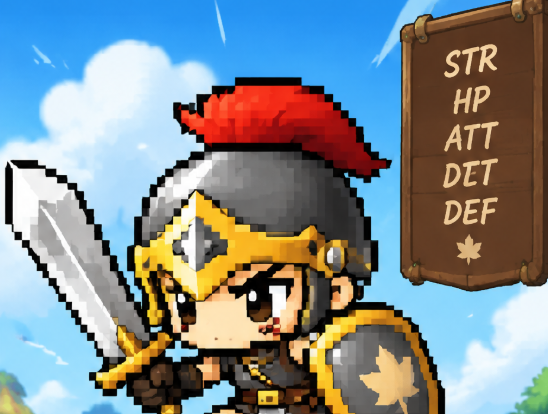
STR, DEX, and Accuracy: Fix the Target Before You Fix the Character
A rigid DEX target is tempting because it removes uncertainty. Unfortunately, it also ignores your equipment, monster choice, and level difference.
If you keep missing, diagnose the problem in this order:
- Try a more suitable target. A lower-level or less evasive monster may immediately improve your session.
- Inspect available equipment. Accuracy or relevant stat bonuses may solve the issue without permanent AP spending.
- Check current buffs and skill effects. Use the actual Classic World descriptions.
- Consider AP changes only after those checks. Permanent allocation deserves more care than a temporary map change.
This is not an argument against DEX. It is an argument against adding DEX because one unsuitable monster annoyed you.
Low-DEX Builds Are Funding Decisions, Too
A player with good accuracy equipment can make choices that a fresh account cannot comfortably copy.
That does not make the fresh account badly built. It means the two characters have different support systems.
My preference for an unfunded Warrior is a build that trains reliably without depending on equipment the player cannot afford. A spreadsheet-perfect build is not especially useful if its practical result is repeated misses and an empty potion bag.
Levels 10–30: First-Job Skills Need a Verified Order
Power Strike and Slash Blast are familiar names to returning Warriors. Broadly, they represent the distinction between focusing damage on one target and attacking groups. Their exact Classic World values, prerequisites, and costs should determine your allocation.
Where several suitable monsters can be gathered, a multi-target attack may improve efficiency. Where enemies are scattered—or too durable—single-target damage can be the more economical choice.
The map decides more than nostalgia does.
Check HP-Related Passives Before Spending Freely
Historical Warrior builds treated the timing of certain HP-growth skills as consequential. Do not assume either that the old behavior remains unchanged or that it has been removed.
Read the current skill descriptions first. If a passive affects future level-up gains, delaying it may matter. If Classic World has reworked that relationship, the old warning may no longer apply.
This is one place where uncertainty should slow you down briefly.
Why This Guide Does Not Publish a Fake “Perfect” SP Table
A level-by-level skill build is useful only when its prerequisites, caps, and point totals are correct.
Classic World’s test revisions already show that historical skill layouts are not a safe substitute. Until the covered launch build is verified, use this priority framework:
Resolve consequential passive timing, establish a practical attack pattern, then improve the skills supporting your actual training route.
Keep a record of your allocation. Do not assume resets are available or inexpensive.
Level 30: Fighter, Page, or Spearman?
Choose your second job for the experience you can actually play, not solely for a later class identity.
| Branch | Why you might choose it | What to investigate first |
|---|---|---|
| Fighter | You want to evaluate a damage-oriented path built around its current offensive tools | Rage, weapon mastery, Rush, and how Final Attack behaves |
| Page | You prefer its weapon options and revised utility interactions | Sword versus blunt-weapon effects, Threaten, and Rush |
| Spearman | You value its weapon style and potential party support | Spear versus polearm mechanics, mastery, and current Hyper Body behavior |
That table is a starting point, not a ranking. A cheap, suitable weapon and a comfortable playstyle can matter more than a small theoretical advantage.
Fighter: Read the Revised Skills, Especially Rage and Rush
MeowDB’s comparison between the first and second closed tests reports that maximum-level Rage changed from an attack bonus of 35 to 40. Its listed defense penalty changed from −35 to −40.
The same comparison says Fighter’s second-job Power Guard slot became Rush, while Power Guard moved to Crusader.
Those are test-to-test records, not guaranteed final launch values. But they are enough to show why copying an old Fighter build can fail: you may be allocating around a different skill layout.
My recommendation is to evaluate offensive support and movement together. A buff that improves damage is useful; a movement tool that reduces time between packs may also improve the session. Their relative value depends on where you train.
Page: Do Not Build Around an Old Blunt-Weapon Effect
The same database reports a substantial change to Blunt Weapon Mastery’s secondary effect.
In its first-test record, the skill supplied an attack bonus and a 25% chance to stun for 3 seconds. In the second-test record, those secondary benefits were replaced by a 20% chance to ignore enemy Weapon Defense.
These percentages describe different effects. Comparing 25% with 20% as though this were a simple numerical nerf would miss the point.
Before choosing a blunt weapon, ask what the current effect does against your likely targets. A weapon path should earn its place through useful mechanics and affordable equipment—not because a decade-old guide called it underrated.
Spearman: Commit for a Reason
Spear and polearm recommendations often carry assumptions about attack animations, mastery, and future skills. Those assumptions need version-specific checking.
On a limited budget, committing to one supported path can simplify equipment spending and SP planning. A hybrid approach needs a demonstrated benefit, because dividing investment has an opportunity cost.
Also check Hyper Body’s current description before treating party utility as a guaranteed advantage. A recognizable skill name is not proof that every historical detail remains intact.
Source for the skill revisions above: MeowDB COT2 skill comparison. Figures reflect the database’s maximum-level comparison and should be rechecked against launch tooltips.
Warrior Training from 1–70: A Route You Can Adjust
Here is the boundary: the following named locations are historical candidates to investigate, not launch-tested rankings. Availability, spawns, monster stats, and access requirements must be confirmed.
| Level range | Candidates to check where available | What makes a candidate worth keeping |
|---|---|---|
| 1–10 | Beginner quests and starting-area monsters | Short travel, easy kills, useful rewards |
| 10–20 | Henesys Hunting Ground, slime maps, Kerning construction areas | Reachable groups without excessive incoming damage |
| 20–30 | Pig maps, subway monsters, KPQ | Reliable hits or worthwhile party completion time |
| 30–40 | Ant Tunnel and suitable Perion-area maps | Consistent kills while second-job skills develop |
| 40–50 | Suitable Evil Eye or Drake maps | Manageable platforms and enough targets to use your attacks well |
| 50–60 | Verified stronger Victoria Island targets and available revised areas | Better measured returns without unsustainable potion costs |
| 60–70 | The best-performing accessible route for your build | Stable EXP, tolerable costs, and useful preparation |
Notice what is missing: a claim that every Warrior belongs on the same map at level 43.
That precision would look helpful. Without supporting measurements, it would just be decoration.
Levels 10–30: Choose Monsters You Can Kill Reliably
Early Warriors benefit from straightforward terrain. If you spend half the session climbing between isolated enemies, a map with theoretically better rewards can lose to a simpler one.
Pig maps and subway maps deserve particular care when their spawns include targets with different difficulty or avoidability. Evaluate the monsters you actually encounter, not the easiest monster named in the guide.
When testing party content, include recruitment time. A quick clear after a long wait is not necessarily efficient leveling.
Levels 30–50: Look for Better Kill Thresholds
A weapon upgrade is most noticeable when it reduces the attacks required to defeat common targets.
Going from three attacks to two is a one-third reduction in attacks per kill. That is arithmetic, not a claim of one-third faster leveling: movement, misses, attack timing, and respawns still matter.
The lesson is practical. Test the upgraded weapon on your normal targets before declaring the purchase successful.
If nothing about your kill pattern changes, a cheaper accuracy improvement—or a different map—might have been more useful.
Levels 50–70: Stop Treating Potion Losses as Background Noise
A difficult map can feel productive because the monsters look more appropriate for your level.
Check the bill.
If each session leaves you poorer and forces another farming detour, measure the combined cycle. Your real progression includes the time spent earning replacement supplies.
Forgotten Hollow is another area to investigate rather than assume. Nexon’s April test notes announced its opening during that test, but those notes do not establish a launch-day level 50–70 training route.
An Original Strategy: Compare the Whole Session, Not Just Combat
This guide’s distinctive contribution is a decision framework, not supposedly secret game data.
A training map has at least three costs: time spent killing, time spent reaching or organizing the session, and resources spent maintaining it. Most map lists focus on the first and barely acknowledge the others.
That is where bad recommendations survive.
Use a 15-Minute Trial
Test two candidate maps under similar conditions. Keep your equipment, buffs, and party setup consistent.
Record the following:
| Measurement | Why you need it |
|---|---|
| EXP gained | Shows actual progression during the trial |
| Potion expenditure | Reveals whether the pace is affordable |
| Ordinary loot and mesos | Measures dependable returns |
| Travel and waiting time | Prevents a misleading combat-only comparison |
| Misses, deaths, or interruptions | Helps explain why the result changed |
Multiply a 15-minute result by four only to create an hourly estimate. It is not a measured hour, and a rare drop can distort it badly.
Repeat close comparisons. One unusually crowded session—or one lucky drop—should not decide your next ten levels.
Choose for Your Constraint
A funded player may reasonably accept higher potion costs for faster EXP. An unfunded player may prefer slightly slower training that pays for itself.
Neither choice is automatically wrong.
The mistake is following a recommendation designed for someone with a different constraint.
Equipment, Crafting, and Mesos: Buy a Solution, Not a Number
Before purchasing an upgrade, finish this sentence:
“This item improves my training because…”
Good answers include “it reduces misses,” “it lowers attacks per kill,” or “it meets the requirement for a useful weapon.” “It has a higher required level” is not enough.
Crafting Changes the Comparison
Nexon’s April closed-test notes introduced crafting for characters level 10 and above. That makes crafting worth checking, but test availability does not guarantee unchanged launch recipes or costs.
Compare the crafted item with a similar market item. Count materials you could otherwise sell. Materials already in your inventory are not economically free.
Avoid speculative scrolling when a clean item already solves the problem. A fresh Warrior usually benefits more from dependable equipment and adequate potions than from gambling the entire budget.
A Note on Buying Mesos Through U4N
Players researching “Buy MapleStory Classic World Mesos on U4N.com” can find a Classic World Mesos marketplace linked from U4N.
My progression advice does not require bought currency. Fix your target choice, hit rate, and potion spending first. More mesos cannot make an unsuitable training route efficient.
KPQ and Party Play: Judge the Entire Process
Nexon’s April test notes said Kerning City Party Quest was restricted to Channel 1 while allowing multiple parties to run simultaneously.
That change matters because entry congestion can influence whether party content is worth doing. However, the channel restriction and simultaneous-instance behavior must be rechecked at launch.
When evaluating KPQ, count recruitment, travel, preparation, failed attempts, and completion rewards—not just the successful run.
For ordinary party grinding, agree on coverage. Warriors chasing each other around the same platforms can waste more time than a modest gear difference ever saves.
Three Warrior Myths That Deserve Retirement
“Every Warrior Needs the Same DEX”
Equipment, funding, level difference, and target choice all affect the decision. A fixed target can be a reference point, but it should not replace diagnosis.
“The Strongest Monster Gives the Best EXP”
EXP per monster is only one input. If the target takes too long, causes misses, or drains supplies, a weaker monster may produce a better session.
“Classic Means the Old Build Still Works”
The recorded changes to Rage, Rush, Final Attack, and Page’s weapon mastery already challenge that assumption.
Use historical guides to understand the class. Use current mechanics to build it.
Level 70: Prepare for the Game That Exists
Before committing to expensive late-stage purchases, check which advancements and regions are actually available.
If third advancement remains unavailable at initial launch, do not spend as though you can immediately use its skills. Maintain a sustainable training setup, keep a mesos reserve, and follow official content announcements.
A useful finishing checklist is short:
- Confirm that your AP and SP choices match the current version.
- Test your main training map after significant equipment changes.
- Keep enough supplies that you are not forced into emergency purchases.
- Verify advancement availability before buying future-dependent gear.
- Save your training results so the next patch has a comparison point.
Frequently Asked Questions
Which Warrior branch is best for a beginner?
There is no launch-tested universal winner established here. Compare current skills, affordable weapons, and your preferred solo or party routine. Choose the branch whose practical requirements you can support.
Should I prioritize accuracy or weapon attack?
If misses are your main limitation, investigate accuracy and target suitability first. If you hit reliably, examine whether more attack will improve your kill threshold.
When should I change training maps?
When a comparable test shows a worthwhile improvement—not merely when a guide says you have reached the next level bracket.
Should I follow a historical level-by-level SP build?
Only after checking it against current prerequisites, skill caps, and effects. Test revisions show that some Warrior skill layouts have changed.
Does reaching level 70 guarantee third advancement?
No. The current MeowDB class reference reports that third jobs are not included in the initial launch. Recheck official release information when the servers open.
A Good Warrior Is a Reliable Warrior
The temptation is always to solve progression with a bigger number: more STR, a stronger weapon, a higher-level monster.
Sometimes that is exactly the right answer.
Often, it is not.
A better target, a cleaner route, or a skill choice that matches your weapon can do more than another expensive purchase. For Classic World’s launch, the strongest habit you can build is checking what changed—and measuring whether your next decision actually helps.
What is limiting your Warrior right now: misses, slow kills, potion costs, or the map itself? Answer that before choosing your next upgrade.