
If you are trying to farm Torchlight: Infinite Flame Elementium, start with a route you can afford to repeat—not the most expensive setup you can enter. A higher Timemark or a larger reward modifier is only useful when the additional income outweighs the extra materials, combat time, and failed runs.
This guide provides a low-budget testing plan for T7 and T7-2, explains how to compare that baseline with T8, and shows how to calculate the income you can actually reinvest. It is a decision framework rather than a claim that one strategy produces a guaranteed amount of currency per hour.
Testing note: The batch sizes below are suggested starting points, not statistically validated sample requirements. All numerical income examples are hypothetical and are not SS14 farming results.
Start With the SS14 Changes That Affect Your Budget
Before copying an older farming setup, check whether its assumptions still match SS14. Three changes are particularly relevant to the decisions in this guide:
- Trade House currency: The October 14 supplemental notes specify that Trade House transactions now use Flame Elementium only. Plan your market purchases around available FE rather than treating Flame Sand as an interchangeable spending balance.
- T8 reward access: Legendary Compasses can drop from Timemark 8, although their drop quantity remains significantly lower than at Profound difficulty. This gives T8 another potential reward source, not a guaranteed profitability advantage.
- Reward scope and combat cost: The Full Load Outlaw Compass adds +100% additional Drop Quantity to Outlaw encounters while giving monsters in the stage +30% additional maximum Life. The reward bonus is encounter-specific; the monster Life penalty applies across the stage.
The practical implication is that you should evaluate where the extra rewards come from and how much of your session pays the difficulty cost. A modifier that improves one encounter can still slow every other fight on the map.
Protect Your Farming Budget Before Buying Upgrades
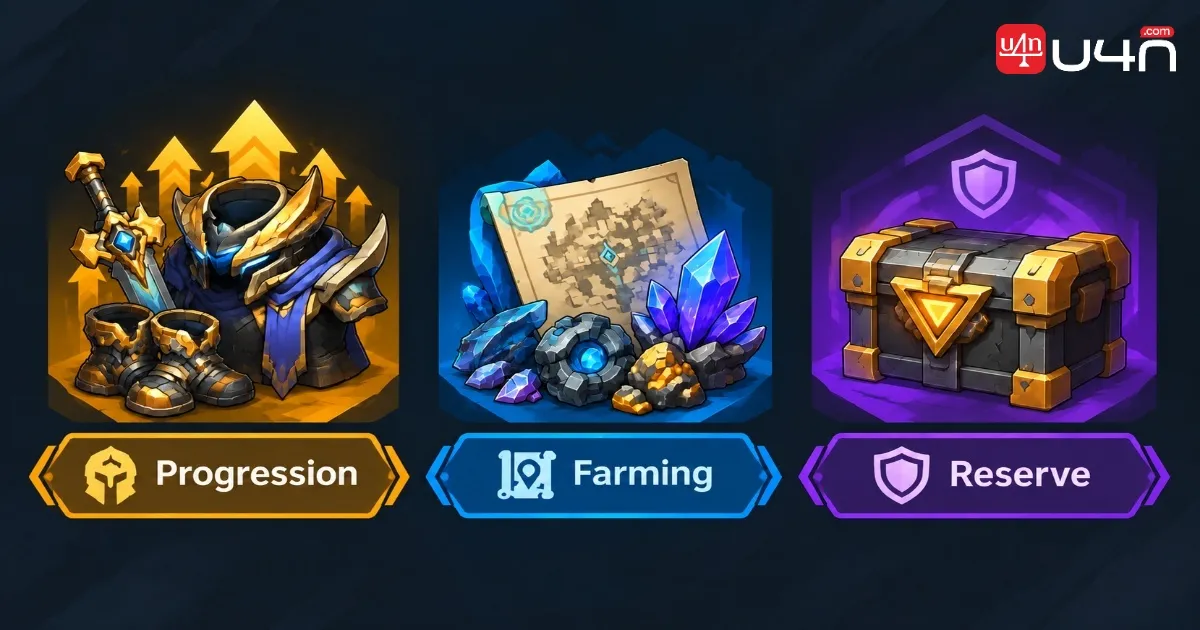
Divide your available resources into three working categories:
| Budget | Purpose | Spending rule |
|---|---|---|
| Progression | Fix damage, defense, or movement problems | Buy an upgrade to solve an identified bottleneck |
| Farming | Pay for the next planned batch of maps | Set the batch cost before starting |
| Reserve | Keep a working route available if a test fails | Do not spend it on an unproven setup |
There is no universal percentage split that suits every character. A more useful rule is to preserve enough resources to return to your established route after an unsuccessful experiment.
During the campaign and early Netherrealm progression, connect each purchase to a visible problem. If ordinary enemies take too long, investigate damage and skill synergy. If deaths interrupt otherwise efficient clears, address survival. If combat feels comfortable but sessions remain slow, review movement, looting, and inventory time before buying more damage.
A Low-Budget T7 and T7-2 Testing Plan
Use T7 or T7-2 as a starting point only if your character can complete it reliably. The purpose of this first route is to establish your own costs and returns—not to prove that these tiers are universally optimal.
Step 1: Choose One Manageable Layout
Pick a layout you can navigate without frequent backtracking and whose boss you can defeat consistently. Keep the route as similar as practical throughout the test.
Do not switch between rushing the boss, full-clearing every corner, and stopping for every optional encounter within the same comparison. Those are different routing decisions and should be evaluated separately.
Step 2: Remove Optional Spending From the First Batch
For your baseline, avoid optional paid modifiers where possible. Use your existing equipment and Pactspirits, and keep the same core setup throughout the batch.
If your chosen route requires consumable materials, record their cost. Materials already in your stash are not automatically free: consuming them can mean giving up a sale or needing to replace them later.
Step 3: Decide What You Will Collect and Sell
Write down a short loot policy before starting:
- Which currency and stackable materials will you collect?
- Which equipment drops are worth inspecting?
- Which items will you list individually?
- Which low-value items will you leave out of the test?
Keep that policy consistent. Otherwise, one route may appear slower simply because you spent more time inspecting and pricing its drops.
Step 4: Run a Small, Fixed Batch
Start with a suggested batch of 10 attempted maps. Record completed maps, failed attempts, total materials consumed, and total session time.
Ten attempts can help expose obvious problems, but they do not establish a dependable long-term average. Repeat the batch before increasing investment, especially if one unusual drop accounts for much of the income.
Step 5: Separate the Clear Test From the Sales Review
You can judge navigation, boss time, and failure rate immediately. Sales require a defined review window.
For example, review both routes after the same 24-hour selling window. That is a suggested accounting convention, not a prediction that every item should sell within a day. Record actual trading time separately from passive listing time, and keep remaining stock classified as unsold.
Baseline Checklist
| Setting | Suggested baseline |
|---|---|
| Difficulty | T7, or T7-2 if already comfortable |
| Optional modifiers | None, or the minimum your route requires |
| Character setup | Existing gear and Pactspirits, unchanged during the batch |
| Routing | Consistent layout preference and encounter policy |
| Initial sample | 10 attempts, followed by another batch if affordable |
| Main question | Can this route reliably fund its next batch? |
Add One Reward Target Before Adding More Cost
Once the baseline is repeatable, choose one reward category or encounter to investigate. Review the current descriptions of the relevant Confusion Cards, Netherrealm talents, and materials before changing the setup.
Build the test around a specific question:
Does this change produce enough additional realized income to cover its material cost and the time it adds?
Keep the difficulty, character, loot policy, and most other settings unchanged. If you add a new Compass, change several talents, replace your Pactspirits, and move to T8 simultaneously, you will not know which change caused the result.
Example Test: Evaluating an Outlaw-Focused Investment
If you want to test Full Load Outlaw Compass, first complete a comparable batch without that investment. Then run a second batch with it, keeping other settings as similar as practical.
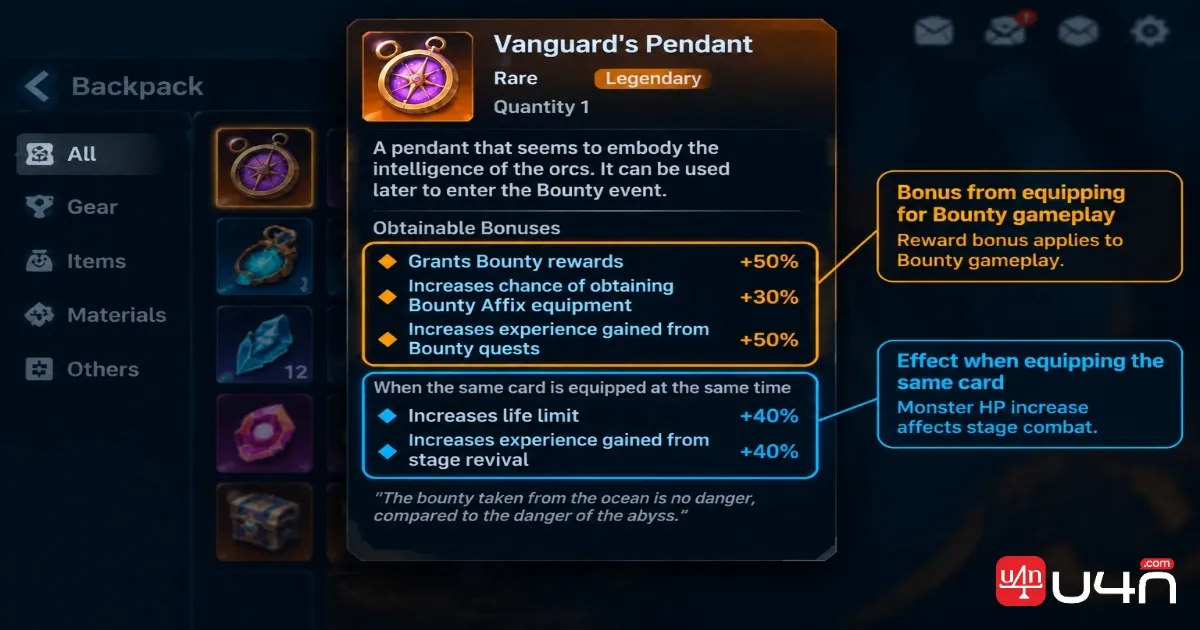
Track the following:
- The purchase or replacement cost of each Compass consumed.
- Total session time, not just the Outlaw encounter time.
- Outlaw-related drops separately where attribution is clear.
- Actual proceeds from items sold.
- Deaths, failed maps, and unusually slow fights.
Do not multiply your baseline map revenue by two. The Compass modifies Outlaw encounter rewards, not every source of income on the map. The correct comparison is the additional realized income against the additional cost and time.
When Should You Move From T7 to T8?
Test T8 when your current route is stable and you can afford the experiment without losing access to that route. Unlocking the difficulty is not, by itself, a reason to make it your permanent farming tier.
A useful readiness check is whether ordinary encounters leave you enough room to recover from mistakes, bosses are manageable, and repeated failures are no longer consuming your budget.
Use Two Stages for the T8 Test
- Affordability and combat check: Prepare a small batch, such as five attempts, with minimal optional investment. Its purpose is to identify severe problems before buying a larger supply of materials.
- Matched comparison: If the first check is comfortable, compare equal-length T7 and T8 sessions using similar accounting, looting, and sales-review rules.
Treat five attempts as a screening exercise, not a reliable profit sample. Repeat comparisons when your budget allows, and avoid drawing a conclusion from one valuable drop.
| Observation | Suggested response |
|---|---|
| T8 is reliable and repeatedly produces better net income per total session hour | Gradually shift more of your farming time to T8 |
| T8 has larger drops but little has sold | Keep the result provisional and review liquidity |
| T8 ordinary packs are comfortable, but bosses dominate the session | Investigate the boss bottleneck before adding investment |
| T8 requires repeated recovery from deaths or failed maps | Return to the working baseline and address the cause |
| T8 only wins because of one exceptional item | Repeat the test and report results with and without that item |
The possibility of Legendary Compass drops is a reason to include those drops in your records. It is not a reason to assign guaranteed Compass income to every T8 session.
Calculate Net Profit Without Inflating the Result
Use one consistent accounting method:
Realized Revenue = Direct FE Collected + Net FE Received From Sales Attributable to the Test
Net Profit = Realized Revenue − Consumed Farming Costs
Net Profit per Hour = Net Profit ÷ Total Active Session Hours
Total active session time should include preparation, mapping, looting, sorting, pricing, and trading. Passive time while an item remains listed should be recorded through your sales-review window rather than counted as continuous playtime.
Hypothetical Example: Higher Revenue, Lower Profit
The following figures illustrate the calculation only. They are not measured SS14 returns or expected hourly rates.
| Metric | Low-investment route A | Higher-investment route B |
|---|---|---|
| Total active session time | 1 hour | 1 hour |
| Direct FE collected | 20 FE | 25 FE |
| Net proceeds from completed sales | 30 FE | 55 FE |
| Total realized revenue | 50 FE | 80 FE |
| Consumed farming costs | 10 FE | 45 FE |
| Net profit | 40 FE | 35 FE |
Route B generates 30 FE more revenue but consumes 35 FE more in materials. With equal session time, route A leaves more spendable currency.
Keep Cash Flow Separate From Supply Value
Consider keeping two cost columns: currency spent buying supplies and the value of supplies consumed. The first shows pressure on your wallet; the second helps compare routes when one uses materials you already owned.
Use a stated valuation rule for owned materials, such as current replacement cost, and apply it consistently. Do not subtract both the purchase cost and the replacement value of the same consumed material in one profit calculation.
Keep unsold items outside realized revenue. Also exclude sales of older inventory from the current test and avoid counting the same currency twice.
Measure Seasonal Gameplay as a Separate Time Investment
Do not assume every seasonal interaction belongs in every farming route. When testing SS14 seasonal gameplay, record the time spent interacting with it and completing associated activities, including any activity outside the map itself.
Where practical, compare similar sessions with a consistent seasonal-engagement policy. Keep season-specific rewards in a separate column until they are sold or otherwise valued under your chosen accounting method.
This prevents a common measurement problem: assigning rewards to a mapping session while leaving out the additional time required to obtain them.
If participating improves your total net return, retain it. If it adds time but its financial value remains unclear, keep that conclusion provisional. You can also choose to participate for progression or enjoyment; just distinguish that goal from maximizing realized FE per hour.

Upgrade the Bottleneck, Not the Entire Setup
Use the test record to decide what to improve next:
- Slow ordinary enemies: Check damage application, coverage, and skill synergy.
- Long boss fights: Investigate single-target damage and time lost avoiding mechanics.
- Frequent deaths: Address the causes before adding harder modifiers.
- Excessive looting time: Refine your collection and inspection policy.
- Large unsold inventory: Review pricing and whether your target rewards match actual buyer demand.
- High revenue but weak profit: Remove optional costs one at a time and retest.
Keep durable character upgrades separate from routine map consumables in your records. A gear purchase can support many future sessions, so charging its entire cost to one batch can obscure the route comparison.
For an optional upgrade bought solely to improve farming, you can also estimate its payback period:
Estimated Payback Hours = Upgrade Cost ÷ Observed Additional Net Profit per Hour
For example, a hypothetical 60 FE upgrade that repeatedly improves net income by 5 FE per hour would take 12 farming hours to recover its cost. That estimate depends on the improvement persisting; it is not a guarantee.
Conclusion: Keep the Route That Funds the Next Session
Start with a manageable T7 or T7-2 baseline, keep optional spending low, and document a repeatable batch. Add one targeted investment only after you understand the original route. Test T8 in stages rather than moving your entire budget into it at once.
Your next upgrade should have a clear purpose, and your next farming batch should have a defined budget. The route worth keeping is the one that repeatedly leaves usable currency after costs—not simply the one with the most impressive drop.