


Forgotten Hollow's strongest selling point is the combination of new training routes and potential weapon upgrades. For players working through the level 40 range, the supplied preview points to several alternatives to familiar Victoria Island hunting grounds. Our team's priority is to separate useful grinding targets from maps that simply look crowded with monsters.
The level 50 weapon leads deserve particular attention. Rafflesia and Duskmander are the main targets discussed, while higher-level enemies introduce additional equipment possibilities. We would approach these as farming leads to investigate, not guaranteed live-server drop tables.
For anyone budgeting their MapleStory Classic World Mesos, that distinction matters. A productive training session should still pay its way when the weapon does not drop. We would rather build a route around manageable enemies, steady experience, and controlled potion use than spend an evening chasing an unconfirmed upgrade.
What This Forgotten Hollow Preview Covers
Nexon's November update preview is the official announcement to check for the Forgotten Hollow update.
Three useful layers of information: monster comparisons, map-layout observations, and preliminary equipment drops. It also repeatedly warns that release data could change.
Our practical reading of the area is straightforward:
| Player goal | Preview targets to investigate | What needs checking |
|---|---|---|
| Move beyond early level 40 training | Glowshroom, Aquamander, Raffle | Actual hits to kill and travel time |
| Replace Copper Drake-style grinding | Ecopus | Defense, platform access, elemental interaction |
| Train while hunting a level 50 weapon | Rafflesia, Duskmander | Live drop tables and sustainable clear speed |
| Find higher-level grinding routes | Rotten Mushroom, Sporewood, Mewd | Accuracy, incoming damage, effective skill damage |
| Attempt boss or rare-equipment farming | Rotten Mushmom and associated maps | Spawn behavior, competition, confirmed rewards |
A map's suggested level range is only a starting point. We would enter cautiously, check whether attacks connect reliably, and then measure how many casts or swings each monster actually takes.
Level 50 Weapons: Which Monsters Should We Watch?
| Equipment lead | Associated monster | Main appeal | Current limitation |
|---|---|---|---|
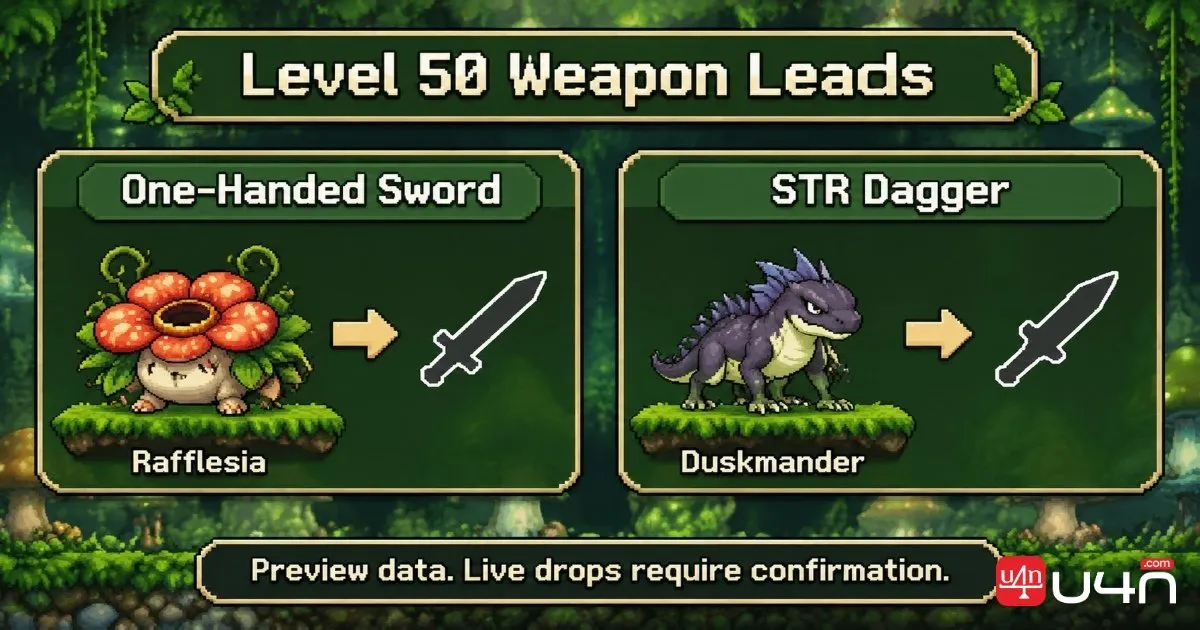
| Level 50 one-handed sword, rendered as Jewel Kuadara | Rafflesia | A targeted upgrade lead for one-handed sword users | Final item details and live drops remain unverified |
| Level 50 STR dagger, called “Cha” in the transcript | Duskmander | Described as having very fast attack speed | Final item details and live drops remain unverified |
| Level 50 crossbow | Sporewood | A possible farming target for crossbow users | Final item details and live drops remain unverified |
| Level 60 Snake dagger | Rotten Mushroom | A higher-level equipment lead | Final item details and live drops remain unverified |
Rafflesia and the One-Handed Sword
Rafflesia is the clearest sword-farming lead. It has a level 50 one-handed sword and places the monster across several maps.
Our recommendation would be to choose the Rafflesia map that preserves your normal training pace. A weapon target becomes less attractive when reaching it means climbing through awkward platforms or repeatedly clearing unrelated monsters.
For a Fighter using a one-handed sword, a slightly less populated map could still be the better farming environment if it allows uninterrupted attacks. We would compare complete rotations, not just the number of Rafflesias visible in a screenshot.
Duskmander and the STR Dagger
Duskmander is the other major target. The transcript highlights a level 50 STR dagger described as having very fast attack speed, which explains the interest from dagger users.
Its distribution may be just as useful as the item itself. The preview shows Duskmander in several locations, potentially giving players alternatives when the most obvious map is occupied.
We would not turn that into a prediction that daggers will become cheap immediately. Multiple hunting grounds can increase farming opportunities, but supply still requires an actual drop rate, enough successful kills, and players willing to sell.
The level 60 dagger deserves even more restraint. It is a lead worth recording, not a reason to abandon a reliable leveling route before release confirmation.

Early Level 40 Training: Start With Familiar Benchmarks
Its use of existing monsters as reference points. Instead of asking players to memorize an unfamiliar bestiary, it compares new enemies with targets they may already be grinding.
Glowshroom is presented as roughly comparable to Lupin in HP, with a more attractive experience return. Aquamander is compared with Skeledog, while Raffle is discussed alongside Lorang.
Those comparisons help us choose where to begin testing. They do not establish equal difficulty.
| Preview monster | Familiar comparison used | Our first test |
|---|---|---|
| Glowshroom | Lupin | Does the same attack sequence still finish the target? |
| Aquamander | Skeledog | Can we maintain our usual kill speed without heavier potion use? |
| Raffle | Lorang | Does the EXP gain compensate for movement and mixed spawns? |
| Ecopus | Copper Drake | Does lower reported HP reduce the number of attacks required? |
Forgotten Entrance-Style Maps
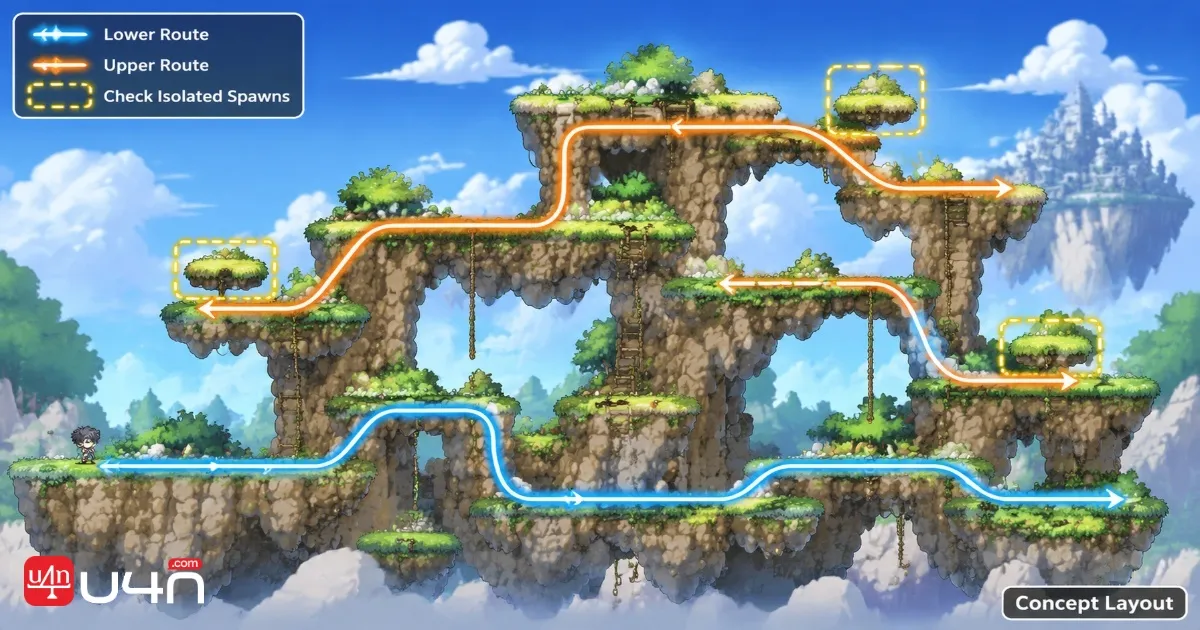
The early entrance maps appear useful because they offer multiple platforms and mixed monster groups.
For a small party, clear boundaries could make that layout manageable: one player handles a lower lane, another covers the upper platforms, and neither repeatedly crosses the other's route.
Solo players should be more selective. A map with plenty of enemies can still feel slow if every rotation involves climbing, dropping, and backtracking.
We would start with Glowshroom or Aquamander routes if those enemies match the character's existing damage range. There is little value in forcing a harder target when a slightly weaker one allows continuous kills.
Ecopus Routes for Players Leaving Copper Drakes
Ecopus is described as a Copper Drake-like target with favorable HP and experience comparisons. The transcript also reports a lightning weakness.
That makes Ecopus a sensible test candidate for Ice/Lightning Wizards, but we would still check the practical result. Does the elemental interaction remove a cast? Does the platform arrangement let the skill reach enough enemies?
The same questions apply to melee characters. A narrow, accessible Ecopus lane may be more productive than a larger map with better-looking spawn numbers.
Duskmander Maps: A Promising Step Beyond Drakes
Duskmander receives some of the preview's most detailed comparisons. The supplied figures put its HP at 2,682, against 2,950 for Drake.
The useful question is not simply whether Duskmander has less HP. We want to know whether that difference changes our attack count.
If both monsters take three hits, the advantage may be modest. If the lower HP lets us move from three hits to two, the route becomes much more interesting. Defense, damage variation, and missed attacks can still prevent that breakpoint from being consistent.
Forbidden Entrance
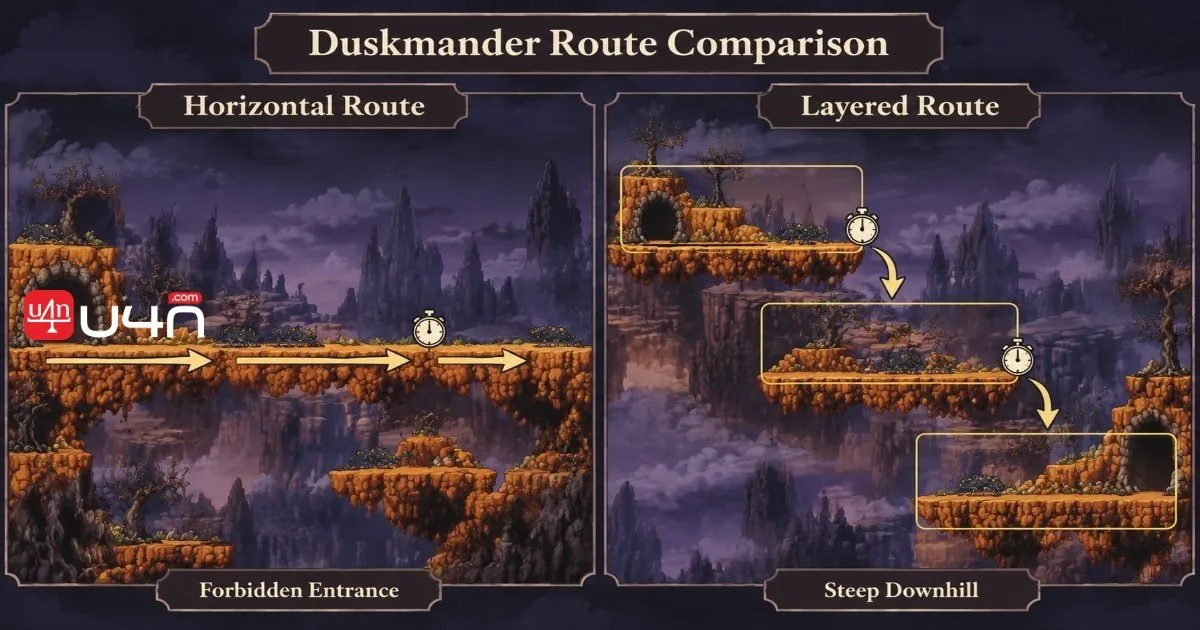
The map described as Forbidden Entrance appears attractive because much of its fighting space follows a relatively direct horizontal route. The preview also shows mixed spawns, including weaker monsters that may need attention.
Our team would check whether a full clear is necessary to maintain useful spawns across the map.
That assignment also needs to make sense for the player taking it. We would agree on party expectations before treating a lower-level character as permanent cleanup support.
Steep Downhill Maps
The Steep Downhill series offers a different trade-off: separated platforms and potentially compact areas for dagger users or other close-range characters.
The preview favors some versions over others because monster placement changes the amount of running required. Two enemies on one ledge and two on another may look adequate on paper, yet feel inefficient when every group requires another transition.
Our preference would be the version that keeps the character attacking most consistently. For a party, that might mean dividing upper and lower sections. For a solo player, it may mean accepting fewer total monsters in exchange for a shorter loop.
The transcript also contains an important data warning: its discussion of “accuracy” shifts between different meanings. We would not publish those numbers as player accuracy requirements. Monster accuracy, monster avoidability, and the player's chance to hit need separate verification.
Higher-Level Routes and Elemental Matchups
The later maps introduce Rotten Mushroom, Sporewood, and Mewd as candidates for stronger characters. These routes are where the preview's lower-HP comparisons become especially tempting, but they also demand more careful testing.
Rotten Mushroom Against Stone Golem
Rotten Mushroom at 3,520 HP and 183 EXP, compared with Stone Golem at 5,134 HP and 175 EXP.
For a character already killing Stone Golems efficiently, Rotten Mushroom deserves a controlled trial. Keep the equipment and buffs unchanged, use comparable test periods, and record both EXP and potion use.
Cleric Routes
Rotten Mushroom and Sporewood are described as having holy-related weaknesses, making their maps relevant to Clerics.
We would separate those issues before recommending a training method. A monster's elemental weakness, whether Heal can damage it, and how much damage the current version of Heal deals are different questions.
A Cleric route should be evaluated using the skill rotation available in the release build. Holy Arrow may be relevant where Heal is inefficient, but the preview alone does not prove which method wins.
Fire/Poison and Ice/Lightning Options
Mewd is described as fire-weak, while Ecopus is described as lightning-weak.
Our advice is to treat those reports as testing priorities. For Fire/Poison Wizards, a Mewd-heavy map could be worth investigating if fire damage compensates for the monster's HP and positioning. For Ice/Lightning Wizards, Ecopus routes may offer a more manageable earlier option.
We would not recommend splitting a mixed map between two wizard types purely because the elements look convenient. Each section still needs enough monsters and a workable rotation to support its assigned player.
Map Layout Matters as Much as Monster Stats
The walkthrough repeatedly returns to a practical concern: good monsters do not rescue a bad route.
We would judge each map by five things:
- Attack uptime: How much of the rotation is spent dealing damage?
- Platform access: Can we move between useful groups without repeated detours?
- Spawn coverage: Are isolated enemies being left behind?
- Resource cost: Are incoming hits and skill costs sustainable?
- Competition: Can we maintain the route without fighting over every group?
Compact layouts may suit melee characters because they reduce chasing. Layered maps may suit organized parties because each player can cover a distinct section. Wide maps can work well too, but only when the travel between packs does not consume the benefit of their extra monsters.
Party size should follow the map, not habit. A full party is not automatically efficient when players repeatedly reach empty platforms or overlap their attacks.
The preview predicts heavy competition around popular weapon maps. We would prepare alternatives rather than assume we can hold the most crowded location. A stable secondary map is a better fallback than spending the session changing channels.
There is also a useful possibility outside Forgotten Hollow: if some players relocate, familiar Victoria Island maps may become easier to access. That is a scenario to watch, not a guaranteed result.
Our First-Session Farming Plan
We would enter with one training target, one equipment target, and a fallback map already selected.
For the first test, we would keep gear, buffs, and attack rotation consistent with our existing hunting ground. We would record starting EXP, finishing EXP, potion use, misses, and approximate downtime. Any session disrupted by repeated competition should be marked accordingly rather than treated as a clean efficiency result.
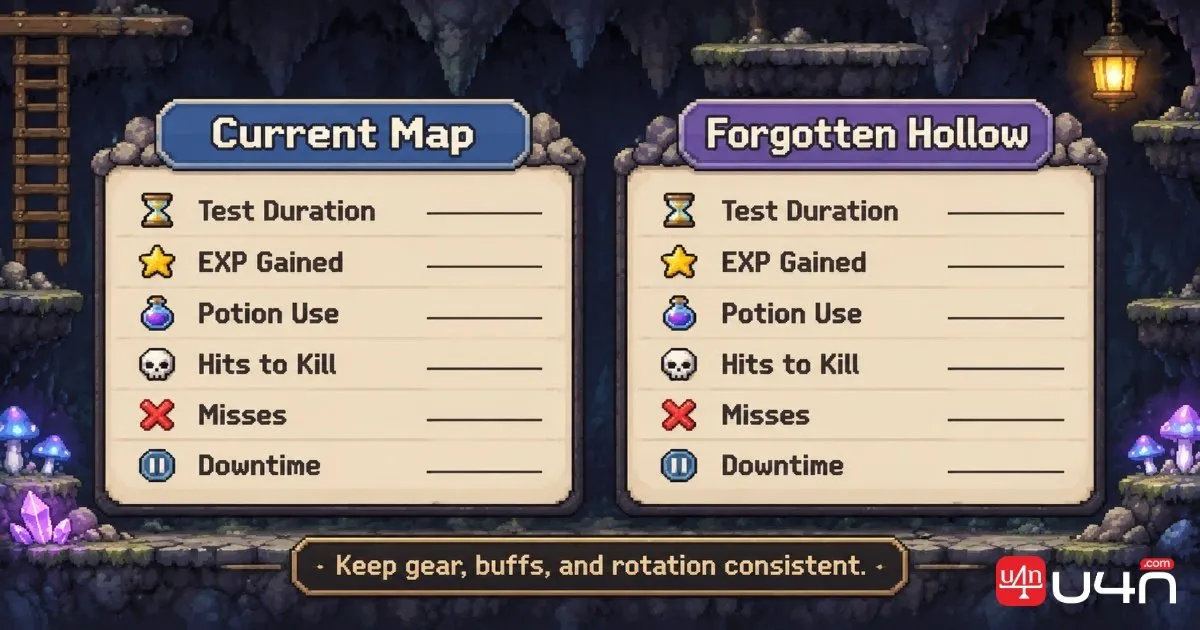
Our checklist for MapleStory Classic World Items would stay separate from the EXP log: exact item name, monster, map, date, and whether the drop was personally observed or only reported. That keeps a promising equipment lead from quietly becoming a supposed guarantee.
If Duskmander reduces our attack count and offers a sustainable route, we would keep testing it. If Rafflesia allows steady training while providing a sword-farming opportunity, we would give it a longer session. If neither beats the current map, we would return to the old route and save the equipment hunt for a stronger damage breakpoint.