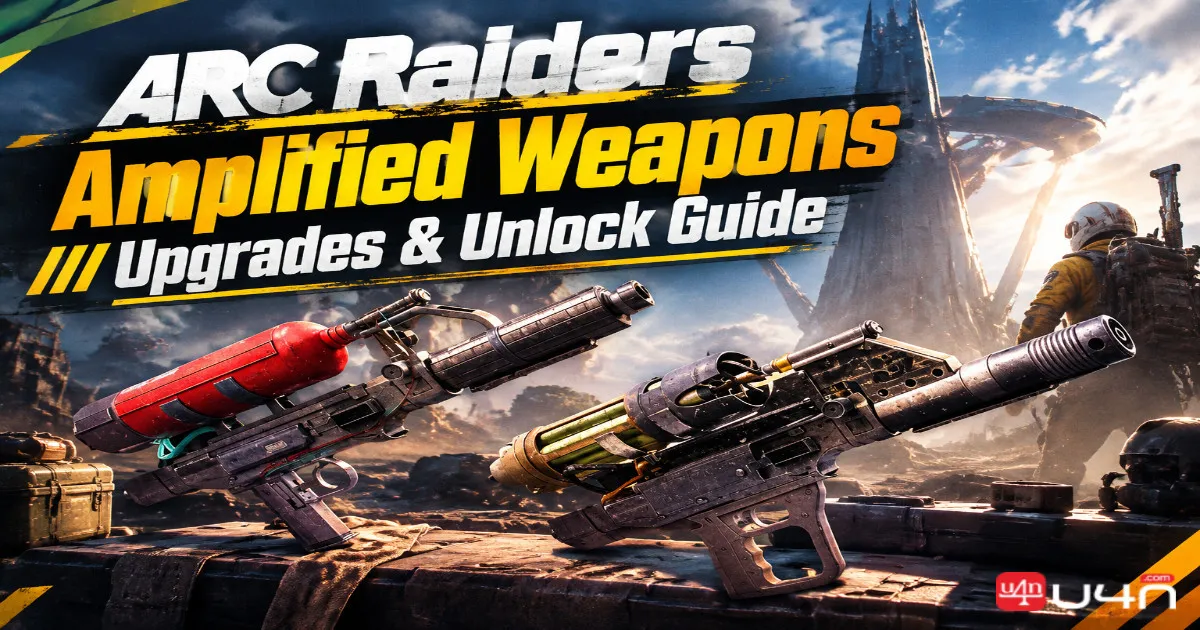
ARC Raiders Amplified Weapons introduce a new endgame progression system in the Frozen Trail update, allowing players to transform fully upgraded firearms into specialized weapons with unique upgrade paths. Rather than simply increasing damage or improving standard statistics, amplification changes a weapon's functionality, appearance, and combat role.
Players can turn the Burletta into a fully automatic firearm, equip the Renegade with a sniper scope, or expand the Rattler's magazine to an impressive 64 rounds. However, unlocking these upgrades requires significant preparation, rare materials, research points, and access to the upgraded Gunsmith and Research Station.
This comprehensive ARC Raiders amplification guide explains how to unlock the Outpost, obtain Amplification Modules, upgrade all 15 eligible weapons, and choose the best amplification paths for PvP and PvE encounters.

What Are Amplified Weapons in ARC Raiders?
Amplified Weapons are enhanced versions of eligible tier IV firearms. The system introduces a fifth progression level beyond the standard weapon upgrade tiers, allowing players to permanently modify a weapon through a dedicated amplification tree.
Each eligible firearm has its own set of upgrades, with options that can substantially change its performance. Some upgrades improve magazine capacity or reload speed, while others introduce new firing modes, specialized ammunition, or improved effectiveness against ARC enemies.
One of the most important differences is that amplification choices are permanent. Selecting an exclusive upgrade can lock out alternative branches, so players should examine each weapon's upgrade tree before spending rare resources.
Amplified Weapons at a Glance
| Feature | Details |
|---|---|
| Update | Frozen Trail |
| Eligible weapons | 15 |
| Required weapon tier | Tier IV |
| Maximum durability | 200 |
| Standard tier IV durability | 130 |
| Required workstation | Gunsmith level IV |
| Research requirement | Research Station level IV for Amplified Research |
| Required item | Amplification Module |
| Upgrade reversibility | No; choices are permanent |
| New weapon models | Yes |
| Attachments | Supported, although some slots change |
Amplification increases maximum weapon durability from 130 to 200, but it does not make a weapon immune to damage. Amplified firearms can still lose durability quickly during intense raids, making repair materials and equipment management important parts of the system.
How to Unlock Amplified Weapons in ARC Raiders
To amplify a firearm, players must complete several progression steps. The process begins with unlocking the Outpost and ends with purchasing individual upgrades from the weapon's amplification tree.

Step 1: Complete the Outpost Project
The Outpost is a three-stage project available through the Outpost tab in the main menu. Accept the project before entering a raid, and bring a camera to complete its first objective.
| Project stage | Objective | Requirements |
|---|---|---|
| 1. Research Topside Living Conditions | Photograph a farmland house | Camera; Ruined Homestead on Blue Gate |
| 2. Gather Building Materials | Submit construction materials | 3 Planks, 5 Sheet Metal, 10 ARC Alloy, 3 Advanced Electrical Components |
| 3. Safeguard the Building Site | Damage flying ARC and a Bully | Deal damage to both enemy types |
For the first stage, travel to the Ruined Homestead in the southern part of Blue Gate and photograph any farmland house in the area. You can zoom in from a distance rather than approaching the building directly.
For the second stage, collect the required construction materials. Celeste sells Planks and Sheet Metal for three Assorted Seeds each, which can reduce the time spent searching for common building supplies.
The final stage requires damage against flying ARC enemies and a Bully. Once both objectives are complete, the Outpost becomes available, allowing you to install and expand your workshop stations.
Resource tip: Scrappy collects Seeds during raids but stops accumulating them when the storage cap of 50 is reached. Claim your Seeds regularly to avoid wasting potential resources.
Step 2: Expand the Outpost to Level 4
Outpost level 4 is essential because it unlocks the ability to upgrade the Gunsmith and Research Station to level IV.
Each expansion adds a room to your Outpost. Choose the room carefully because installed rooms cannot subsequently be moved or exchanged.
| Expansion | Unlocks | Required materials |
|---|---|---|
| Level 1 to 2 | Research Station level II and a new room | 3 Steel Cable, 20 Sheet Metal, 3 Cable Strippers |
| Level 2 to 3 | A new room | 3 Epoxy Buckets, 35 Planks, 3 Hand Drills |
| Level 3 to 4 | Gunsmith and Research Station level IV, plus a new room | 40 Sheet Metal, 3 Laser Levels, 3 Insulation Rolls |
The most difficult items are often specialized construction materials, including Steel Cable, Epoxy Buckets, Hand Drills, Laser Levels, and Insulation Rolls.

The Freight Terminal at Pendola Pass is a useful place to investigate when it appears as a high-value loot zone. Search train cars, nearby tables, shelves, and other accessible surfaces rather than checking containers exclusively.
Step 3: Upgrade the Gunsmith to Level IV
Once the Outpost reaches level 4, you can upgrade the Gunsmith from level III to level IV.
| Required material | Quantity |
|---|---|
| Radial Press | 3 |
| Magnetic Accelerator | 3 |
| Emperor Modulator | 1 |
The Emperor Modulator is the critical requirement. According to the supplied Frozen Trail guide information, it can be obtained inside the fallen Emperor on Pendola Pass.
The Gunsmith upgrade unlocks the Weapon Upgrades tab, where eligible tier IV firearms can be amplified.
Step 4: Upgrade Your Weapon to Tier IV
Before amplification, the selected firearm must already be at tier IV.
This requirement applies even if you have obtained the correct Amplification Module. Upgrade the weapon first, then open the Gunsmith's Weapon Upgrades tab and select the Amplify option.
Amplification also repairs the weapon as part of the process, increasing its maximum durability from 130 to 200.
Step 5: Use the Correct Amplification Module
Amplification Modules come in five marks, corresponding to weapon rarity. Using the wrong mark will prevent you from amplifying the selected firearm.
| Module | Weapon rarity |
|---|---|
| Mk. I | Common |
| Mk. II | Uncommon |
| Mk. III | Rare |
| Mk. IV | Epic |
| Mk. V | Legendary |
Modules are reported to drop from the Frigate and inside the fallen Emperor. The supplied guide states that the different marks have the same drop rate, so the higher marks are not necessarily harder to find.
Once you obtain a module, consider placing it in your safe pocket when possible. Losing a rare module during a failed extraction can delay your amplification plans.
Step 6: Research and Purchase Amplification Upgrades
After amplifying a weapon, right-click it to open its dedicated upgrade tree. Each node displays the materials and research requirements needed to unlock the corresponding modification.
Many upgrades require prior research through the level IV Research Station. Research involves completing raid objectives, submitting research points and ARC components, and confirming the completed project.
The Research Station supports up to five active research projects simultaneously. Planning research around your preferred weapons can help reduce unnecessary grinding.
Where to Find Amplification Modules and Rare Materials
Amplification requires more than the module itself. Several upgrade branches also consume rare materials, including Pressure Regulators and Pneumatic Actuators.
The most useful farming locations depend on the type of item you need.
| Item | Primary source or method | Purpose |
|---|---|---|
| Amplification Modules | Frigate and fallen Emperor | Unlock weapon amplification |
| Emperor Modulator | Inside the fallen Emperor | Upgrade Gunsmith to level IV |
| Pressure Regulator | Emperor Payloads during Redirection conditions | Craft amplified weapon upgrades |
| Pneumatic Actuator | Emperor Payloads during Redirection conditions | Craft amplified weapon upgrades |
| Steel Cable | Search high-value loot zones | Outpost expansion |
| Epoxy Bucket | Train cars and loot areas | Outpost expansion |
| Hand Drill | Search industrial and train-car areas | Outpost expansion |
| Laser Level | Search suitable loot areas | Outpost expansion |
| Insulation Roll | Search suitable loot areas | Outpost expansion |
How to Farm Emperor Payloads
On Pendola Pass, the Redirection map condition can provide access to Emperor Payloads when a Harvester payload is redirected. These containers are reported sources of Pressure Regulators and Pneumatic Actuators.
If you're planning several amplification upgrades, prioritize runs that can provide multiple valuable resources at once. This reduces the number of raids required to collect research materials, weapon components, and rare crafting items.
Always check the active map condition and loot-zone indicators before committing to a route, as availability and useful locations can vary between raids.
How Amplified Research Works
Amplified Research unlocks specialized modifications that can then be purchased on compatible firearms. It is available through the Research Station's Amplified Research tab once the station reaches level IV.
Most research projects involve two stages:
- Complete the raid objectives. These can require dealing damage to specific ARC enemies using particular weapons or equipment.
- Submit research resources. Provide the required research points and ARC components, then complete the project.
After research is unlocked, the associated upgrade still needs to be purchased separately for each compatible firearm.
For example, Embedded Blast Engineering unlocks X-Rounds for compatible weapons. The supplied example requires damage objectives against Fireflies, Hornets, Fireballs, and Surveyors using Light Impact Grenades, followed by 5,000 research points and five Rocketeer Drivers.
All 15 Amplified Research Projects
| Research project | Upgrade unlocked | Compatible weapons |
|---|---|---|
| Embedded Blast Engineering | X-Rounds | Anvil, Bettina, Kettle |
| Thermite-Tipped Rounds | Incendiary Rounds | Aphelion, Canto, Hairpin, Rattler |
| Mobile-Fire Grip Fittings | Sprint Shooting | Burletta, Canto, Hairpin, Rascal |
| Trigger Reset Systems | Semi-Auto | Bettina, Hairpin |
| Targeted Component Trial | Anti-Weak Point | Equalizer, Osprey |
| Top Mounted Optics Retrofittings | Scoped | Jupiter, Renegade |
| Action Economy | Ergonomic Bolt | Jupiter, Osprey |
| Extended Burst Cycles | Increased Burst | Aphelion, Burletta |
| Compact Combustion Charges | Incendiary Grenades | Hullcracker, Rascal |
| Shield Stress Testing | Anti-Shield | Kettle |
| Burst Assembly Recovery | Burst Fire | Burletta |
| High-Voltage Exposure | Charged Burst | Aphelion |
| Magazine Geometry 101 | Drum Mag | Rattler |
| Beam Resonance Tech | Ramping Damage | Equalizer |
| Solid-Core Casting Tech | Slug Rounds | Il Toro |
Not every amplification requires a dedicated research project. Modifications such as Bigger Mag, More Reload, Mag Reload, High Velocity, Tracker Rounds, Carbine Conversion, Full-Auto, and Anvil Splitter are listed separately from the 15 research projects in the supplied game-file information.

How to Earn Research Points
Research points come from research items collected during raids. These items are consumed when studied at the Research Station.
| Research item | Reported research value |
|---|---|
| Frigate Diagnostic Node | 1,000 points |
| ARC Data Module | 200 points |
| Common research documents | Varies by item |
The Frigate Diagnostic Node is especially valuable because it provides a substantial number of research points in one item. ARC Data Modules are another useful option when encountered during raids.
Remember that research points are also used for other Research Station activities, including blueprints and furniture designs. Consider reserving enough points for your next weapon upgrade before spending them elsewhere.

Every Amplified Weapon and Its Upgrade Options
The Frozen Trail amplification system supports 15 firearms, each with its own modifications and restrictions. Some weapons offer straightforward improvements, while others can be transformed into entirely different combat tools.
Complete Amplified Weapons List
| Weapon | Available upgrades | Key benefit |
|---|---|---|
| Anvil | X-Rounds, Anvil Splitter | Armor damage or split projectiles |
| Aphelion | Bigger Mag, Charged Burst, Increased Burst, Incendiary Rounds | Flexible burst fire and ammunition |
| Bettina | Bigger Mag, Semi-Auto, X-Rounds | Magazine capacity or specialized damage |
| Burletta | Burst Fire, Increased Burst, Full-Auto, Sprint Shooting | Major changes to firing mode |
| Canto | Carbine Conversion, Sprint Shooting, Incendiary Rounds | Stability or mobile firing |
| Equalizer | Bigger Mag, Anti-Weak Point, Ramping Damage | Sustained beam damage or ARC specialization |
| Hairpin | Semi-Auto, Sprint Shooting, Tracker Rounds, Incendiary Rounds | Faster firing or target tracking |
| Hullcracker | Incendiary Grenades, Mag Reload | Area damage or faster reloading |
| Il Toro | More Reload, Slug Rounds | Faster reloads or concentrated damage |
| Jupiter | Bigger Mag, Scoped, Ergonomic Bolt | Improved ranged handling |
| Kettle | Anti-Shield, Full-Auto, X-Rounds | Shield breaking or alternate fire modes |
| Osprey | Ergonomic Bolt, Anti-Weak Point, Tracker Rounds | Sniping and target utility |
| Rascal | High Velocity, Sprint Shooting, Incendiary Grenades | Projectile speed and mobility |
| Rattler | More Reload, Drum Mag, Incendiary Rounds | Extended magazine or burning damage |
| Renegade | More Reload, Scoped | Improved reloads or long-range precision |
The Stiletto and Bantam are not included among the 15 amplifiable weapons in the supplied information.

1. Anvil: X-Rounds or Anvil Splitter
The Anvil has two distinct paths.
X-Rounds improve its effectiveness against ARC armor plating while slightly increasing damage against Raiders. This is a useful option for players who want to preserve a more conventional firing style while improving the weapon's anti-ARC role.
Anvil Splitter changes each shot into four projectiles, adding three projectiles per shot. However, each projectile deals 70% less damage, and the modification also changes headshot performance, dispersion, and accuracy characteristics.
These upgrades are mutually exclusive, so choose between concentrated damage and the split-projectile approach before committing.
2. Aphelion: Flexible Burst Fire
The Aphelion offers several upgrade combinations, including a larger magazine, Charged Burst, Increased Burst, and Incendiary Rounds.
Charged Burst allows players to hold the trigger to charge a shot before releasing it. Increased Burst builds on that mechanic by increasing the number of projectiles per burst.
Incendiary Rounds offer a different approach, adding burning damage to targets. This gives the Aphelion flexibility for players who prefer direct burst damage or additional damage over time.
3. Bettina: Magazine Capacity or Semi-Automatic Fire
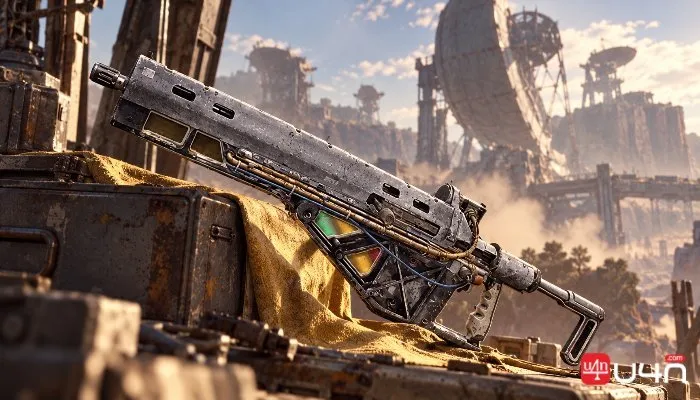
The Bettina's Bigger Mag upgrade increases magazine capacity by 15 rounds.
Alternatively, Semi-Auto changes the firing mode and adds three base damage. X-Rounds can then be added beneath the Semi-Auto branch, increasing effectiveness against ARC armor plating.
The choice depends on whether you value sustained fire or a more deliberate, damage-focused shooting style.
4. Burletta: Full-Auto or Burst Fire
The Burletta is one of the most dramatically transformed weapons in the amplification system.
| Upgrade | Effect |
|---|---|
| Burst Fire | Fires three-round bursts, adding two projectiles per burst |
| Increased Burst | Expands the burst to five projectiles and adds three magazine rounds |
| Full-Auto | Increases fire rate by 60%, with trade-offs to damage and recoil |
| Sprint Shooting | Allows firing while sprinting |
Burst Fire and Full-Auto are mutually exclusive. The Burst Fire route is the more controlled option, while Full-Auto prioritizes a higher volume of fire at the expense of accuracy, recoil management, and headshot effectiveness.
Sprint Shooting can combine with either branch, providing additional mobility.
5. Canto: Carbine Conversion or Sprint Shooting
The Canto can be modified for improved stability and accuracy through Carbine Conversion, although this comes at the cost of agility.
Sprint Shooting is the alternative for players who prefer to remain mobile during combat. Incendiary Rounds can combine with either approach, allowing players to retain additional burning damage.
6. Equalizer: Anti-Weak Point or Ramping Damage
The Equalizer's amplification tree focuses on its beam-based combat role.
- Bigger Mag: Increases magazine capacity.
- Anti-Weak Point: Improves damage against ARC weak points but reduces effectiveness against ARC armor plating.
- Ramping Damage: Increases damage as the beam remains on the same target.
Anti-Weak Point and Ramping Damage are exclusive choices. The former rewards precise targeting, while the latter favors maintaining beam contact during an engagement.
7. Hairpin: Semi-Auto, Tracker Rounds, or Incendiary Rounds
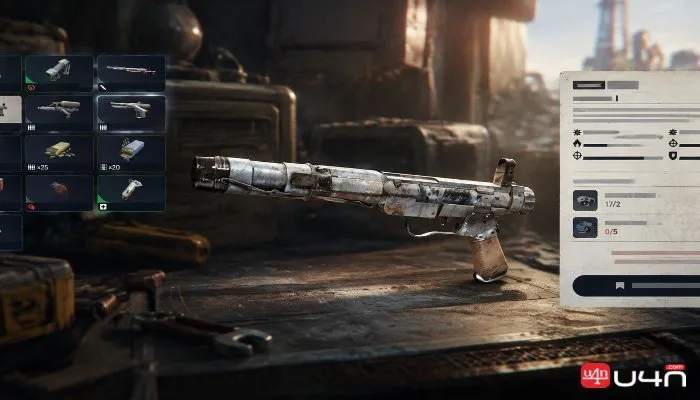
The Hairpin's amplification choices can change how it functions in close-to-medium-range combat.
| Upgrade | Effect |
|---|---|
| Semi-Auto | Increases fire rate by 150%, with a reduced headshot multiplier and increased spread |
| Sprint Shooting | Allows firing while sprinting; requires Semi-Auto |
| Tracker Rounds | Reveals targets hit for five seconds |
| Incendiary Rounds | Adds five burn damage per second for two seconds |
The main choices are mutually exclusive, meaning you must choose the branch that best supports your intended role. Semi-Auto combined with Sprint Shooting is an aggressive option, while Tracker Rounds provide team utility by revealing enemies.
8. Hullcracker: Incendiary Grenades or Mag Reload
The Hullcracker can spread fire when grenades detonate on ARC enemies, giving it an area-damage option.
Mag Reload changes its reloading behavior so the entire magazine can be reloaded at once rather than loading grenades individually.
Because the Hullcracker is an epic weapon, it requires an Amplification Module Mk. IV.
9. Il Toro: Faster Reloading or Slug Rounds
The Il Toro's More Reload upgrade allows more shells to be loaded during each reload step, reducing the time required to replenish the weapon.
Slug Rounds replace the standard buckshot pattern with a single, high-damage projectile. This offers a different approach to shot placement and damage delivery.

10. Jupiter: Scope and Bolt-Action Handling
The Jupiter has three listed options: Bigger Mag, Scoped, and Ergonomic Bolt.
Scoped adds an optic for improved target acquisition at range. Ergonomic Bolt allows players to operate the bolt without leaving the scope, making it easier to maintain visual contact with a target between shots.
These upgrades make the Jupiter particularly relevant to players who prefer a precision-focused combat role.
11. Kettle: Anti-Shield, Full-Auto, or X-Rounds
The Kettle offers three distinct amplification options.
| Upgrade | Effect |
|---|---|
| Anti-Shield | Breaks shields faster |
| Full-Auto | Enables automatic fire at the expense of accuracy and stability |
| X-Rounds | Improves damage against ARC armor plating |
X-Rounds block both Anti-Shield and Full-Auto, so players must choose their preferred route carefully. Anti-Shield is suitable for Raider encounters, while X-Rounds provide a more specialized anti-ARC option.
12. Osprey: Precision and Target Tracking
The Osprey can receive Ergonomic Bolt, Anti-Weak Point, or Tracker Rounds.
Anti-Weak Point improves damage against ARC weak points while reducing damage against armor plating. Tracker Rounds reveal targets hit by the weapon for a short period.
These two modifications are mutually exclusive, but Ergonomic Bolt can combine with either one.

13. Rascal: High Velocity or Incendiary Utility
The Rascal's amplification options include High Velocity, Sprint Shooting, and Incendiary Grenades.
High Velocity increases projectile speed, which can help when engaging moving targets. Sprint Shooting supports a mobile approach, while Incendiary Grenades add an area-damage option against ARC enemies.
14. Rattler: The 64-Round Drum Magazine
The Rattler is one of the most notable candidates for amplification because its Drum Mag upgrade increases magazine capacity by 40 rounds, bringing the total to 64.
| Upgrade | Effect |
|---|---|
| More Reload | Reloads four rounds per step instead of two |
| Drum Mag | Adds 40 rounds, increasing capacity to 64 |
| Incendiary Rounds | Adds burning damage while retaining the 24-round magazine |
The Drum Mag introduces trade-offs: increased recoil and dispersion, along with slower aiming-down-sights speed.
Incendiary Rounds provide a separate route, adding five burn damage per second for two seconds without increasing magazine capacity. They can combine with the More Reload and Drum Mag paths where permitted by the weapon tree.
15. Renegade: Scoped Long-Range Combat
The Renegade offers More Reload and Scoped.
More Reload increases the number of rounds loaded per reload step. Scoped adds a sniper-style optic, making the weapon more suitable for mid- to long-range engagements.
The scoped Renegade is particularly interesting for players who prefer engaging ARC enemies from rooftops or pressuring Raiders from a distance. Its amplification changes the weapon's role, but close-range combat may become less comfortable.
The scoped configuration also loses its magazine attachment slot, so review the available attachment options before committing to this build.
Best Amplified Weapons: Which Upgrades Are Worth Prioritizing?
There is no single best amplification for every situation. The right choice depends on your preferred weapons, the type of enemies you encounter, and whether you focus on PvP, PvE, or a mixture of both.
The following recommendations are based on the listed upgrade effects and the early-access impressions supplied for the Frozen Trail system.
| Weapon and upgrade | Best use | Main advantage | Main drawback |
|---|---|---|---|
| Rattler with Drum Mag | Sustained combat | 64-round magazine | Higher recoil and dispersion |
| Renegade with Scoped | Mid- to long-range fights | Improved ranged targeting | Less suited to close-range combat |
| Burletta with Full-Auto | Aggressive encounters | Higher rate of fire | Greater recoil and reduced accuracy |
| Burletta with Burst Fire | Controlled engagements | Predictable burst damage | Less continuous fire |
| Hairpin with Semi-Auto and Sprint Shooting | Mobile close-to-medium combat | Faster firing while moving | Increased spread |
| Anvil with X-Rounds | Anti-ARC combat | Better damage against ARC armor plating | Less specialized for other roles |
| Equalizer with Ramping Damage | Sustained beam tracking | Damage builds while maintaining contact | Requires continued target tracking |
Best for Sustained Fire: Rattler Drum Mag
The 64-round magazine is the Rattler's defining amplification option. Combined with More Reload, it can provide a substantial reserve of immediately available ammunition.
However, the increased recoil and dispersion mean that players should evaluate their attachments and firing discipline rather than assuming the extra capacity guarantees better performance.
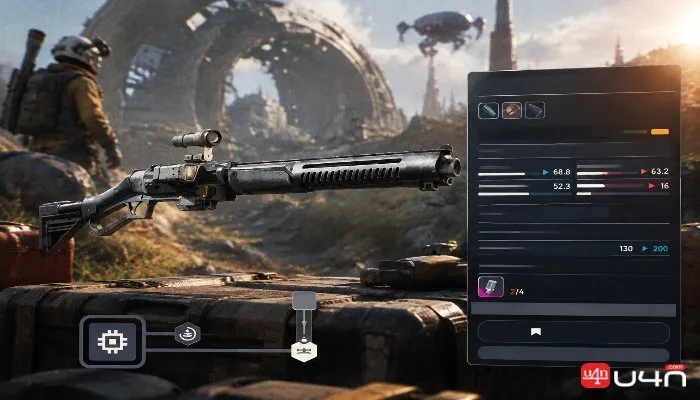
Best for Long-Range Engagements: Scoped Renegade
The Scoped Renegade is an attractive option for players who prefer engaging enemies before they close the distance. Its optic supports target acquisition at range, making it useful for overwatch and ranged pressure.
Its reduced suitability for close encounters is an important trade-off. Consider carrying a secondary weapon that performs better at shorter distances.
Best for Aggressive Mobility: Hairpin
The Semi-Auto and Sprint Shooting combination can support an aggressive playstyle by allowing faster shots while moving.
Tracker Rounds are a useful alternative for players who prioritize team coordination and enemy visibility over direct damage specialization.
Amplified Weapon Durability and Repair Guide
Amplification raises maximum durability from 130 to 200, but amplified weapons can still degrade rapidly during raids.
The supplied early-access observations report that looted amplified firearms can appear with approximately 10 or 11 durability remaining. These weapons may be useful for a short encounter, but they are not reliable long-term replacements for a properly maintained firearm.
How to Repair Amplified Weapons
Amplified Fragments are used to repair amplified firearms. They can be obtained by recycling amplified weapons, old Anvil Splitter modifications, or spare Amplification Modules.
The Field Repair skill is another useful option, restoring up to 30% weapon durability during a round, according to the supplied guide.
| Repair method | How it helps |
|---|---|
| Amplified Fragments | Repairs amplified weapons |
| Recycle spare modules | Can provide seven fragments from an Amplification Module, according to the supplied guide |
| Recycle an amplified weapon | Converts an unwanted weapon into repair resources |
| Field Repair skill | Restores up to 30% durability during a round |
Because repair resources can become expensive, avoid using an amplified firearm for every low-risk encounter. Reserve your best builds for raids where their specialized upgrades provide a meaningful advantage.
Common Amplification Mistakes to Avoid
Players can waste considerable resources by rushing through the amplification process without checking the requirements or upgrade restrictions.
- Amplifying before reaching tier IV: The firearm must be fully upgraded before amplification becomes available.
- Ignoring Outpost progression: Gunsmith level IV requires Outpost level 4.
- Using the wrong module: Module marks correspond to weapon rarity.
- Overlooking research requirements: Many upgrade nodes require research before they can be purchased.
- Choosing an exclusive branch too quickly: Some choices permanently lock out alternatives.
- Ignoring durability costs: Amplified weapons still deteriorate and require dedicated repair resources.
- Spending all research points elsewhere: Reserve enough for your preferred weapon modifications.
- Forgetting to claim Seeds: Scrappy stops accumulating Seeds at the storage cap.
Players who regularly browse community marketplaces or inventory resources for other extraction shooters may also encounter searches for ARC Raiders Items and guides about whether to buy ARC Raiders Blueprint offers. Regardless of how you approach inventory planning, prioritize the actual in-game requirements for amplification and verify any third-party offer carefully before spending money.
ARC Raiders Amplified Weapons FAQ
How do you amplify a weapon in ARC Raiders?
Unlock the Outpost, expand it to level 4, upgrade the Gunsmith to level IV, and upgrade the selected firearm to tier IV. Use the correct Amplification Module in the Gunsmith's Weapon Upgrades tab, then research and purchase the modifications you want.
Where do Amplification Modules drop?
The supplied Frozen Trail information identifies the Frigate and the interior of the fallen Emperor on Pendola Pass as the sources. Module marks correspond to weapon rarity.
Can you reverse an amplification upgrade?
No. Amplification changes are permanent, and certain choices lock out other branches of the same weapon tree. Review the upgrade options before confirming your selection.
Can you loot amplified weapons from other players?
Yes. However, the supplied guide reports that looted amplified weapons typically have only around 10 to 11 durability out of 200, limiting their usefulness.
How many weapons can be amplified?
There are 15 eligible weapons: Anvil, Aphelion, Bettina, Burletta, Canto, Equalizer, Hairpin, Hullcracker, Il Toro, Jupiter, Kettle, Osprey, Rascal, Rattler, and Renegade.
The Stiletto and Bantam are not included in the supplied launch-era amplification list.
Do amplified weapons still support attachments?
Yes, although some attachment slots change. For example, the Scoped Renegade loses its magazine slot, while the Rattler retains its stock, grip, and barrel slots.
What is the best amplified weapon?
The best option depends on your role. The Drum Mag Rattler is attractive for sustained fire, the Scoped Renegade supports long-range engagements, and the Burletta offers substantial changes to firing mode. For anti-ARC specialization, X-Rounds and other targeted upgrades may be more useful than general-purpose improvements.
Prepare Your Outpost Before Choosing an Amplification Build
ARC Raiders' amplification system adds a substantial endgame progression layer to Frozen Trail. Unlocking it requires Outpost construction, rare materials, a level IV Gunsmith, a fully upgraded firearm, and the appropriate Amplification Module.
The most effective approach is to decide which weapon you want to specialize in before spending research points and rare crafting materials. Focus on the upgrades that complement your combat role, account for permanent branching choices, and maintain enough repair resources to keep your amplified firearm operational.
Whether you prefer the Rattler's 64-round magazine, the Renegade's long-range scope, or the Burletta's automatic firing mode, understanding the requirements and trade-offs will help you get more value from every raid.