The Divided quest in ARC Raiders takes us across Pendola Pass to locate four hidden Nomad recordings. If you are struggling to find the right rooms or planning a route that avoids unnecessary backtracking, our team has put together this practical walkthrough. You can focus on the objectives instead of wasting time searching every building, leaving more room to collect useful ARC Raiders Items along the way.
The key to completing this mission is knowing where each recording is hidden and how to reach it efficiently. We recommend choosing your route based on your spawn location, checking each objective as you go, and avoiding fights that do not help you progress. Here is how to find all four recordings and finish the quest with less guesswork.
The key to completing this mission is knowing where each recording is hidden and how to reach it efficiently.
Divided Quest Overview and Route Planning
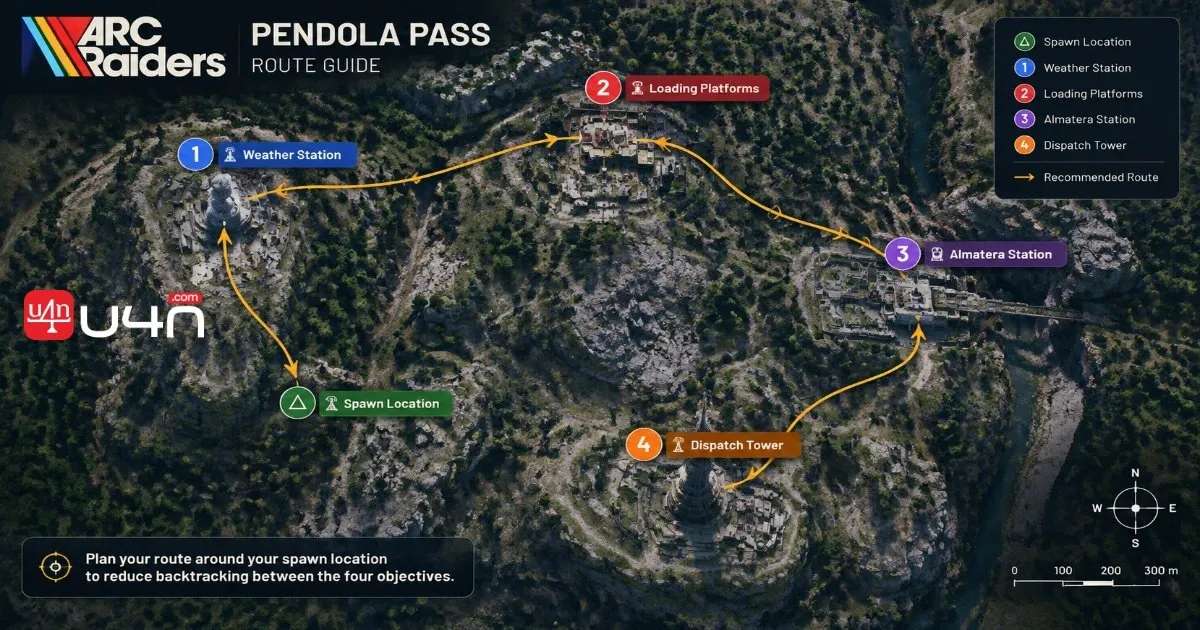
The quest requires you to search four locations on Pendola Pass. Each recording is associated with a different landmark, and the main challenge is navigating the buildings rather than completing complicated combat objectives.
| Location | Where to search | Key detail |
|---|---|---|
| Weather Station | Inside the small station building | Check the desk |
| Loading Platforms | Upper section of the loading area | Follow the stairs and catwalk |
| Almatera Station | Reception area near the center | Look around the computers |
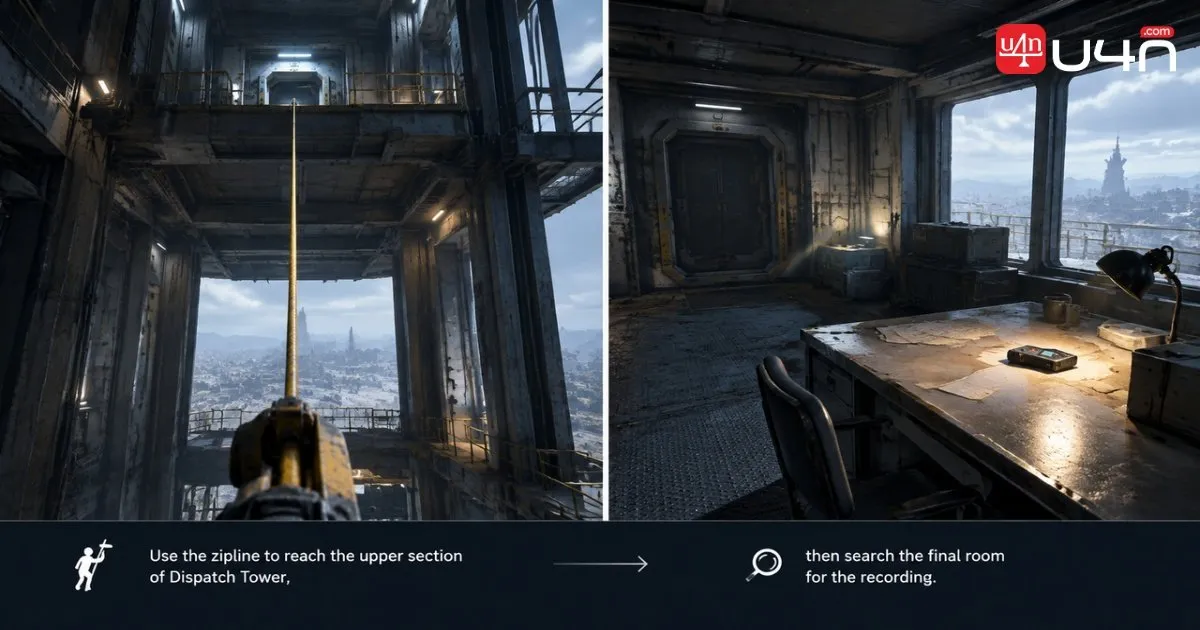
| Dispatch Tower | Upper floor of the tower | Use the zipline and access the upper room |
Our team recommends checking your spawn before committing to a route. If you enter from the southern side, start with the closer objectives and work toward the northern locations. If you spawn farther north, reverse the order where practical.
There is no need to follow one rigid sequence. A sensible route is the one that minimizes travel and leaves you with a manageable path to extraction.
Weather Station and Loading Platforms Recording Locations
Weather Station
The Weather Station is a straightforward first stop if it fits your route. Once you reach the building, head inside and look for the recording on a desk.
You do not need to search every nearby structure. We recommend checking the main room first and interacting with the recording as soon as you find it. Confirm that the objective registers before moving on.
Loading Platforms
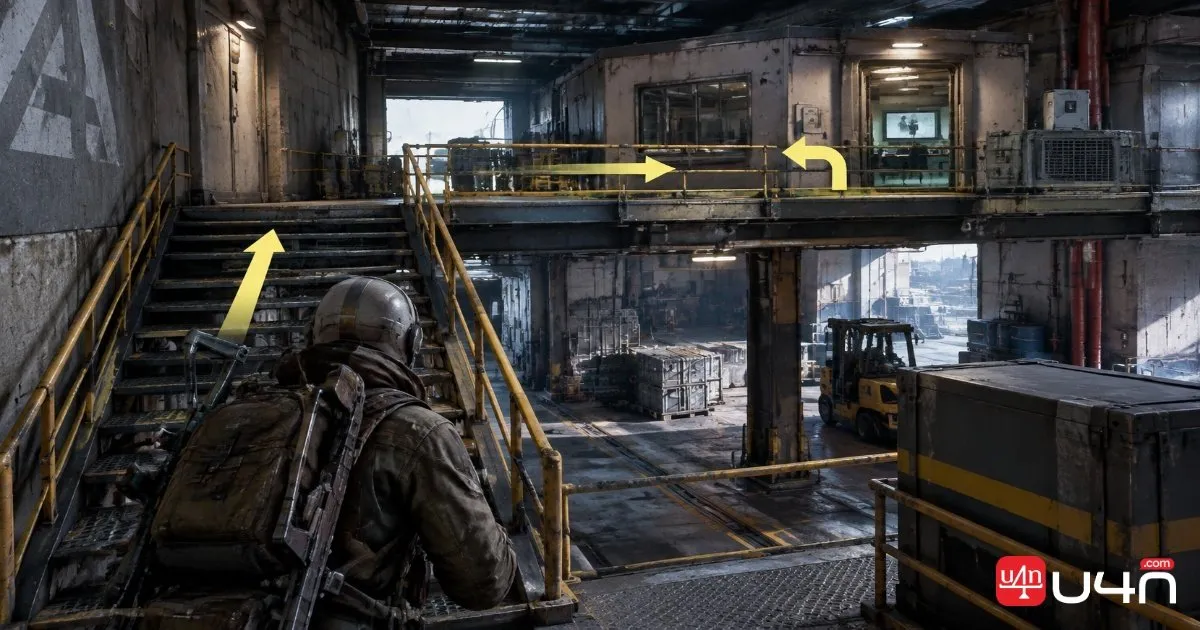
The Loading Platforms area can take longer because it contains multiple structures and different levels. Instead of searching randomly, head toward the northern portion of the area and look for the room described in this walkthrough.
Move inside, climb the stairs, and follow the catwalk to the target room. Take a left when you reach the appropriate section and look for the recording inside.
This is where a clear landmark matters more than speed. If you find yourself searching the ground level without making progress, return to the upper route and check the rooms along the catwalk.
Almatera Station: Find the Recording at Reception
Almatera Station is another location where knowing the interior layout saves time.
Start from the central part of the station and look for a doorway leading toward the reception area. Continue through the passage until you reach the desk and nearby computers. The recording should be located around the reception desk, so focus your search there rather than checking every room in the building.
The original route also identifies this area as being near the train station key room, which can serve as a useful reference if you already recognize that part of the station.
Once you locate the recording, interact with it and check your quest tracker. Confirming completion immediately helps prevent an unnecessary return trip later.
Dispatch Tower: Reach the Upper Room
The Dispatch Tower is the most involved of the four objectives because reaching the recording requires additional movement through the structure.
Follow these steps:
- Enter the tower and locate the obstructed door described in the original walkthrough.
- Use your pickaxe to break through the obstruction if it is still present.
- Look for the zipline that leads to the upper section.
- Ride the zipline, then move toward the upper room.
- Breach the designated door if required.
- Search the desk and interact with the final recording.
The original demonstration estimates roughly eight pickaxe hits for the obstructed entrance. Treat that as an observation rather than a guaranteed number for every situation.
Our advice is to pay attention to vertical navigation here. If the recording does not appear on the floor you are searching, make sure you have reached the correct upper room before retracing your steps.
Extraction and Quest Completion
After collecting the recordings, check the quest tracker to make sure the objectives have registered. Then plan your extraction around your current position and the available route.
Do not keep exploring simply because you have reached the final objective. Once your task is complete, unnecessary detours can introduce additional risk without helping you finish the quest.
The original walkthrough ends by extracting safely and returning to the quest interface to claim the reward. If your progress or completion status looks different in the live game, check the current quest instructions before assuming that the mission has been fully turned in.
Summary
Divided is much easier when you approach it as a navigation task rather than a race. Find the Weather Station recording on the desk, search the upper section of Loading Platforms, check the reception area at Almatera Station, and reach the upper room of Dispatch Tower.
Our team recommends adjusting the route to your spawn, confirming each objective before leaving, and prioritizing a safe extraction over unnecessary exploration. A little route planning can also leave more time to gather useful ARC Raiders Materials during the same run, provided those detours do not put your quest completion at risk.
FAQ
Do I need special equipment for the Divided quest?
The original walkthrough suggests that a dedicated combat loadout is unnecessary. However, the Dispatch Tower section may require a pickaxe to clear an obstructed entrance, depending on the current state of the location. Check the entrance before entering the raid if you want to avoid surprises.
Can I complete all four recordings in any order?
The original walkthrough allows different routes based on spawn location. Choose the order that makes sense for your starting point and extraction plan rather than following a fixed sequence regardless of distance.
What should I do if a recording does not register?
Make sure you interact with the recording itself rather than simply entering the room. Check your quest tracker afterward. If the objective remains incomplete, inspect the correct floor and target area again.
What is the safest way to finish the quest?
Keep your route simple, avoid unnecessary engagements, verify each objective, and head toward extraction once your required progress is complete. If you are unsure whether the quest has been fully completed, check its status after returning rather than relying on memory alone.