

Phantom Blade Zero doesn't let players defeat every boss by simply attacking harder. Some enemies punish careless aggression with long combo strings, while others introduce elemental effects, unusual defensive mechanics, or multi-enemy encounters that demand a completely different approach.
The latest boss discoveries have also made exploration more important. Beyond the main story encounters, players can find four hidden Acolyte bosses tied to elemental masks, resistance equipment, and a secret realm with additional weapons and upgrade materials.
Our team has put together this Phantom Blade Zero Boss Guide to help you prepare for difficult encounters, understand the mechanics behind different fights, and avoid wasting valuable resources. We'll cover the four elemental Acolytes, The Hunt, The Gold-Masked One, and the preparation strategies that make challenging boss battles more manageable.
How Boss Fights Work in Phantom Blade Zero
Before looking at individual encounters, players should understand one important part of Phantom Blade Zero's combat system: different attacks require different defensive responses.
A boss that relies on ordinary melee combos can often be handled through consistent parries and carefully timed attacks. However, enemies using special Red and Blue attacks, elemental effects, or unusual damage conditions require more specific responses.
Understand Red and Blue Attack Signals
Red and Blue attack indicators are particularly important during challenging encounters.
| Attack signal | Recommended response | Combat purpose |
|---|---|---|
| Blue attack | Perform a correctly timed parry | Counter the attack and create an opening |
| Red attack | Use a perfectly timed dodge when required | Avoid the special attack and potentially reposition |
| Regular melee attack | Parry, block, or dodge according to its timing | Reduce incoming damage |
| Grab attack | Recognize the animation and respond to its prompt | Avoid a damaging follow-up |
| Ranged projectile | Parry or reposition depending on the sequence | Prevent unnecessary damage while approaching |
Don't assume every red attack can be handled like an ordinary strike. Some special attacks are designed to punish the wrong defensive response.
Our recommendation is to spend the opening moments of an unfamiliar boss fight learning its attack rhythm. Watch the enemy's movement, identify the beginning of each attack, and avoid committing to long combos before you understand its recovery windows.
Recognize Safe Damage Windows
A boss finishing one attack doesn't always mean it has finished its entire sequence. Some enemies pause briefly before launching another strike, while others use grabs or projectiles to punish players who immediately rush forward.
A reliable approach is to use short attack combinations during confirmed openings. Once you understand the full sequence, you can increase your damage output without constantly exposing yourself to counterattacks.
All Four Acolyte Bosses: Locations and Strategies
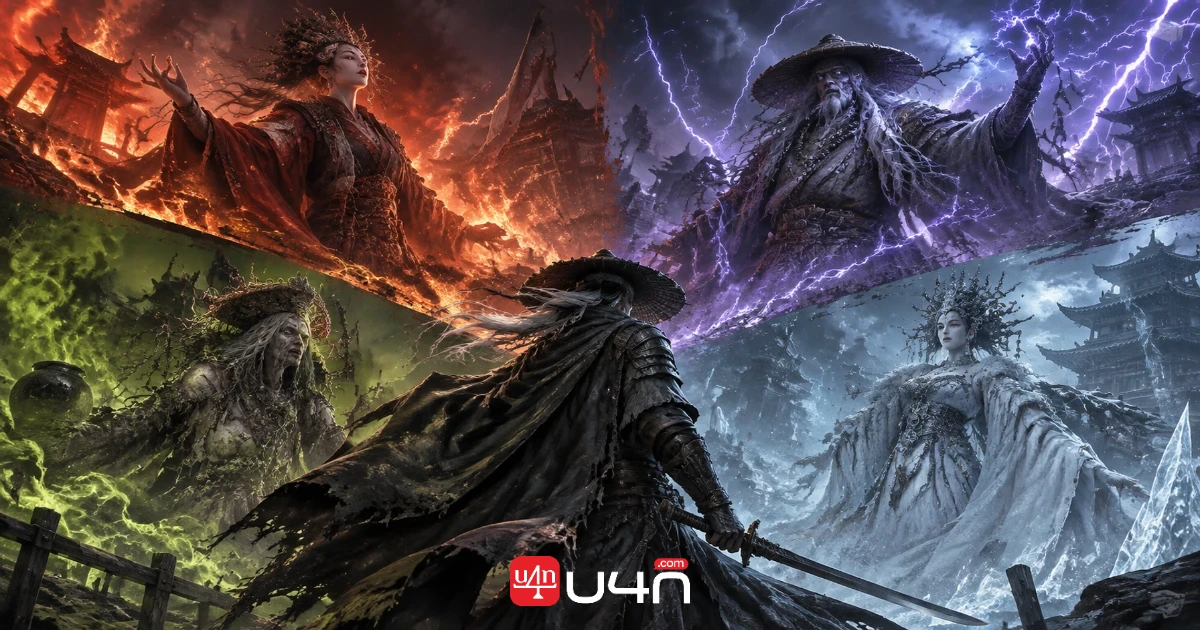
One of the most interesting hidden boss challenges in Phantom Blade Zero revolves around four elemental Acolytes. Each one is associated with a different element and drops a mask required to unlock the Four Guardians' Mirror.
The four encounters also encourage players to prepare specific resistance equipment instead of relying on the same accessories throughout the game.
Acolyte Locations and Requirements
| Acolyte | Element | Location | Important requirement | Reward |
|---|---|---|---|---|
| Acolyte Yanru | Fire | Village of Lu | Story access | Yanru's Blazing Mask |
| Acolyte Lei Ting | Lightning | Pangzhen | Flaming Mane | Leiting's Thunder Mask |
| Acolyte Guhe | Poison | Meigu Lake | Sha-Chi-Powered Boat | Guhe's Venom Mask |
| Acolyte Hansui | Ice | Crimson Manor | Puppet's Tongue | Hansui's Frost Mask |
The questline, Secrets at the Heart of the Lake, begins when you collect one of Firefly's Memory Flowers in the Village of Lu.
The first three Acolytes can be challenged through their scarecrows, which transport Soul into separate arenas. Hansui is different because she appears during a two-enemy encounter inside Crimson Manor.
Acolyte Yanru: Control the Fire Pressure
Yanru is a fire-based caster located in the northern farming fields of the Village of Lu, in the Terraces area.
Her attacks revolve around fireballs, flaming clones, and explosions that can make standing still extremely dangerous.
Recommended strategy:
- Equip Flameward before entering the arena to reduce fire damage and Burn buildup.
- Move sideways when she launches fireball volleys instead of approaching in a straight line.
- Keep moving when she summons flaming clones and launches aerial attacks.
- Watch for the large aura beneath Soul. When it ends with a Red flash, use a Perfect Dodge to teleport toward Yanru and create an opportunity to attack.
- Avoid staying directly in front of her during close-range fire attacks. Move toward her side when the opportunity appears.
Yanru rewards Yanru's Blazing Mask. If you're struggling with her damage output, returning after obtaining Flameward is a much better option than repeatedly attempting the encounter without suitable protection.
Acolyte Lei Ting: Handle Lightning and Paralysis
Lei Ting is located on a southwestern cliffside in Pangzhen, below Old Man Gen's House.
His route is blocked by vines until you obtain the Flaming Mane. To get it, defeat Flame, the Mask-Bound Lion Dance Grandmaster, and take the Dormant Flaming Mane to Lei Dang at Jingyang Hall for repair.
Once you have the repaired item, use it to clear the vines near the Pond of Fading Song.
Recommended strategy:
- Equip Thunderward to reduce lightning damage and slow Paralysis buildup.
- Pay attention to attack colors rather than relying entirely on the boss's movement.
- Parry Blue attacks to drain Lei Ting's Sha-Chi.
- Perfect Dodge Red attacks to perform a Ghoststep behind him.
- Avoid remaining in one position for too long when he begins applying lightning pressure.
Defeating Lei Ting rewards Leiting's Thunder Mask. While exploring Old Man Gen's House, remember to collect the Dusty Old Wooden Comb, which advances The Journey Home tale.
Acolyte Guhe: Survive the Poison Arena
Guhe waits on an island at Meigu Village East Dock. You'll need the Sha-Chi-Powered Boat, available during Chapter 6, to reach the area.
Activate the dock's bell and travel to the eastern end of the island to find the scarecrow.
Poison is the main threat in this encounter. Guhe's attacks and the arena itself can build up poison quickly, making prolonged defensive play dangerous.
Recommended strategy:
- Equip a polished Preservation Jar to reduce poison damage.
- Bring an upgraded Green Serpent Brew to remove poison when the buildup becomes dangerous.
- Avoid standing still during extended attack sequences.
- Use short damage windows rather than trying to maintain constant pressure.
- Keep an eye on your status effects instead of focusing only on the boss's health bar.
Guhe drops Guhe's Venom Mask. The Deathlock accessory is also located beside the scarecrow, but you need to place the Preservation Jar at a nearby dragon statue to claim it.
Acolyte Hansui: Survive the Dual Boss Encounter
Hansui is the final Acolyte and appears deep inside Crimson Manor in Weeping Creek Valley.
Unlike the other three Acolytes, she doesn't fight alone from the beginning. The encounter starts against the Puppet Scavenger, and Hansui joins when the enemy reaches approximately 50% health.
You need the Puppet's Tongue to open Crimson Manor. Obtain it by completing the three Herald's Illusion portals and interacting with the hanging puppet at the Puppet Cell bell in Mountain of Imprisonment.
Recommended strategy:
- Keep your distance from the Puppet Scavenger's heavy attacks and avoid standing directly in front of it.
- When Hansui arrives, shift your attention to her instead of continuing to attack the Scavenger.
- Watch for her ice spells, which build Chill and can freeze Soul for several seconds.
- Carry Green Serpent Brew because it can remove the Freeze effect.
- Defeat Hansui first, then finish the remaining Puppet Scavenger.
The encounter rewards Hansui's Frost Mask, Crystal Puppet Eye [Yang], and Alloyed Scythe Blade. It also unlocks the Nothing Goes to Waste trophy.
Best Resistance Equipment for Elemental Bosses
The four Acolyte encounters demonstrate why accessory selection matters. A resistance accessory can reduce the pressure created by a boss's main element, giving you more opportunities to learn its attacks without losing health too quickly.
Recommended Resistance Accessories
| Boss | Accessory | Main benefit | Preparation priority |
|---|---|---|---|
| Yanru | Flameward | Reduces fire damage and Burn buildup | High |
| Lei Ting | Thunderward | Reduces lightning damage and Paralysis buildup | High |
| Guhe | Preservation Jar | Reduces poison damage | High |
| Hansui | Frostward | Reduces Chill effects and Freeze duration | High |
There is an important difference between obtaining an accessory and upgrading it. A polished resistance accessory can offer considerably better protection than an unupgraded version.
For example, a polished Flameward reduces fire damage by 80%, making it especially valuable against Yanru.
Frostward is a special case because its location becomes accessible after Crimson Forest freezes over, which happens after entering Mirage Estate. Players pursuing the True Ending should pay attention to this timing rather than assuming every resistance accessory can be collected before the same progression checkpoint.
Why Green Serpent Brew Is Worth Carrying
Green Serpent Brew is particularly useful because it removes status effects and increases resistance.
Instead of treating it as an ordinary healing item, think of it as emergency protection against dangerous status buildup. It is useful across the Acolyte encounters, especially when poison or Freeze starts interfering with your ability to respond to attacks.
Its charges are limited, so avoid using it when a status effect is barely noticeable. Save it for moments when the effect threatens to interrupt your movement or defensive timing.
The Hunt Boss Guide: Master Both Phases
The Hunt, Hunter of the Order, is the final boss of Weeping Creek Valley and one of the first encounters that seriously tests a player's ability to adapt between phases.
The fight becomes more aggressive in its second half, but the additional pressure is manageable once you understand the attack sequences.
Phase 1: Watch Aerial Attacks and Axe Throws
The Hunt uses several aerial attacks that end in fast sequences of strikes. Missing the initial defensive timing can leave you exposed to multiple follow-up hits.
Rather than trying to react to every individual strike, focus on the first impact. If you're not confident with the parry timing, dodging away from the sequence is generally safer.
His Red Marker attacks are another major threat. Some markers are partially hidden by his animations, so watching his body movement is more reliable than waiting for a perfectly visible indicator.
Be especially careful after a successful parry. Certain attacks lead into a grab with a random button prompt, meaning the initial counter doesn't automatically make you safe.
The Hunt can also throw axes after creating distance. Don't immediately chase him when he backs away. Wait to see whether he is preparing a ranged attack before closing the gap.
Phase 2: Don't Interrupt the Longer Combos
The second phase gives The Hunt two additional arms and significantly increases his melee pressure.
His attacks become longer, with more frequent slashes, additional axe throws, and more opportunities to catch players who attack too early.
| Phase 2 attack | Recommended response |
|---|---|
| Long melee strings | Wait for the complete sequence before attacking |
| Combo-ending grabs | Learn which strings lead into the grab |
| Aerial attacks | Focus on the initial timing and prepare for the Blue Marker |
| Double axe throws | Wait until the full projectile sequence ends |
| Pillar attack near half health | Move away from the pillars and dodge the incoming dive |
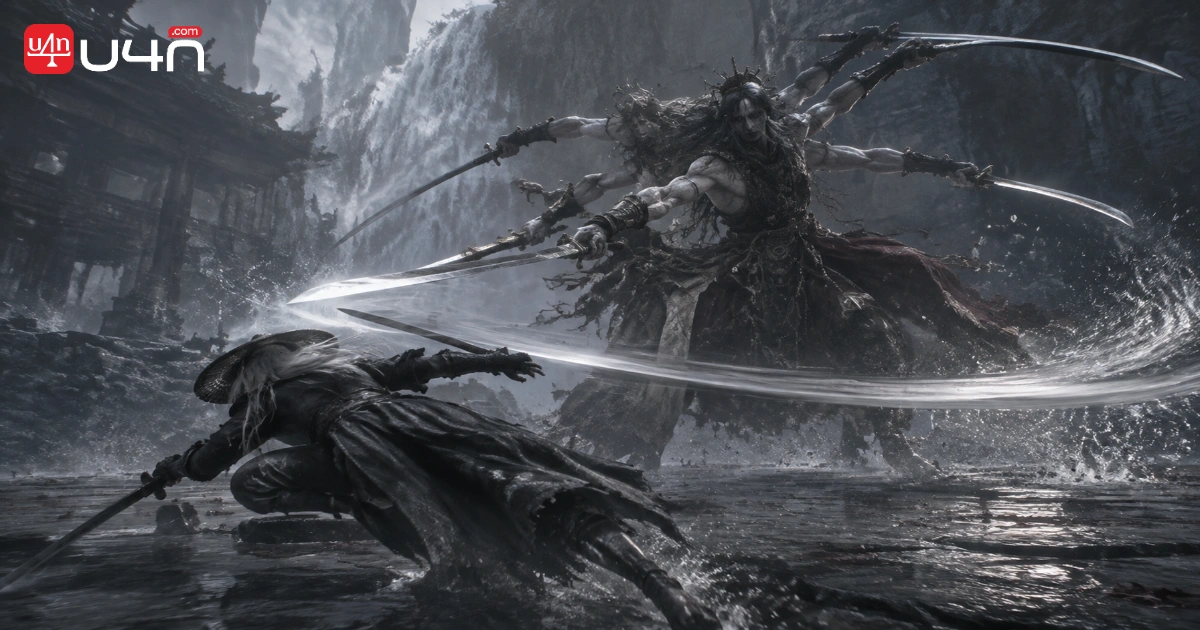
The pillar attack deserves special attention. When The Hunt summons pillars around the arena, move away from them and prepare for his dive. Use a dodge rather than risking a parry against this high-damage attack.
One useful advantage is that dying during Phase 2 sends you directly back to that phase. This allows you to practice its mechanics without repeating the entire first phase every time.
Our recommendation is to use that checkpoint to learn one dangerous attack at a time. Once the longer combos become familiar, the fight feels much more controlled.
The Gold-Masked One: Master the Red and Blue Counters
The Gold-Masked One is a different kind of boss. It is an optional encounter associated with the Long Pillars, and its combat mechanics punish players who rely too heavily on ordinary attacks.
During the first challenge, normal attacks cannot reliably damage the boss while its Sha-Chi remains active. You need to interact correctly with its special attack mechanics or deplete its Sha-Chi before creating a meaningful damage opportunity.
Wait for the Correct Counter Opportunity
The fight revolves around three important conditions:
- Deplete the boss's Sha-Chi.
- Land a Perfect Blue Parry.
- Land a Perfect Red Dodge.
Once you successfully counter an attack, use the opening to deal damage before the boss recovers.
One of the most dangerous moves is the sudden Red grab. It can deal enormous damage, especially on Hellwalker difficulty, so don't become comfortable during the boss's slower attack strings.
Learn the Projectile and Aerial Sequences
The Gold-Masked One has two useful attack patterns to recognize.
The first begins with a projectile, followed by a rapid volley and a Blue Parry attack. Focus on parrying the projectiles and prepare for the final Blue counter instead of rushing toward the boss.
The second is an aerial overhead slash that can lead into a Red Dodge attack. When the boss jumps, prepare for the follow-up rather than attacking immediately after the first strike.
Avoid holding block throughout its long melee combinations. Repeatedly blocking can drain Stamina and leave you vulnerable before the sequence ends.
Why the Reward Matters
Defeating the first Gold-Masked One challenge rewards Counterstrike Bracers. They increase damage by 20% for two seconds after a successful parry.
This accessory is particularly useful for players who build their combat style around defensive counters. It rewards good timing and turns successful defense into an offensive advantage.
Unlock the Four Guardians' Mirror and Discordance Realm
Defeating all four Acolytes is not the end of the questline. Their elemental masks are required to open the Four Guardians' Mirror in northwestern Meigu Lake.
The mirror leads to Discordance, also known as the Phantom Illusionist Ruins. This hidden area contains additional encounters, collectibles, upgrade materials, and a weapon reward.
How to Open the Mirror
Before traveling to the mirror, make sure you have collected all four masks:
- Yanru's Blazing Mask.
- Leiting's Thunder Mask.
- Guhe's Venom Mask.
- Hansui's Frost Mask.
Take the Sha-Chi-Powered Boat through the ice floes in northwestern Meigu Lake and reach the frozen shoal. Activate the Four Guardians' Mirror bell, then interact with the mirror to break the barrier.
The two Crystal Puppet Eyes are not required to enter Discordance, but both are necessary for the final step of Secrets at the Heart of the Lake. Collecting them before progressing too far can save you a return trip.
Important Discordance Rewards
| Reward | Type | Why It Matters |
|---|---|---|
| Acolyte Whisk | Accessory | Builds elemental energy and restores one Remnant Spark at full charge |
| Acolyte Icicle | Accessory | Increases Chill effect and duration by 30% |
| Whiteshadow | Weapon | Uses Chill and Frozen effects to control enemies |
| Sha-Chi Amber Fragments | Upgrade material | Supports progression and upgrades |
| Blackstone Fragments | Upgrade material | Useful for equipment progression |
| Chaos Iron Fragment I | Tempering material | Used to upgrade Sanguine Twin into Shadowless Edge |
| Memory Flower petals | Health progression | Contributes to maximum HP |
The final boss of Discordance is the Blizzard Blademaster. Defeating him unlocks Whiteshadow, a weapon that builds Chill and Frozen effects. Its special attack, Whiteshadow's Frosthowl, freezes enemies caught in its path.
The area also contains a Long Pillar encounter with the Gold-Masked One. Defeating him rewards Chaos Iron Fragment I and advances Bloodline Awakening.
If you're working toward the full Secrets at the Heart of the Lake questline, interact with the red statue after defeating the Blizzard Blademaster and place both Crystal Puppet Eyes to open the ritual chamber. Defeating the elders inside completes the final step and rewards Violet Blossom.
Common Boss Fight Mistakes and Final Preparation Tips
Even with the correct equipment, players can make a difficult encounter harder by repeating avoidable mistakes.
Don't Ignore Elemental Resistance
A boss built around one element can punish players who enter without the appropriate resistance accessory. Before attempting an Acolyte, check your equipment instead of relying entirely on healing.
Don't Attack Through Every Combo
A short pause doesn't always mean the boss is finished. Wait for a clear recovery animation before committing to a longer attack sequence.
Don't Waste Status-Cleansing Items
Green Serpent Brew is valuable against dangerous status effects. Save it for moments when poison, Freeze, or another effect threatens to disrupt your combat rhythm.
Don't Ignore Hidden Boss Progression
The Acolytes are connected to a larger questline. Collecting their masks and opening the Four Guardians' Mirror provides access to additional rewards that are easy to miss if you focus only on the main story.
For players preparing their equipment and progression, Phantom Blade Zero Items for sale can serve as an additional resource. However, the most important factor in difficult boss fights remains understanding attack patterns, choosing suitable resistance gear, and using defensive mechanics correctly.
Final Verdict
Phantom Blade Zero rewards players who adapt rather than rely on one universal boss strategy. Yanru, Lei Ting, Guhe, and Hansui each introduce different elemental threats, while The Hunt and the Gold-Masked One test your ability to recognize attack sequences and respond with precise counters.
Our team's biggest recommendation is to prepare for the encounter before entering the arena. Equip the right resistance accessory, carry useful status-cleansing items, and learn the boss's most dangerous attacks before focusing on damage.
Once you understand what each enemy is designed to test, boss fights become less about surviving random pressure and more about controlling the rhythm of the encounter. That is the difference between repeatedly struggling against a boss and consistently finding the opening that leads to victory.