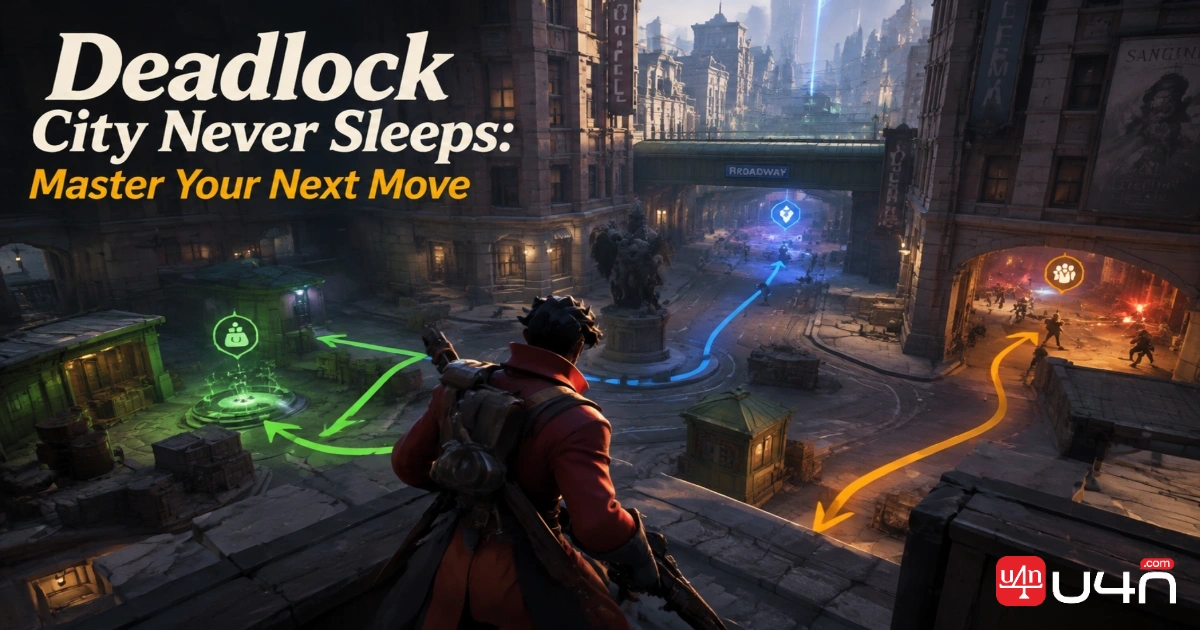
The camp is nearly cleared when the pings start. We can finish it, abandon it, or pretend we haven't noticed the fight. None of those choices is automatically wrong. The mistake is making the decision without checking what we can still influence, and what we're about to give up.
Our team approaches Deadlock Boosting discussions with that same distinction: individual execution and map judgment are separate problems. This Deadlock City Never Sleeps map guide focuses on the second one. We'll break down when to farm, rotate, or fight, then connect those decisions to district risks, realistic match situations, and the follow-up that makes a good play worthwhile.
Start With the Map's Next Deadline
Our quickest answer is this: collect resources until something more valuable needs our presence, rotate before that opportunity expires, and fight only with a clear purpose.
We prefer thinking in deadlines rather than rigid stages. An approaching wave, a threatened structure, and a teammate preparing to engage all create different demands on our time.
| Our immediate situation | Our preferred response | The question that can override it |
|---|---|---|
| A wave needs collecting; nothing urgent is developing | Farm | Are we overlooking an immediate defense? |
| A camp sits beside our intended route | Consider clearing it | Can we finish without missing the next play? |
| Allies are setting up a reachable engagement | Move into supporting range | Are we ready to contribute? |
| Teammates are already escaping | Help the retreat or redirect | Can entering actually improve their position? |
| Opponents commit elsewhere | Evaluate pressure or a resource trade | What happens if nobody answers their push? |
| We gain an elimination | Reassess the map | What can we secure before the opening closes? |
For orientation, Valve's City Never Sleeps presentation identifies Broadway, Greenwich, and York as the main lanes, with Theater, Chinatown, Haunted Lot, and Plaza forming the four districts. It also introduces Haunts with different behaviors in place of the previous neutrals. That gives us both a navigation framework and a reason to reassess familiar farming habits.
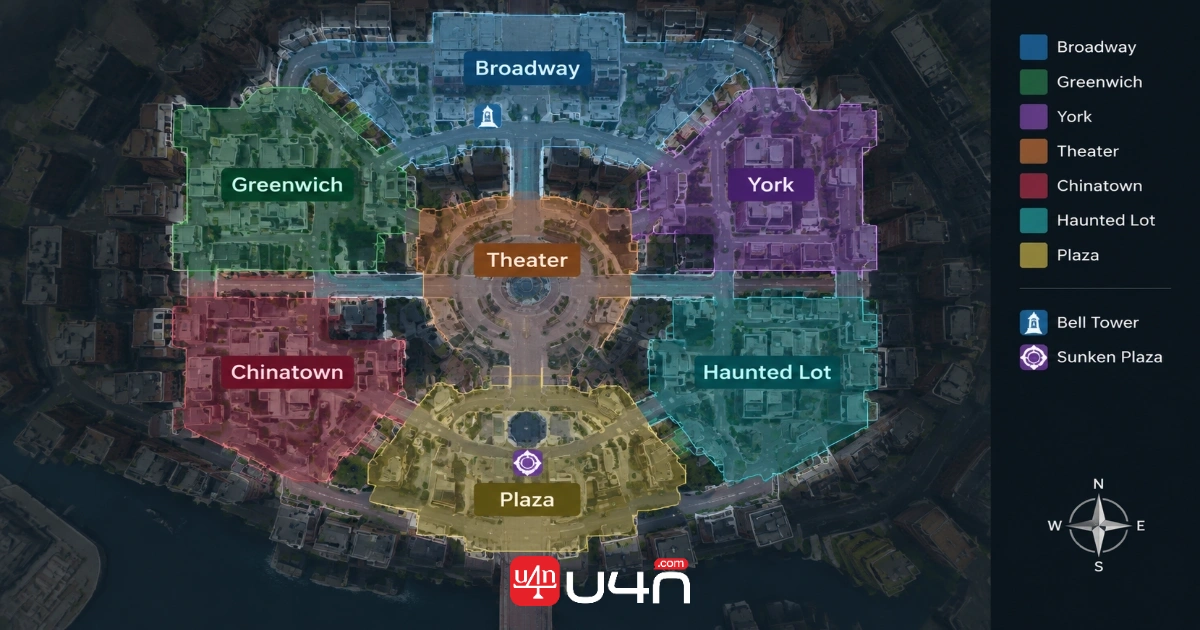
Our recommendation is to learn connections, not just names: which resource sits near our lane, which approach reaches our teammates, and which exit remains usable if enemies arrive.
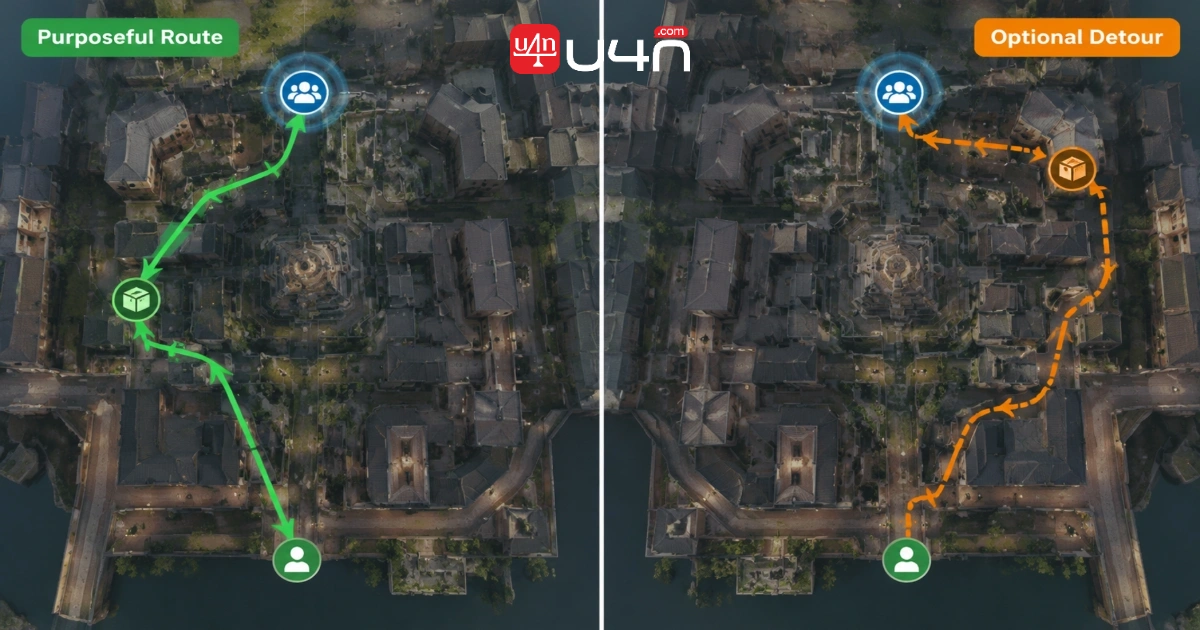
When to Farm: Give Every Detour a Job
Compare the Farm With Its Cost
We don't judge a camp only by what we collect. We compare it with the action we postpone.
Before committing, we ask:
- Does a wave need attention first?
- Are teammates waiting for us to become ready?
- Does this collection complete an important purchase?
- Where will we be when we finish?
That last question catches a lot of questionable routes. We might earn useful Souls yet finish on the wrong side of the map, with another journey between us and the next contest.
Our preferred farming route leaves us richer and better positioned, not just richer.
Set a Stop Condition
"Farm until we're strong" is too vague to guide a decision. We recommend a specific stopping point:
Finish this resource, make the purchase, then join the setup.
Or:
Collect the wave, check enemy positions, then decide whether the nearby camp still fits.
We want each additional camp to earn its place. Being halfway through a farming loop doesn't obligate us to complete it.
A useful team habit is calling the final collection: "One wave, then I'm ready." That gives everyone a timing they can plan around.
Change the Goal When Ahead or Behind
When behind, we'd prioritize repeatable recovery over an ambitious trip into uncertain territory. Our objective is to remain available while rebuilding options, not to force the entire comeback through one risky clear.
When ahead, we'd question whether another farming loop helps us use the lead. We prefer collecting resources along a pressure route, then arriving together for a deliberate play.
We shouldn't farm indefinitely to prepare for a fight we keep postponing.
When to Rotate: Calculate the Fight We'll Reach
Distinguish Travel Time From Useful Arrival
A fight being close doesn't guarantee we can help. Our team evaluates the likely situation at arrival:
- Will allies still have enough health to participate?
- Can we enter alongside someone rather than alone?
- Are we approaching from a playable angle?
- What happens to our lane while we're away?
We'd rather make this assessment before moving than halfway through a journey we feel compelled to finish.
That also gives us permission to cancel. If teammates disengage or the situation collapses, we can redirect instead of arriving out of obligation.
Prepare the Departure
When circumstances allow, we recommend stabilizing the wave, purchasing what we need, and stating our timing before leaving.
Useful calls sound like this:
"I'm buying, then moving toward you."
"Hold the position; I can approach from the side."
"Don't commit yet. I'm still clearing."
We avoid promising an arrival we haven't checked. "Coming" can encourage teammates to stay in a fight longer than our actual position supports.
Don't Mistake a Rescue Attempt for a Good Rotation
Suppose our teammates are retreating and we're the only reinforcement nearby. We'd first look for a way to protect their exit.
We wouldn't automatically charge through them toward healthier opponents. Our presence might be more valuable holding a corner, discouraging pursuit, or preparing the next defense.
A rotation succeeds when it improves the situation, not only when it produces a kill.
When to Fight: Commit for a Result
Before an engagement, we want a sentence that explains its purpose:
We're contesting this position so we can protect the structure.
We're catching this isolated opponent so we can pressure together.
If our explanation is simply "they're there," we'd pause.
Use Five Checks, Not Just a Headcount
| Check | What our team wants to establish |
|---|---|
| Participation | Who can contribute immediately? |
| Condition | Do we have usable health, stamina, and cooldowns? |
| Purchases | Have we converted our resources into the tools we need? |
| Approach | Can we enter together and retain an exit? |
| Conversion | What will we secure if the engagement works? |
We use these questions together. An extra teammate doesn't automatically compensate for poor positioning, and a promising target doesn't eliminate the need for follow-up.
Separate Winning the Exchange From Extending It
After the first elimination, we recommend making a fresh call.
Can we pressure? Can we take a controlled objective? Do we need to recover? Is another chase pulling us away from the original purpose?
We're particularly cautious about the almost-finished target. Low health makes an opponent tempting, but we still want to know where the chase ends and what it delays.
Our preference is to collect the reward from the opening before gambling on a second one.
End the Fight Deliberately
We'd call the reset as clearly as the engagement. Otherwise, one player starts farming, another keeps chasing, and the rest hesitate between them.
"Take this, then leave" gives the team a shared limit. We don't need every win to become the largest possible play.
District Risks: Read the Reward and the Response
Two locations deserve specific attention. Chinatown's Bell Tower is a concentrated Soul hotspot whose bell rings across the map during collection. Sunken Plaza sits below the Plaza district's main square, where outside sounds fade and stamina drains as we descend. Our recommendations below are strategic interpretations of those mechanics, not guaranteed routes.
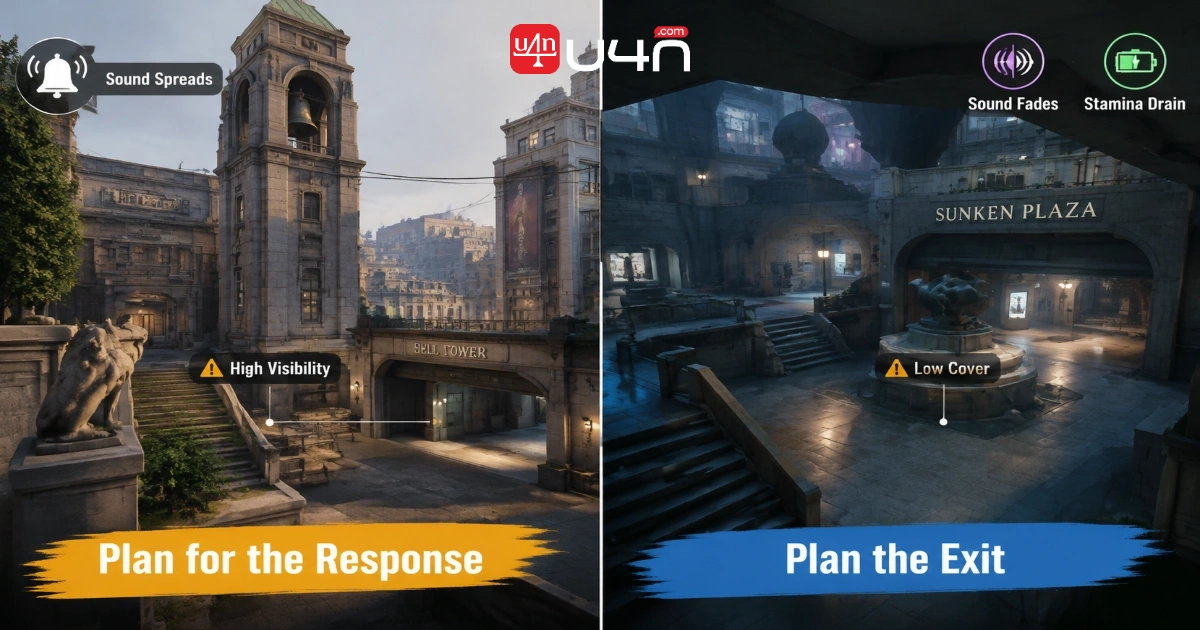
Bell Tower: Budget for the Response
We'd check visible opponents, missing opponents, nearby support, and our next destination before starting.
The important distinction is between an opening to begin and enough time to finish. We wouldn't treat those as the same thing.
Our preferred exit conditions are established beforehand:
- Leave when missing opponents could reasonably arrive.
- Leave when teammates need us elsewhere.
- Leave when continuing would compromise our escape.
We'd also avoid improvising a bait play without informing teammates. Drawing attention is useful only if our team is prepared to act on it.
Sunken Plaza: Keep the Visit Specific
Our approach would be a limited task with a known exit, not an automatic full clear.
Before descending, we'd ask what we're comfortable spending and how we'd respond to pressure. If enemy information is incomplete, we recommend choosing a more conservative commitment.
Once inside, "one more resource" needs a new decision. Entering under acceptable conditions doesn't mean those conditions remain acceptable throughout the visit.
Theater and Haunted Lot: Resist Completion for Its Own Sake
We wouldn't assign either district a permanent "safe farm" label. Instead, we'd evaluate each visit against the next responsibility.
Our practical rule is simple: leaving resources behind is acceptable when staying would leave our team behind.
Three Match Situations Worth Practicing
These are hypothetical examples, designed to show our reasoning rather than prescribe an answer for every match.
Situation A: We're Clearing While Teammates Engage
Our best default: Check whether the engagement will remain playable by the time we arrive.
What changes the call: We'd leave quickly for a reachable, important defense or a close fight our arrival can influence. We'd finish or redirect when allies are already escaping and our route leads into an isolated entry.
The common mistake: Hesitating, abandoning the wave late, then joining after the useful window has closed.
Our improvement isn't simply rotating earlier. It's deciding earlier, and telling teammates what we can actually provide.
Situation B: Enemies Reveal Elsewhere Near Bell Tower
Our best default: Compare the collection opportunity with lane pressure and regrouping.
What changes the call: We'd consider the resource when the enemy commitment creates a credible window. We'd reconsider if dangerous opponents remain missing or our teammates need immediate support.
The common mistake: Treating one piece of enemy information as permanent permission.
We'd choose an exit condition before starting and reassess when the map changes.
Situation C: We Win, but Our Team Is Low
Our best default: Identify a limited reward we can secure without demanding another full engagement.
What changes the call: We'd extend only when our remaining resources, positioning, and enemy information support it.
The common mistake: Confusing a won exchange with unlimited permission to advance.
We want the follow-up to fit the team we have left, not the team we had before the fight.
Replace Bad Habits With a Short Checklist
When reviewing our decisions, we'd start with these habits rather than blaming every loss on aim or teammates.
| Habit we'd question | Replacement we recommend |
|---|---|
| Repeating the same farming loop | Choose the next destination first |
| Leaving whenever a ping appears | Estimate our useful arrival |
| Joining an engagement from guilt | Identify the contribution we can still make |
| Entering a district without an exit | Set a departure condition |
| Delaying a meaningful purchase | Buy, then reassess |
| Chasing while an objective is available | Compare the chase with the conversion |
| Scattering after a successful fight | Agree on one follow-up |
Our Five-Question Reset
Before committing to the next action, we ask:
- 1. What matters next?
- 2. What are we giving up?
- 3. Will we arrive in time?
- 4. What information are we missing?
- 5. What happens if this works?
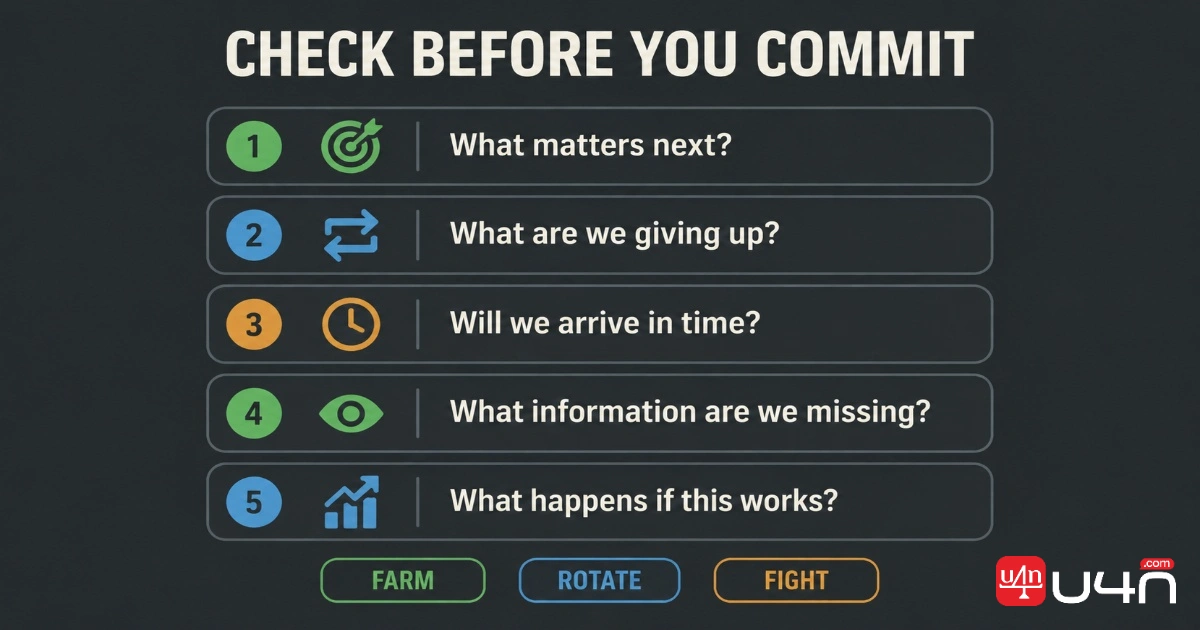
We use this between actions, not as a lengthy discussion during combat. The point is to interrupt autopilot while there's still time to change the plan.
Quick Answers to Common Map Questions
Should We Farm or Fight?
We'd farm when the collection supports our next useful action and no greater responsibility needs us immediately. We'd fight when the contest matters and we're ready to contribute.
When Should We Leave Our Lane?
We'd leave when the destination offers enough value to justify what we surrender. A teammate asking for help deserves a check, not an automatic yes or no.
Should We Stop Farming Every Time Teammates Engage?
No. We'd assess urgency, arrival time, and the likely situation on arrival. If the original fight is no longer reachable, we'd look for a defense, escape cover, or trade.
How Do We Avoid Falling Behind While Rotating?
We recommend cutting journeys that achieve neither resources nor pressure. Clear communication, earlier decisions, and collecting only what fits our route help us avoid unnecessary backtracking.
How Should We Approach Bell Tower and Sunken Plaza?
We'd treat both as planned commitments. At Bell Tower, we account for the response. At Sunken Plaza, we define the task and protect our ability to leave.
Our Closing Call
For readers weighing whether to buy Deadlock Accounts, we'd separate account choice from match improvement. Our recommendation is to review three decisions afterward: the camp we stayed for, the rotation we started too late, and the reward we overlooked after a win. Those moments give us specific habits to work on.
We don't aim to farm the most or attend every skirmish. We aim to make our next action easier for the team to use. Farm with a stopping point, rotate with an arrival in mind, and fight with a follow-up already chosen. That's the map discipline we'd build first.