



Our team would approach the Frigate Inductor with one focused objective: reach the container room shown in the supplied run, search it, and prepare to leave. Takes a partial-clear approach through the Frigate, using an exterior traversal to reach a later section without completing every encounter.
Before committing our ARC Raiders Items, we would separate the equipment needed for that route from the extra supplies carried for a full clear. Movement tools, ammunition, and healing deserve priority. Optional fights and side containers can wait.
Finding an Inductor is possible on repeated attempts, but does not establish a guaranteed drop rate. We would treat this as a demonstrated search route, with the same attention to access, survival, and extraction as any other material run.
The goal is to reach the Frigate's container room, search the available containers, secure the Inductor if it appears, and extract. Completing every encounter aboard the Frigate is not required for this demonstrated route.
Pack for Movement and the Required Fights
Mixes a targeted material run with preparations for completing the Frigate. Our recommendation is to pack around the shorter objective while keeping enough ammunition to recover from a messy encounter.
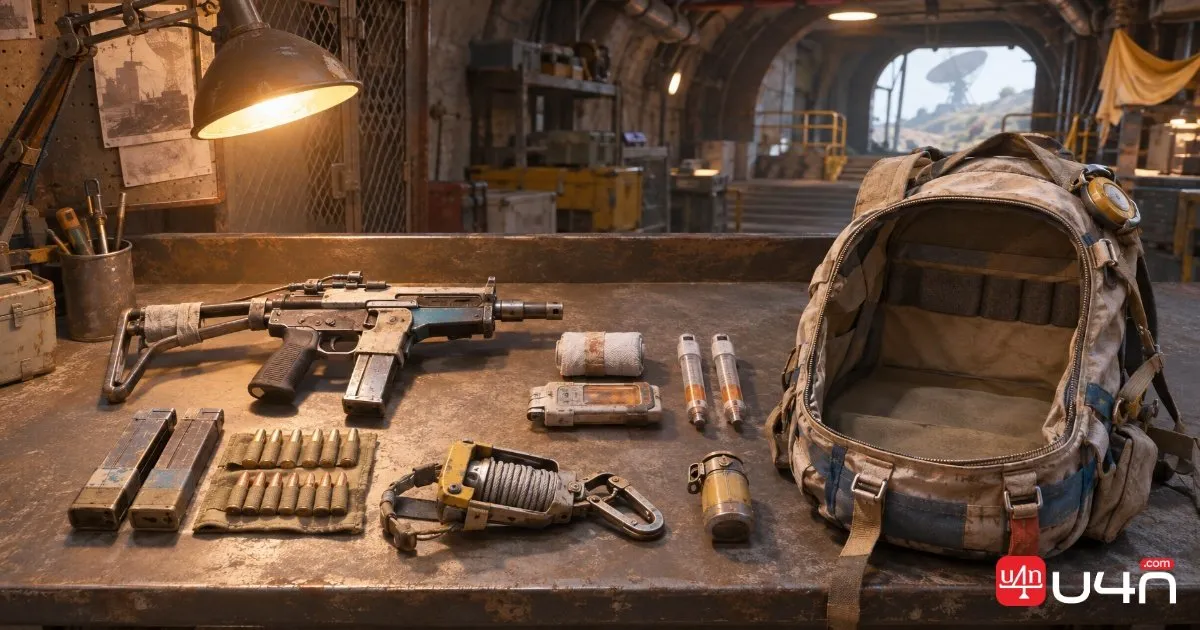
| Equipment | Purpose | Our Recommendation |
|---|---|---|
| Weapon suited to Hydra encounters | Handle enemies blocking progression | Bring a weapon you can use reliably under pressure |
| Ammunition | Fight enemies and destroy progression targets | Allow for missed shots and unexpected combat |
| Grappling equipment | Follow the exterior approach | Confirm the exact tool and controls before deploying |
| Healing supplies | Recover between encounters | Keep healing accessible during the traversal |
| Available inventory space | Carry the target material | Clear unnecessary weight before boarding |
We would also verify the recommended augment's item-protection rules rather than assume the material will be safe after a failed extraction.
Open the Initial Route Before Moving Outside
We board the Frigate, enter the opening section, and destroy the initial power core before taking the exterior route.
This is the first progression step we would mark clearly in a walkthrough. Nearby containers are secondary; opening one is useful only if the approach remains secure.
We then clear nearby ARC before starting the traversal. Our preference would be to resolve immediate threats before stepping onto an exposed route. Trying to correct a jump while taking fire leaves little room for recovery.
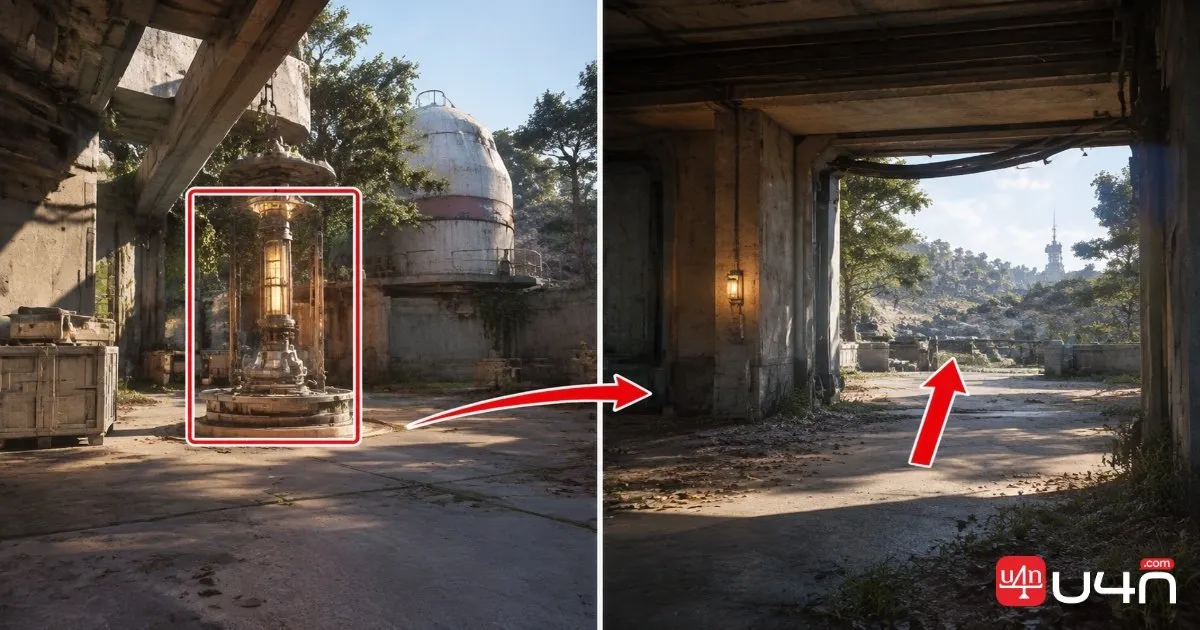
Confirm the Boarding and Core Positions
- Identify the initial boarding.
- Locate the first power core before beginning the exterior traversal.
- Clear nearby ARC threats before moving onto exposed sections.
Traverse the Hull in Short, Controlled Stages
The exterior movement is the section that needs the most preparation. Moving along the hull toward an opening underneath the Frigate, with pauses to recover stamina.
Our approach would be to identify the next attachment or landing point before leaving the current position. After each movement, settle the camera, check the next stretch, and recover before continuing.
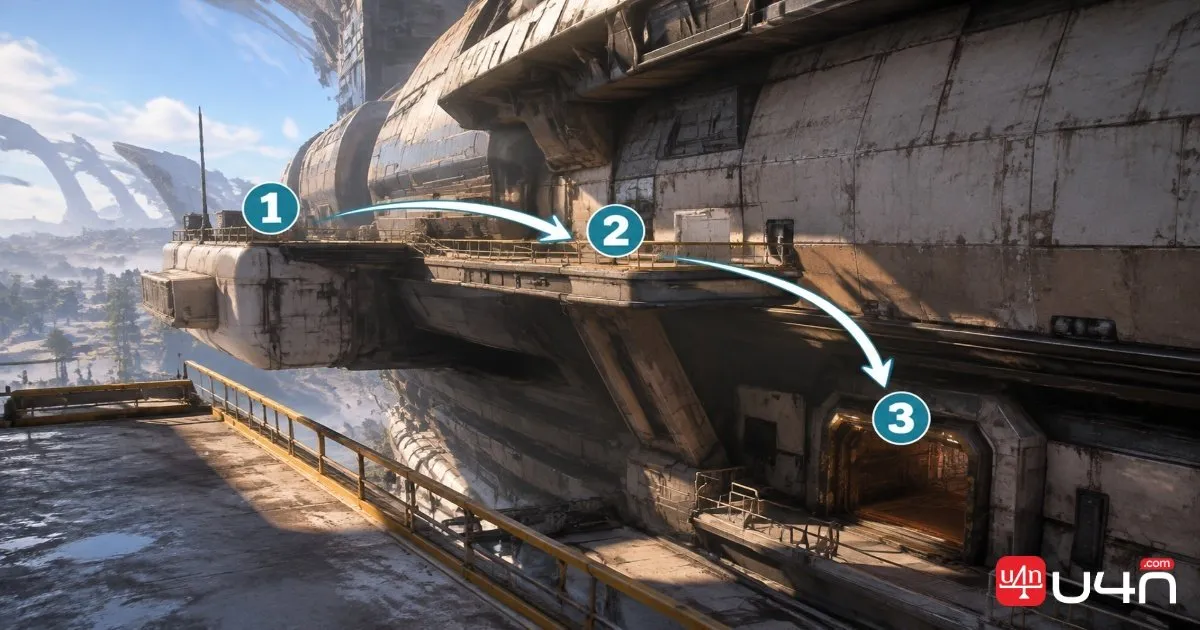
We recommend reeling closer to the hull during swings.
We would also check an emergency exit before committing. If the approach goes wrong, having a recovery plan is more useful than deciding what to do halfway through the fall.
Use Controlled Movement Instead of Long Swings
- Identify the next attachment or landing point before moving.
- Recover stamina between exterior traversal stages.
- Check the hull position and camera direction before continuing.
- Confirm a recovery option before attempting a difficult swing.

Follow the One-Side Progression Into the Room
Once inside the later section, it shifts to a local Hydra encounter and a set of yellow progression targets.
The transcript changes its enemy and target counts as the run develops. Its most specific explanation describes clearing one side, destroying four yellow targets to open a doorway, then destroying two more targets near the fans. We would use those as checkpoints to verify against the footage, rather than promise a fixed encounter count.
Watch for the actual result of each action. Has the doorway opened? Has the next passage become accessible? Have the fans stopped? A visible progression change matters more than assuming the route is ready because a certain number of shots have landed. We also destroy another power core while preparing to continue the full Frigate run, but explicitly describe it as unnecessary for reaching the material room. Keep that optional action separate from the shorter route.
Check Each Progression Result
- Clear the Hydra encounter blocking the route.
- Destroy the four yellow targets described.
- Check whether the doorway has opened before advancing.
- Destroy the additional two targets near the fans.
- Confirm the next passage is accessible and distinguish optional power cores from required progression.
Search the Container Room Before Taking Detours
This approach ends in a room containing four containers, where we find Frigate Inductor.
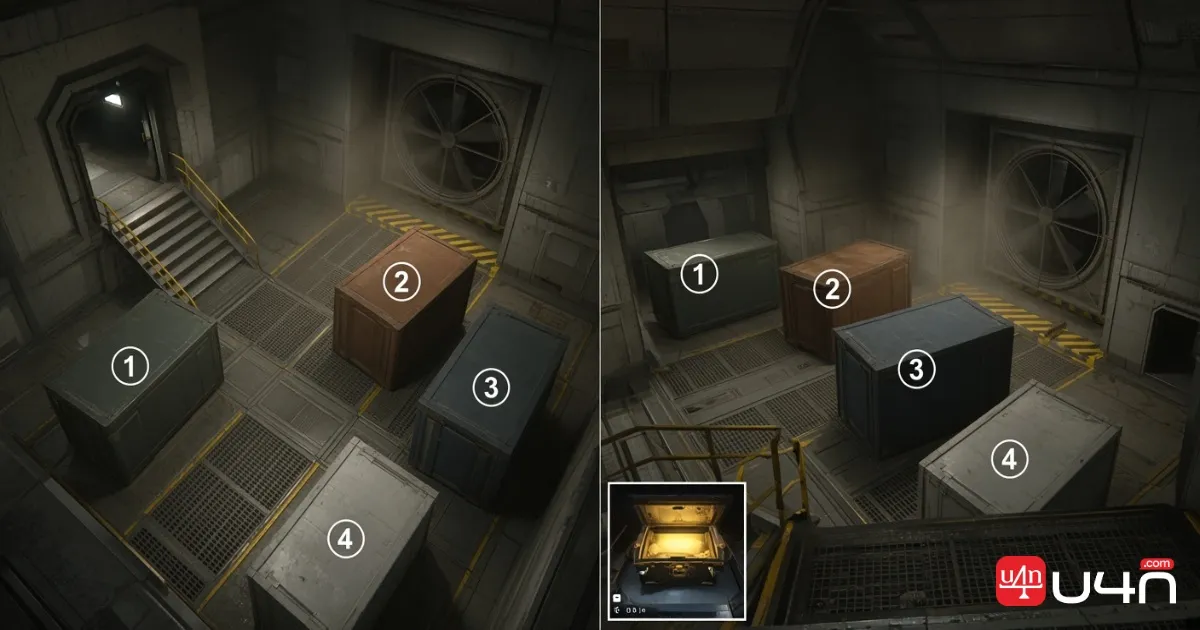
Our team would search the accessible containers before spending more ammunition elsewhere. Check whether they have already been opened, keep track of the entrance, and confirm the item in the inventory when it appears.
Repeated successful runs support we's recommendation to search this area. The ARC Tracker Frigate Inductor item record identifies the ARC Frigate as its source, but does not make an individual container a guaranteed drop.
Search All Four Containers
- Check each accessible container in the room.
- Confirm whether another player has already opened it.
- Verify the Frigate Inductor in your inventory before leaving.
- Keep track of the entrance and your available exit options.
If the room is empty, we would reassess the remaining supplies and exit options. An unsuccessful search is not a reason to commit automatically to the rest of the Frigate.
Leave With the Objective Complete
Once the Inductor is secured, our priority would shift to getting out. We would heal, check ammunition, and choose the available exit before considering another encounter.
For readers also researching ARC Coins, keep that separate from the equipment decisions for this run. The preparation here should follow the demonstrated route and the gear already available.
Before another attempt, we would review the exact section that caused trouble, replace the supplies it consumed, and confirm the movement sequence. Once the material is in the bag, optional loot can wait.