

The Ruins of Lordaeron is a five-player dungeon designed for characters around levels 15–20 in Tirisfal Glades. Set among the remains of the old capital above Undercity, this instance combines open-city exploration, optional boss encounters, faction-specific quests, and several useful early-game rewards. For players building their characters through the early leveling stages, it is also a good opportunity to collect WoW Forever Gold, complete multiple objectives in one run, and upgrade important equipment.
Unlike more linear dungeons, the Ruins of Lordaeron does not force every group to follow a single boss order. Several encounters are optional or event-based, and some quest objectives are easy to miss if the group rushes through the streets. We recommend preparing your quests before entering, assigning interrupt responsibilities, and checking the major reward locations along the way. A little preparation can make the run much smoother, especially for groups around level 15.
Ruins of Lordaeron Overview and Entrance
The Ruins of Lordaeron is located in Tirisfal Glades, directly above Undercity and south of Brill. The instance supports five players and contains six regular bosses, one faction-restricted rare spawn, and several quest objectives. Its open layout allows groups to explore different streets without following a completely fixed encounter order.
| Dungeon Detail | Information |
|---|---|
| Recommended Level | 15–20 |
| Group Size | 5 players |
| Location | Tirisfal Glades |
| Entrance Coordinates | 70.3, 11.1 |
| Regular Bosses | 6 |
| Rare Spawn | Lordaeron Captain |
| Factions | Horde and Alliance |
| Main Rewards | Gear, quests, profession blueprints, cloth set |
How to Reach the Dungeon
Horde Route
Horde players have the easier journey. Undead characters can travel from Deathknell toward Brill, while other Horde races can use the zeppelin from Orgrimmar to Tirisfal Glades. From Undercity, take the elevator to the surface and head toward the ruined courtyard.
The entrance portal stands to the left of the courtyard gate. Follow the road south from Brill until you reach the ruined capital, then look for the portal near the Undercity entrance.
Alliance Route
Alliance players face a considerably longer journey through contested territory. The traditional route starts at Stormwind Harbor:
- Take the boat to Auberdine in Darkshore.
- Travel onward to Menethil Harbor and continue to Southshore.
- Follow the road north through Hillsbrad Foothills, passing Dalaran.
- Swim across Lordamere Lake toward Tirisfal Glades.
- Follow the road to the Ruins of Lordaeron entrance.
Alliance Skyborne characters have a shorter alternative. The Mage Tower portal in Stormwind provides access to Dalaran, allowing them to skip much of the overland journey.
Alliance characters should be careful around Forsaken guards in Brill and the ruins. These guards attack on sight, so avoid unnecessary fights while traveling.
Dungeon Map and Boss Locations
The city layout is one of the most important things to understand before starting the run. Although the group can approach several encounters in different orders, we recommend following a route that minimizes backtracking and keeps optional events easy to locate.
| Area | Encounter | Important Detail |
|---|---|---|
| King's Alley | Witherfang | Patrols with spider adds |
| Southeast Hallway | The Baron | Skeleton patrol nearby |
| Lordamere Overlook | Viktor the Vile | Optional campfire event |
| Market Street | The Abandoned | Triggered by approaching a statue |
| Northwest Corridor | Bjork | Patrols near a possible quest item |
| City Center | Rath'mael | Final main boss |
| Western City | Lordaeron Captain | Horde-only rare spawn |
The Lordaeron Captain may appear after the other bosses have been defeated. His location is not fixed, so Horde groups can use /target Lordaeron Captain to check for him.
Ruins of Lordaeron Quests and Faction Differences
Quest preparation makes a noticeable difference in this dungeon. Horde characters have six associated questlines, while Alliance characters have four. The biggest difference is that Horde players need to collect several quests before entering, whereas Alliance players can pick up all their dungeon-related quests inside the instance.
Horde Quests
Horde players should visit Brill, The Sepulcher, and Undercity before starting the run.
| Quest | Quest Giver | Objective | Notable Reward |
|---|---|---|---|
| The Wrath of Rath'mael | Deathguard Kristof, Brill | Defeat Rath'mael | Forsaken Greataxe or Gnarled Necromancer's Staff |
| A Frightened Request | Tabitha Heartweaver, The Sepulcher | Find Edward Heartweaver | Edward's Knife or Tabitha's Cuffs |
| Light's Justice | Morbin Lightbane, Undercity | Collect 25 Intact Limbs | The Stitcher or Spare Part Bindings |
| The New Plague | Theodore Griffs, Undercity | Obtain Highly Toxic Strain | Plaguefang or Blight Gloves |
| Unending Torment | Starts with Abominable Head | Complete the Apothecarium follow-up | Three reward choices |
| Crest of Lordaeron | Crest found inside | Deliver the Crest to Undercity | Small Sack of Gems |
The first four quests should be accepted before entering. Unending Torment begins when you loot the Abominable Head from The Baron, while Crest of Lordaeron starts with an item discovered during the dungeon.
Alliance Quests
Alliance players can pick up their quests inside the instance, which makes preparation more straightforward.
| Quest | Starting Point | Objective |
|---|---|---|
| Abominable Creatures | Captain Truman, entrance | Obtain the Head of the Baron |
| Bloodied Insignia | First Insignia dropped by undead | Collect 10 Bloodied Insignias |
| Remember That I Love You | Blood-Stained Letter near the graveyard | Deliver the letter to Stormwind |
| Crest of Lordaeron | Crest found inside | Deliver it to Lady Dena Kennedy |
The Bloodied Insignia quest is particularly convenient because ordinary undead enemies can drop the required items during a normal clear. Remember That I Love You also continues into Duskwood, so players should keep track of its follow-up rather than treating it as a single-instance objective.
Where to Find the Crest of Lordaeron
The Crest of Lordaeron does not have one guaranteed spawn location. Groups should check several possible spots before leaving:
- Behind an interactive door near The Baron's area.
- Inside a building or tower near Bjork's patrol route.
- Along the city walls guarded by gargoyles.
- On the wall of the small temple beyond Bjork.
Both factions can complete this objective. Horde players return the Crest to Oran Snakewrithe in Undercity, while Alliance players deliver it to Lady Dena Kennedy in Stormwind.
All Bosses and Combat Strategies
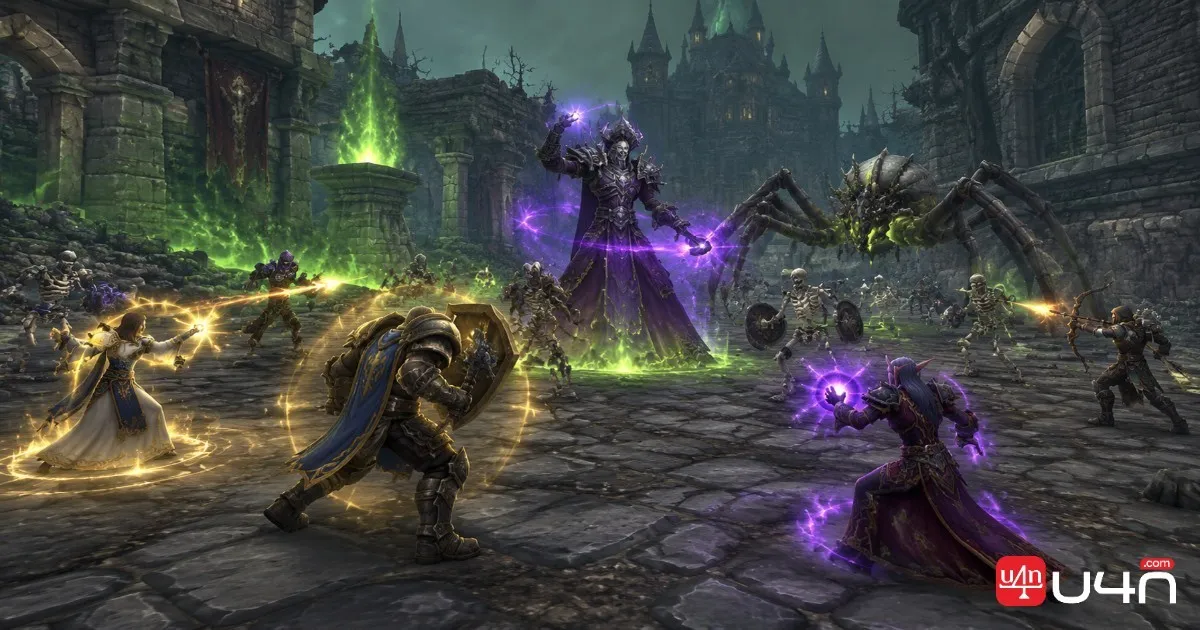
The dungeon features six main bosses, ranging from levels 17 to 20, plus the level 19 Lordaeron Captain. Most encounters are manageable with a properly organized group, but the event-based fights and several threat-related mechanics require more attention.
We recommend assigning interrupts before engaging The Abandoned and Rath'mael. These two encounters can become unnecessarily difficult if everyone assumes another player will handle the important casts.
1. Witherfang – Level 17
Location: King's Alley, near the entrance.
Main Threat: Leech Poison.
Encounter Type: Single-target fight with two spider adds.
Witherfang patrols the entrance area alongside two additional spiders. Her Leech Poison drains the tank's Health over time and restores the same amount to the boss.
Recommended Strategy:
- Clear nearby spider packs before pulling.
- Kill or stun the two accompanying spiders first.
- Have a Druid, Paladin, or Shaman remove the poison.
- Let the tank maintain control while DPS focuses on the boss.
This is a relatively straightforward opening encounter, but ignoring the poison can unnecessarily increase healing pressure.

2. The Baron – Level 17
Location: End of the southeast hallway.
Main Threat: Knockout.
Encounter Type: Tank disruption and threat management.
The Baron uses Knockout to deal heavy damage, launch the tank into the air, and stun them for several seconds. The effect also reduces the tank's threat, potentially causing the boss to switch targets.
Recommended Strategy:
- Eliminate the nearby skeleton patrol before engaging.
- DPS players should watch their threat after every Knockout.
- Save stuns when possible to interrupt his ability.
- The tank should taunt the boss again as soon as the stun ends.
Horde players should loot the Abominable Head after the fight for Unending Torment. Alliance players need the Head of the Baron for Abominable Creatures.
3. Viktor the Vile – Level 19
Location: Southwest Lordamere Overlook.
Main Threat: Five waves of skeletons.
Encounter Type: Optional event encounter.
Viktor the Vile does not appear automatically. Players must activate the Grim Campfire inside a ruined house near Lordaeron Graveyard. Doing so triggers five waves of skeletons before Viktor enters the fight.
The add waves are more dangerous than the boss himself because they consume a considerable amount of healer Mana.
Recommended Strategy:
- Clear nearby enemies before activating the campfire.
- Make sure the healer has sufficient Mana.
- DPS players should use bandages, Health Potions, and self-healing.
- Allow the tank to establish threat before attacking Viktor.
- Remove Leech Poison when necessary.
This encounter is optional, but its equipment rewards make it worth considering when the group has enough resources.
4. The Abandoned – Level 18
Location: Market Street.
Main Threat: Life Drain and Frost Nova.
Encounter Type: Three add waves followed by a boss.
The Abandoned appears after players approach a statue with glowing red eyes along the corridor leading into Market Street. Three waves of enemies spawn before the boss joins the fight.
His important abilities include:
| Ability | Effect | Countermeasure |
|---|---|---|
| Frost Nova | Deals group-wide Frost damage and roots players | Prepare healing and avoid unnecessary damage |
| Life Drain | Drains the tank's Health and heals the boss | Interrupt or stun |
| Chill | Applies a slowing effect to melee attackers | Manage melee positioning |
Recommended Strategy:
- Assign at least one player to interrupt Life Drain.
- Keep a second interrupt available if possible.
- Use Earth Shock, Kick, or Shield Bash when appropriate.
- Save enough healer Mana for Frost Nova and the boss itself.
Life Drain deserves the most attention. Allowing repeated casts extends the encounter and increases the amount of healing required.
5. Bjork – Level 19
Location: Northwest corridor.
Main Threat: Knockback and Anti-Magic Shield.
Encounter Type: Tank positioning and caster management.
Bjork patrols the northwest section of the city. His attacks are relatively simple, but his knockback can push the tank into an unpulled enemy group.
He also uses Anti-Magic Shield, which temporarily grants him immunity to magic.
Recommended Strategy:
- Clear nearby enemy packs before engaging.
- Keep the tank's back toward a wall.
- Casters should avoid wasting spells during Anti-Magic Shield.
- Healers should maintain the tank's Health because Bjork's melee attacks hit hard.
After the fight, check the nearby building and the small temple behind his area for a possible Crest of Lordaeron spawn.
6. Rath'mael – Level 20
Location: City center.
Main Threat: Flamestrike.
Encounter Type: Final main boss and interrupt coordination.
Rath'mael is the final main boss and has the largest Health pool in the dungeon. Clear all surrounding enemies before starting the encounter.
His primary ability is Flamestrike, a channeled Fire attack that targets the location where the tank stood when the cast began.
Recommended Strategy:
- Assign two players to alternate interrupt duties.
- Interrupt Flamestrike whenever possible.
- The tank should move away from the targeted position as soon as the cast begins.
- Keep the healer's attention on the tank throughout the encounter.
A missed interrupt can cause heavy damage to everyone standing near the tank. We recommend having a clear rotation rather than relying on whoever reacts first.
After defeating Rath'mael, Horde players can find Edward Heartweaver for A Frightened Request. Alliance players should look for the Blood-Stained Letter near the graveyard.
7. Lordaeron Captain – Level 19 Rare
Location: Western section of the city.
Main Threat: Long patrol route.
Encounter Type: Rare spawn, Horde only.
Lordaeron Captain is a rare enemy that may appear after all six main bosses have been defeated. He is friendly to Alliance characters, meaning only Horde groups can engage him.
His combat mechanics are relatively simple. The main danger comes from his long patrol route, which passes several groups of enemies.
Recommended Strategy:
- Check for the rare spawn after defeating the main bosses.
- Clear nearby packs before pulling him.
- Avoid fighting him while he is close to other patrols.
- Keep the tank in control throughout the encounter.
His loot includes Haunting Blade and Phantom Armor, both of which require level 22. These rewards are more relevant to characters approaching the next stage of leveling than to freshly eligible dungeon groups.

Trash Mobs, Group Setup, and Loot
Dangerous Trash Mobs
The open streets of Lordaeron make enemy positioning particularly important. Several packs stand close together, and patrols can join an ongoing fight if the group does not check the surrounding area.
| Enemy | Main Danger | Recommended Response |
|---|---|---|
| Spiders | Patrols and nearby adds | Clear patrols before pulling bosses |
| Skeletal Soldiers | Heavy melee damage | Use stuns and controlled pulls |
| Shrieking Banshees | Silence effects | Prioritize them when possible |
| Flesh Golems | Heavy attacks and threat-resetting Knock Away | Keep the tank near a wall |
| Ghouls | Groups of three or four | Avoid pulling multiple packs together |
Most enemies are Undead, making Priest's Shackle Undead particularly useful once available. Priests can also use crowd control to prevent dangerous packs from overwhelming the tank.
Horde and Alliance players should also pay attention to quest drops. Intact Limbs and Bloodied Insignias can come from ordinary undead enemies, so clearing packs instead of skipping everything may save additional farming later.
Recommended Group Composition
For a standard five-player group, we recommend one tank, one healer, and three DPS. The most important consideration is bringing enough utility to handle interrupts, poison removal, and crowd control.
| Role or Utility | Recommended Classes | Main Purpose |
|---|---|---|
| Tank | Warrior, Paladin, Druid | Maintain threat and control enemy positioning |
| Healer | Priest, Paladin, Druid | Sustain the group through add waves |
| Interrupts | Shaman, Rogue, Warrior | Stop Life Drain and Flamestrike |
| Poison Removal | Druid, Paladin, Shaman | Counter Leech Poison |
| Crowd Control | Priest, Paladin | Control Undead and dangerous adds |
A group with two reliable interrupts has a clear advantage against The Abandoned and Rath'mael. We also recommend allowing the healer to recover Mana before activating either event encounter.
Boss Loot and Equipment Rewards
The Ruins of Lordaeron offers equipment for several roles, including physical damage dealers, casters, tanks, and healers. Most regular boss gear requires character levels 15–19, while Lordaeron Captain's rewards require level 22.
Here are some notable drops worth watching:
| Boss | Notable Drop | Main Benefit |
|---|---|---|
| Witherfang | Segmented Spider Leg | Agility and Spirit |
| The Baron | Abomination Bones | Strength and Shadow Resistance |
| Viktor the Vile | Vilewalkers | Strength and Stamina |
| The Abandoned | Rotmender's Leggings | Stamina and Mana regeneration |
| Bjork | Corpse Chopper | Restores Health, Mana, and Rage |
| Rath'mael | Rotmender's Treads | Healing and Spell Power |
| Lordaeron Captain | Haunting Blade | Healing and damage bonuses |
One item deserves special attention: Corpse Chopper. Its use effect restores Health, Mana, and Rage from a nearby Humanoid or Undead corpse. Since this dungeon contains many Undead enemies, the weapon has a practical leveling advantage beyond its basic stats.
Rotmender's Raiment: The Five-Piece Healing Set
Rotmender's Raiment is one of the most interesting rewards in this dungeon. This five-piece cloth set is designed primarily for healers, and every piece can be obtained inside the Ruins of Lordaeron.
| Set Piece | Source | Binding |
|---|---|---|
| Rotmender's Garb | Any enemy | Bind on Equip |
| Rotmender's Sash | Any enemy | Bind on Equip |
| Rotmender's Gloves | Any enemy | Bind on Equip |
| Rotmender's Leggings | The Abandoned | Bind on Pickup |
| Rotmender's Treads | Rath'mael | Bind on Pickup |
The set bonuses are:
- 2 pieces: +5 Shadow Resistance.
- 3 pieces: +10 Intellect.
- 4 pieces: When Mana drops below 15%, restores 200 Mana over 10 seconds, or twice that amount in Haunted and Wasteland areas. Has a 5-minute cooldown.
- 5 pieces: Healing spells have a chance to apply an additional healing effect, restoring 40 Health every 3 seconds for 15 seconds.
For healers, the Intellect and Mana recovery bonuses are particularly useful during longer encounters. The final bonus also adds extra healing without requiring another direct cast.
The three Bind on Equip pieces can be traded or sold through the Auction House, while the leggings and boots require direct dungeon farming. This gives players some flexibility when completing the set.

Profession Blueprints and Quest Rewards
Rath'mael also drops two profession blueprints:
| Blueprint | Profession | Skill Requirement |
|---|---|---|
| Blueprint: Fermenter | Alchemy | 140 |
| Blueprint: Arcane Salvager | Enchanting | 140 |
The Fermenter blueprint is a relatively uncommon drop, so Alchemists may need multiple runs. Both recipes are useful for players developing their professions beyond the early leveling stages.
Quest rewards also deserve attention, particularly the Horde weapons from The Wrath of Rath'mael and Light's Justice.
| Item | Quest | Recommended Use |
|---|---|---|
| Gnarled Necromancer's Staff | The Wrath of Rath'mael | Caster and healer progression |
| Forsaken Greataxe | The Wrath of Rath'mael | Strength-based melee |
| The Stitcher | Light's Justice | Healing-focused characters |
| Slain Baron's Signet | Abominable Creatures / Unending Torment | Early tank equipment |
| Remembrance Armor | Bloodied Insignia | Mail-wearing characters |
We recommend choosing rewards based on your character's actual role rather than selecting the item with the highest apparent stat total. Spell Power, healing bonuses, Stamina, and Strength serve very different purposes, especially at these early levels.
Summary
The Ruins of Lordaeron is more than a straightforward leveling dungeon. Its open layout, faction-specific quests, event encounters, rare spawn, and healing set give players several reasons to complete a thorough run rather than rushing directly between bosses.
Our team recommends preparing Horde quests before entering, checking all possible Crest of Lordaeron locations, and assigning interrupt responsibilities for The Abandoned and Rath'mael. Groups should also manage healer Mana carefully during the two add-wave events.
For character progression, prioritize useful boss drops, profession blueprints, and the Rotmender's Raiment pieces that match your role. Players who want to complete their equipment setup can also review available WoW Forever Items, but a well-planned dungeon run remains the most direct way to obtain the instance's exclusive boss rewards.
FAQ
What level should I be for Ruins of Lordaeron?
The recommended level range is 15–20. Most regular boss equipment requires levels 15–19, while Lordaeron Captain's rewards require level 22.
Can Alliance players enter Ruins of Lordaeron?
Yes. Alliance characters can enter the dungeon, although reaching it requires traveling through contested territory. All four Alliance questlines begin inside the instance.
How many bosses are in Ruins of Lordaeron?
There are six regular bosses: Witherfang, The Baron, Viktor the Vile, The Abandoned, Bjork, and Rath'mael. Lordaeron Captain is an additional rare spawn available only to Horde groups.
How do you summon Viktor the Vile?
Find the Grim Campfire inside a ruined house in southwest Lordamere Overlook, near Lordaeron Graveyard. Activate it and defeat five waves of skeletons to summon Viktor.
Can Alliance players kill Lordaeron Captain?
No. Lordaeron Captain is friendly to Alliance characters, so only Horde groups can fight him and obtain his rare rewards.
Where do you find the Crest of Lordaeron?
The Crest has several possible spawn locations, including an interactive door near The Baron, buildings near Bjork's patrol route, city walls, and the small temple beyond Bjork. Check these locations before leaving the dungeon.
Is Rotmender's Raiment worth collecting?
Yes, particularly for healers. Its Intellect, Mana recovery, and additional healing effects make it a useful early-game set. All five pieces are available from enemies and bosses in the dungeon.