Mages in MapleStory Classic World have a rough early game, but that does not mean they stay weak forever. Their damage, accuracy, mana costs, and access to elemental weaknesses all affect how quickly they level. If you are planning a new character, understanding these mechanics will help you avoid expensive mistakes and make better use of your MapleStory Classic World Mesos.
Our team recommends treating the mage journey as two distinct phases: a shared leveling route from level 1 to 35, followed by a specialized build for Fire/Poison (F/P), Ice/Lightning (I/L), or Cleric. The real turning point comes when your second-job skills begin outperforming Energy Bolt against the right targets. Until then, choosing efficient maps and controlling potion costs matter more than chasing the most serious theoretical damage.
Why Mages Struggle Early in Classic World
Classic World changes several familiar mage mechanics, so players who remember the original game should not assume their old builds and hunting routes will work exactly the same way.
The biggest difference is how much your damage depends on level, equipment, monster defenses, and elemental matchups. A monster that is weak to your element can be an excellent target, while one with resistance or high magic defense may turn an apparently efficient route into a slow grind. The MapleClassic Wiki's magic damage formula explains how Magic Attack, INT, level differences, and elemental interactions affect spell damage.
| Mechanic | What it means for your build |
|---|---|
| Lower magic damage | Expect some familiar monsters to take longer to defeat than they did in the original game. |
| Reduced elemental weakness bonus | Element matching remains important, but its damage advantage is smaller than in the original version. |
| Level 10 first job advancement | Start your mage progression earlier, but plan your early skill points carefully. |
| LUK requirements on wands | You cannot ignore LUK entirely when planning future equipment. |
| Cold Beam no longer freezes | Its control effect slows enemies rather than completely stopping them. |
| Heal damages undead monsters | Clerics can use Heal offensively, but only against suitable targets. |
| No second-job Booster | Attack speed remains a consideration when comparing skills and weapons. |
These changes explain why mages can feel underwhelming in their 30s. Their damage is not the only problem: missed attacks, expensive MP consumption, and poor monster matchups can all reduce effective experience per hour.
The good news is that the situation improves as your character gains levels and stronger skills. Instead of judging a mage by its early-game performance, we recommend evaluating each build by its damage against suitable monsters, its potion costs, and the level at which it reaches important kill thresholds.
Shared Leveling Guide: Levels 1–35
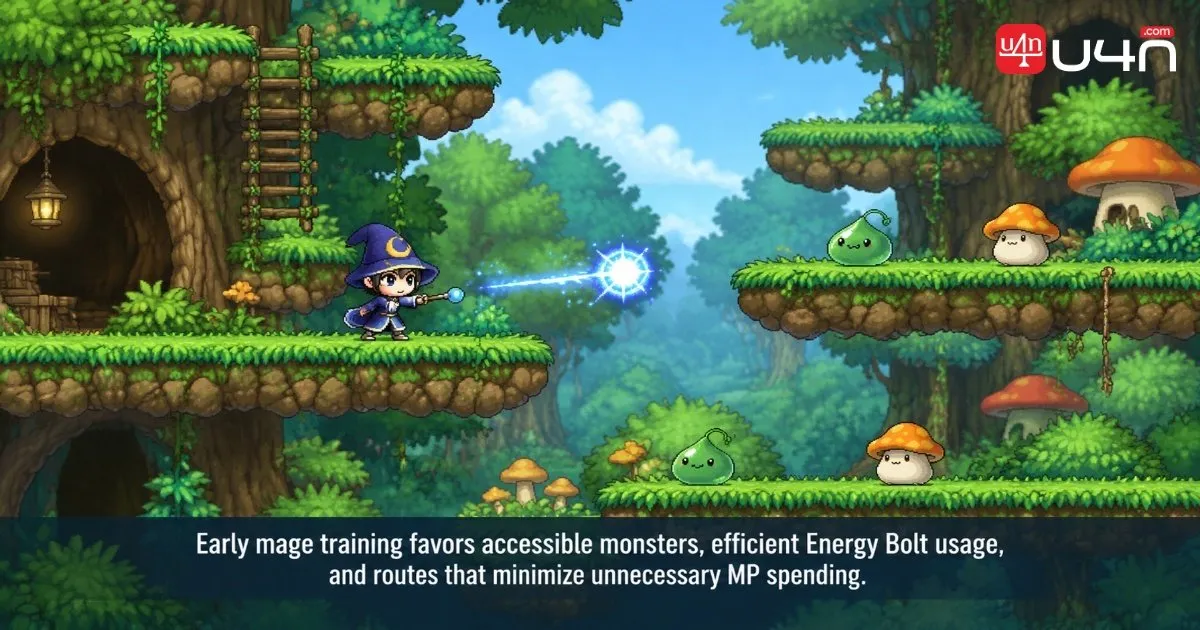
All three mage paths share the same basic progression before their specialized builds begin to take shape. During this stage, Energy Bolt is the most practical default attack because it consumes less MP per cast than Magic Claw.
Magic Claw still has a situational advantage: it can attack through certain walls and terrain where Energy Bolt cannot. If your hunting spot has awkward platforms or obstructed lines of sight, that flexibility may save time. Otherwise, conserving MP is usually the safer choice.
Levels 1–10: Leave Maple Island Quickly
Complete only the useful free-potion quests, then move on. At level 10, visit Grendel in Ellinia to become a Magician.
For your early stats, invest in INT while keeping your future equipment requirements in mind. Once you begin leveling beyond 10, the guide's recommended baseline is LUK equal to your character level minus 10, with the remaining points going into INT. This keeps your character aligned with the stated wand requirements.
Levels 10–20: Train Around Ellinia
The tree dungeons south of Ellinia are reliable starting points because Slimes provide straightforward targets. The northern forest offers another option with Slimes and Green Mushrooms, while Stumps and Dark Stumps can work for party-based training.
From around level 16, consider Kerning Subway Line 1 Area 1. Bubblings can be defeated with two Energy Bolts under the guide's recommended progression, and their concentrated spawns make the area useful for group hunting.
Levels 20–30: Choose Between Stirges, Ant Tunnel, and KPQ
Your best option depends on competition and whether you prefer solo training or party play.
| Priority | Training spot | Why it works |
|---|---|---|
| Tier 1 | Kerning Subway transfer area — Stirges | Fast kills and Lemon drops that help offset MP costs. |
| Tier 1 | Sleepywood Damp Swamp | Octopus and Jr. Necki provide an alternative when subway maps are crowded. |
| Tier 1 | Kerning Party Quest (KPQ) | Party progression becomes available from level 21 with four players. |
| Tier 2 | Ant Tunnel | Horny Mushrooms and Zombie Mushrooms become more practical as your damage improves. |
| Tier 3 | Perion Wild Boar Land | A useful party option once your damage is sufficient for the monsters there. |
| Alternative | Quieter roadside maps | Lower competition can compensate for weaker monster density. |
Do not treat this ranking as universal. A crowded Tier 1 map can be less efficient than a quieter Tier 2 area if you spend too much time waiting for monsters or competing for kills.
Levels 30–35: Keep Using Energy Bolt
After reaching level 30, complete the second-job advancement quest. Before entering the test map, spend your remaining first-job skill points: second-job points cannot be used to complete first-job skills.
Once you choose F/P, I/L, or Cleric, remember that the new attack skills do not automatically replace Energy Bolt as your best option. Our calculations place the general transition around levels 37–38 for Fire Arrow and Cold Beam, although elemental weaknesses can make them worthwhile earlier.
For levels 30–35, prioritize Perion Wild Boar Land, Ant Tunnel, and KPQ. Bubblings can also remain a strong choice if the subway is accessible and you can maintain fast kills.
Jr. Wraiths deserve special caution at this stage. Their accuracy requirements can make them frustrating for lower-level mages, even when the damage looks attractive on paper.
F/P, I/L, and Cleric: Builds and Training Spots
At level 30, your second-job choice determines your main attack skills, preferred monster types, and longer-term hunting route. The three paths share the same early-game foundation, but they reward different approaches once their specialized skills become effective.
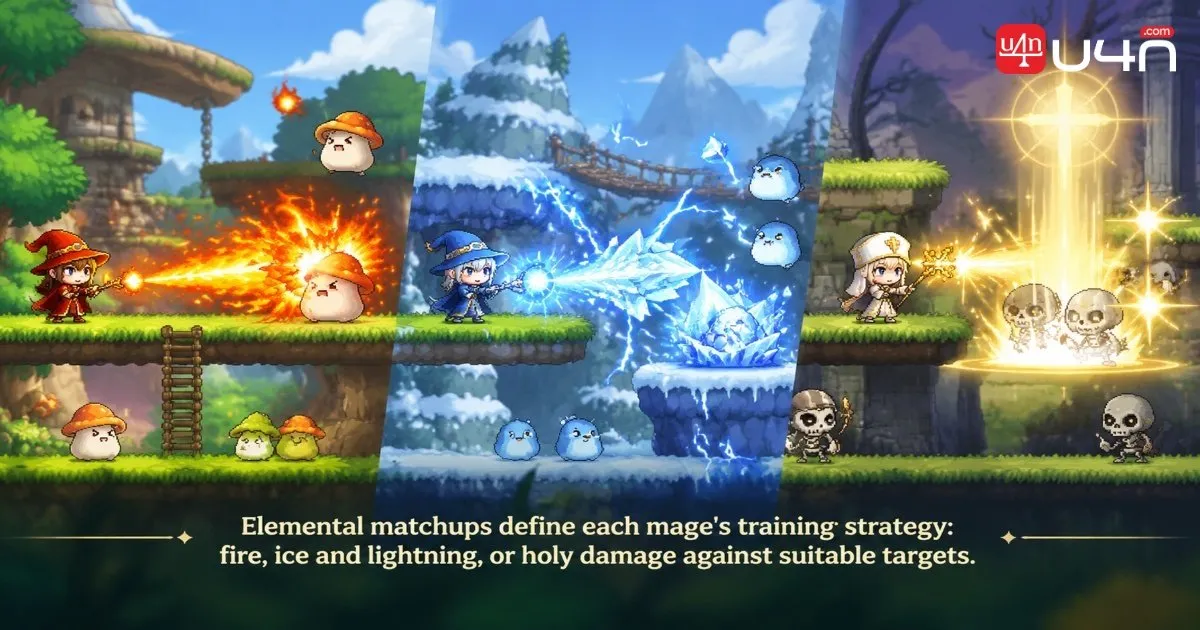
Fire/Poison Mage: Prioritize Fire Weakness
F/P is the damage-focused option in this guide, particularly when you can consistently target monsters weak to fire. Its main challenge is knowing when to invest in Poison Mist rather than relying on Fire Arrow.
Recommended skill progression
- Level 30: Take Teleport to level 1.
- Levels 31–40: Prioritize Fire Arrow.
- Levels 41–50: Build Poison Mist for area damage, while adjusting the order if your preferred maps support frequent multi-target hits.
- Meditation: Consider investing in it earlier if you mainly fight one monster at a time and do not benefit much from Poison Mist.
Poison Mist becomes more attractive when it hits several monsters at once. If you mostly attack isolated targets, the skill may take longer to repay the points invested in it.
| Level range | Recommended targets | Practical advice |
|---|---|---|
| 35–40 | Curse Eyes in the northern forest tree dungeon | Use Fire Arrow. Curse Eyes resist poison, so Poison Mist is not the answer here. |
| 35–40 | Jr. Wraiths in the subway | Fire weakness makes them attractive, but competition can be high. |
| 40–45 | Ligators in Kerning Swamp | Their fire weakness can bring the route to a one-hit threshold as your damage improves. |
| 40–45 | Cold Eyes | Another fire-weak target; the drops may also help with equipment progression. |
| 45–50 | Wraiths in the subway | Good experience potential, although accuracy and competition remain important. |
| 50+ | Crocos or Wraiths | Choose according to damage, accuracy, and map availability. Avoid assuming every popular target is a good match for fire damage. |
Our recommendation is to prioritize reliable kills over theoretical area damage. A Poison Mist rotation that takes too long to finish can lose to straightforward Fire Arrow spam, especially when MP costs and monster movement are taken into account.
Ice/Lightning Mage: Build Around Elemental Matchups
I/L becomes much more appealing when you understand which monsters are weak to ice or lightning. This path can struggle in the 30s, but its later training options make it a strong choice for players willing to change maps as their skills develop.
Recommended skill progression
- Level 30: Take Teleport to level 1.
- Levels 31–40: Prioritize Cold Beam.
- Levels 41–50: Build Thunder Bolt for area damage.
- Alternative: Players trying to save early skill points can invest in Energy Bolt and Meditation first, then reset their build before committing to Cold Beam. This route depends on reset availability and cost.
Cold Beam is especially useful against ice-weak monsters, while Thunder Bolt is better suited to groups of targets vulnerable to lightning. As with F/P, area attacks pay off most when you can consistently hit multiple monsters.
| Level range | Recommended targets | Practical advice |
|---|---|---|
| 35–41 | KPQ | A reliable alternative when solo maps are crowded. |
| 35–41 | Ant Tunnel | Useful for steady kills as your damage improves. |
| 36–43+ | Fire Boars in Perion Burnt Land | Ice weakness makes them a natural Cold Beam target; the one-hit threshold depends on your build. |
| 39+ | Northern cave | A backup when better-known elemental maps are occupied. |
| 40–50 | Lorangs on Florina Beach | Consider these when Thunder Bolt is developed, and lightning weakness improves your clear speed. |
| 48–50 | Subway Line 1 Area 4 | Wraiths offer strong experience potential, but accuracy and kill speed must be checked. |
| 50+ | Dangerous Valley and East Rocky Mountain VII | Copper Drakes are a key ice-weak target; consider Red Drakes later when your accuracy and damage are sufficient. |
Do not assume that unlocking Cold Beam immediately makes every ice-weak monster efficient. Your actual damage and accuracy still determine whether the trip is worth it. If you are close to a one-hit threshold, another level or a modest equipment improvement can make a meaningful difference.

Cleric: Reduce Costs and Target Undead Monsters
Cleric is the utility-focused path. It generally offers less direct damage than the other two mage builds, but Heal can reduce potion spending and make Clerics useful in parties. The important distinction is that Heal is not a universal offensive skill: its damage applies to undead targets.
Recommended skill progression
- Level 30: Take Heal.
- Level 31: Invest one point each in Teleport, MP Eater, and Holy Arrow.
- Levels 31–40: Prioritize Holy Arrow, then develop Heal, Invincible, and Bless according to your needs.
- Later progression: Keep Holy Arrow as your main attack against suitable non-undead targets, and use Heal offensively when hunting undead monsters.
| Level range | Recommended targets | Practical advice |
|---|---|---|
| 35–40 | Jr. Wraiths in the subway | Both Holy Arrow and Heal can be useful because these monsters are undead. |
| 35–40 | KPQ | A good party option for players who want group progression and support value. |
| 40–45 | Zombie Lupins in the monkey forest or swamp | Their holy weakness makes them a practical target, although they can still take several hits. |
| 40–45 | Jr. Wraiths | A fallback when the monkey forest is crowded or kill speed is not sufficient. |
| 45–50 | Subway Wraiths | Strong experience potential, but expect multiple hits and pay attention to accuracy. |
| 50+ | Dark Stone Golem parties in Sleepy Dungeon III | Holy weakness makes these monsters a natural later target for Clerics. |
Cleric's economic advantage should be evaluated through net cost, not damage alone. Spending less on potions is valuable, but a low kill rate can offset those savings. If a party provides better experience while allowing you to contribute support, it may be more efficient than solo grinding.
Gear, Accuracy, and Level 50+ Progression
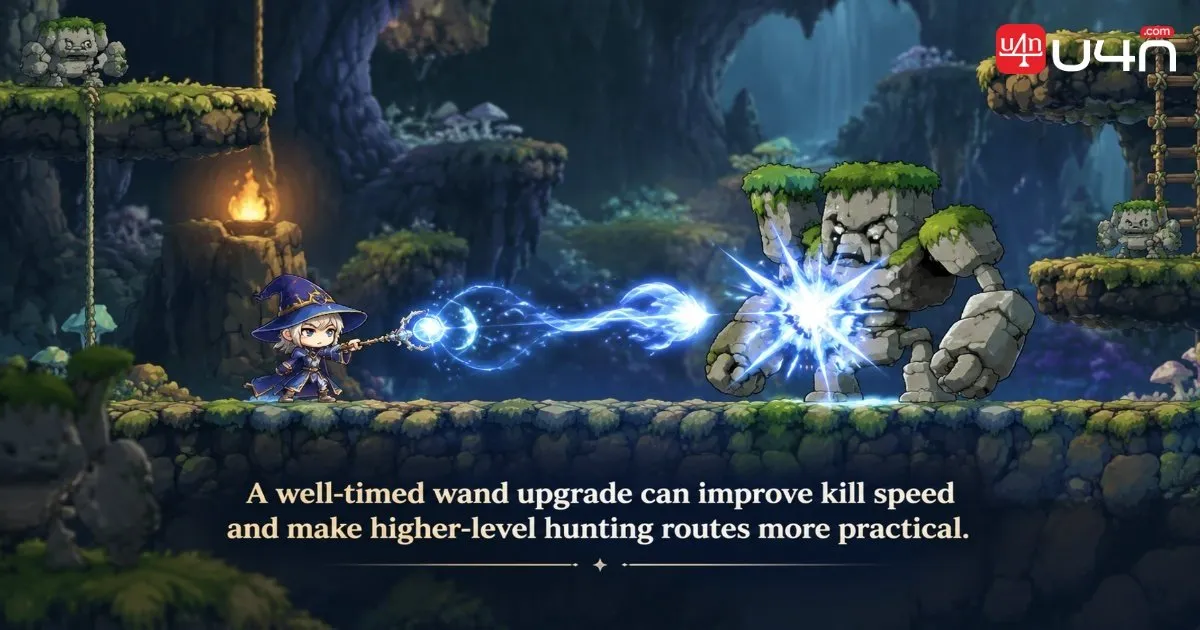
Your equipment should support your next damage threshold rather than simply follow the highest available item level. For mages, a stronger wand can improve training efficiency more directly than replacing armor that provides similar INT.
Recommended Equipment Priorities
| Slot | Item or direction from the guide | What to consider |
|---|---|---|
| Weapon | Fairy Wand at level 40 | The guide lists 69 magic attack and describes it as a craftable option. Verify current material costs and availability before investing. |
| Level 50 weapon | No confirmed option in the source material | Do not plan around an unverified drop or crafting recipe. |
| Robe | Level 40 Starlight and level 50 robes | Check the color-specific INT and LUK stats rather than assuming all variants are equivalent. |
| Hat and shoes | Level 50 options with LUK | Useful when meeting the next wand's LUK requirement. |
| Gloves | Mage gloves and magic-related scrolls | Compare the cost of improving your gloves against the benefit of upgrading your weapon. |
| Cape | Blue Justice at level 35; Blue Icarus at level 46 | Confirm the actual stats and current market availability before choosing one. |
| Shield | Pan Lid | A defensive option mentioned in the guide; its value depends on current availability and your preferred setup. |
The MapleClassic Wiki's Magician gear guide provides a reference for wand stats, equipment requirements, and crafting information. Check current in-game availability and prices before committing to an upgrade.
The guide also recommends checking NPC sale prices before selling miscellaneous items. This is a sensible habit when your character is short on Mesos, since seemingly minor drops and potion expenses add up over long training sessions.
Accuracy Can Matter as Much as Damage
A high damage number is not useful if your attacks frequently miss. The original guide highlights Jr. Wraiths as a problematic target for lower-level mages and notes that higher-level monsters such as Red Drakes demand substantially more accuracy.
Before committing to a map, evaluate three things:
- Accuracy: Are you landing attacks consistently, or wasting MP on misses?
- Magic defense: Does the monster reduce your damage enough to increase the number of casts required?
- Kill threshold: Can you defeat the target in fewer casts with your current weapon and skill level?
A map that looks ideal because of elemental weakness can still perform poorly if you miss too often. Likewise, a small damage upgrade may be worth more than a large increase in nominal stats if it moves you from three casts to two.
Where Should You Hunt After Level 50?
The guide's high-level recommendations follow the same principle as the earlier routes: choose monsters that match your elemental strengths, then compare real kill speed and accuracy.
| Path | Suggested direction | Main consideration |
|---|---|---|
| F/P | Crocos or Wraiths | Favor targets where your fire damage remains effective; avoid fire-resistant monsters. |
| I/L | Copper Drakes, followed by suitable higher-level targets | Ice weakness can provide a clear advantage, but stronger monsters require better accuracy. |
| Cleric | Dark Stone Golem parties | Holy weakness and party support make these a natural progression target. |
Wraiths can remain competitive even after level 50 if the alternatives require too many hits or cause frequent misses. Do not switch maps just because you have reached a new level. Switch when the new target improves your effective experience rate, survivability, or overall cost.
Summary: The Best Mage Route Depends on Your Goals
The main lesson is simple: do not judge MapleStory Classic World mages by their performance in the 30s alone. Early progression is about conserving MP, choosing manageable monsters, and avoiding routes where poor accuracy cancels out potential damage. Once your second-job skills become effective, elemental weaknesses and kill thresholds matter far more.
- Choose F/P if you want a damage-focused build and are willing to seek fire-weak monsters.
- Choose I/L if you enjoy adapting your route to ice and lightning weaknesses.
- Choose Cleric if you value party utility and lower potion costs, especially when undead targets are available.
Before changing maps, check your skill level, weapon, accuracy, and actual casts per kill. A reliable two-hit route can be better than a contested map where your attacks miss, or your damage fluctuates too much.
The best progression plan is the one that improves your real kill speed without draining the resources you need for the next milestone.
For players who want to plan equipment upgrades alongside training expenses, keeping a clear budget for MSCW Mesos can help prevent early spending from delaying more important weapon improvements.
FAQ
Should mages keep using Energy Bolt after level 30?
Often, yes. The guide recommends keeping Energy Bolt until around level 35 because second-job attacks may not outperform it immediately. Fire Arrow and Cold Beam can become useful earlier against monsters weak to their elements.
Which mage class is best for solo leveling?
There is no universal winner. F/P benefits from fire-weak targets, I/L performs well when its elemental matchups are favorable, and Cleric can reduce potion costs while attacking undead monsters effectively. Map availability and accuracy can change the result.
When should I start using area attacks?
Area attacks become worthwhile when you can hit several monsters consistently and clear them quickly enough to justify the MP cost. Poison Mist and Thunder Bolt should be evaluated by the number of targets you can hit, not simply by whether the skills are unlocked.
Why do I keep missing Jr. Wraiths?
Your character's level and accuracy may be insufficient for consistent hits. A monster can have an attractive weakness or experience reward and still be a poor training target if too many attacks miss.
Is the most expensive weapon always the best upgrade?
No. Compare its actual magic attack, equipment requirements, total acquisition cost, and effect on casts per kill. If an upgrade does not improve your practical hunting efficiency, it may be better to save those resources for a more meaningful milestone.