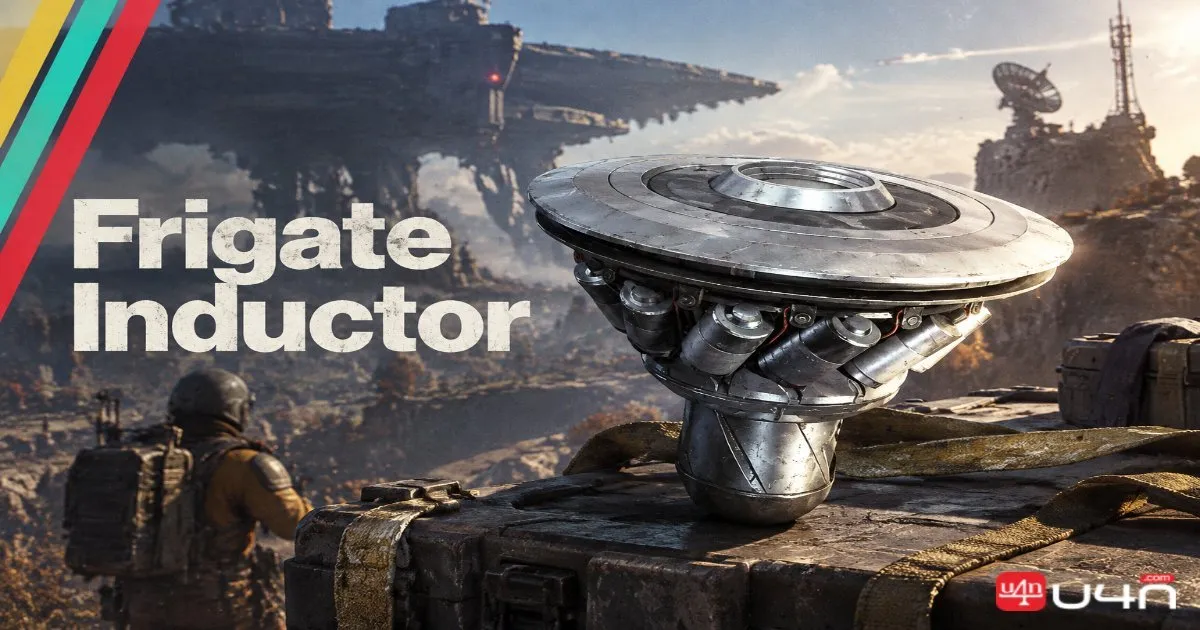
The Frigate Inductor in ARC Raiders is a Legendary crafting material required to upgrade the Research Station to Level 4 in the Frozen Trail update. Although many Raiders assume that obtaining one requires a coordinated squad to complete the ARC Frigate sabotage sequence, solo players can farm this valuable item without reaching the ship's final Cargo area.
The key is knowing where to look. Frigate Inductors can spawn in breach-and-search containers distributed across the ARC Frigate's hull, wings, and upper walkways. By prioritizing these containers and extracting before the situation becomes too dangerous, solo Raiders can check between four and ten potential loot locations per raid.
This guide covers the Frigate Inductor's stats, its Research Station upgrade requirements, the best container locations, recommended solo loadouts, and a repeatable farming route for collecting this essential ARC Raiders item.

What Is the Frigate Inductor in ARC Raiders?
The Frigate Inductor is a Legendary Topside Material introduced in the Frozen Trail update. Its in-game description states that it can be used to upgrade the Research Station, making it an important progression item for players working toward advanced weapon perk research.
Unlike ordinary loot that can be gathered from multiple locations, the Frigate Inductor is obtained from the ARC Frigate. Fortunately, you do not necessarily need to complete the entire ship encounter or open the final Cargo container to find one.
Frigate Inductor Item Stats
| Attribute | Details |
|---|---|
| Item name | Frigate Inductor |
| Rarity | Legendary |
| Category | Topside Material |
| Loot category | ARC |
| Stack size | 1 |
| Weight | 0.5 kg |
| Sell value | 7,000 coins |
| Source | ARC Frigate |
| Recycles into | 2 Advanced ARC Powercells and 2 ARC Circuitry |
| Primary use | Research Station Level 4 upgrade |
The Frigate Inductor occupies a single inventory slot and weighs just 0.5 kg. Its 7,000-coin sell value makes it valuable even outside its progression role, but selling it is generally a poor decision if your Research Station is still below Level 4.
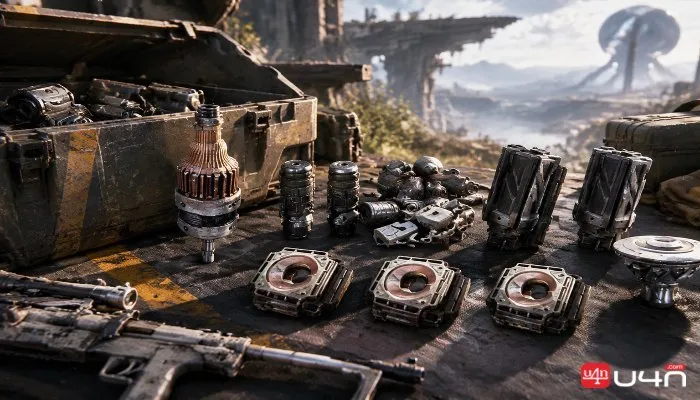
Important: Do not recycle your first Frigate Inductor. The materials obtained through recycling are less useful than the progression unlocked by completing the Research Station upgrade.
Why You Need the Frigate Inductor
The main reason to farm the Frigate Inductor is to unlock Research Station Level 4. This upgrade opens access to 15 weapon perk research projects, including enhancements for weapons such as the Equalizer and Rattler.
These projects introduce additional progression objectives, requiring Research Points, specific ARC components, and combat achievements.
For example, Beam Resonance Tech improves the Amplified Equalizer, allowing its beam damage to ramp up the longer it remains on a target. The research objective involves Queen Reactors and dealing damage to Vaporizers with an Equalizer during a single round.
Without the Level 4 Research Station, these advanced weapon perk projects remain inaccessible.
Research Station Level 4 Upgrade Requirements
| Required material | Quantity |
|---|---|
| Thermal Shaker | 3 |
| ARC Data Module | 3 |
| Frigate Inductor | 1 |
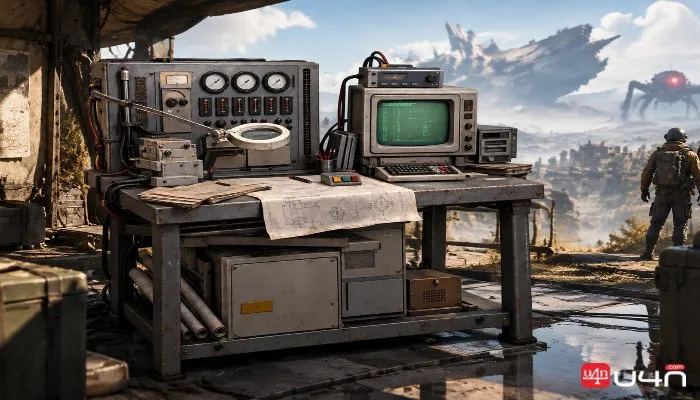
You only need one Frigate Inductor to complete the upgrade. Additional copies can be sold for 7,000 coins each or retained for future use.
The ARC Data Module is another important component in this recipe. Make sure you collect all three required materials before attempting the upgrade.
How to Upgrade the Research Station to Level 4
1. Complete the Sheltered Retreat Project to gain access to the Outpost.
2. Upgrade your Research Station to Level 3 through the normal progression path.
3. Collect three Thermal Shakers, three ARC Data Modules, and one Frigate Inductor.
4. Open the Research Station upgrade menu at your Outpost.
5. Confirm the Level 4 upgrade.
6. Begin researching the Amplified Weapon perk that best fits your preferred loadout.
Once the upgrade is complete, you can begin working toward the additional weapon enhancements available at this research level.
Where to Find Frigate Inductors in ARC Raiders
The most important farming detail is that Frigate Inductors can spawn in breach-and-search containers across the ARC Frigate, not exclusively in the final Cargo area.
These containers are distributed throughout different sections of the ship, allowing solo players to gather loot while avoiding the main sabotage objective.
The number of containers available varies between encounters, so you should check every accessible location rather than relying on a single guaranteed spawn.

Frigate Inductor Locations
| Location | Potential containers | Difficulty |
|---|---|---|
| Wing vents | Around 4 | Low to moderate |
| Outer wing tips | 1–2 | Moderate |
| Top deck walkways | 2–4 | Moderate to high |
| Fire room sections | 2–4 per side | High |
| Center vent shafts | Several possible locations | Moderate to high |
| Hull breach ports | Varies | Moderate |
| Final Cargo | Final encounter loot | High; requires additional objectives |
Container counts are approximate and depend on the encounter's layout and spawn configuration. These are potential checks, not guaranteed Frigate Inductor spawns.
For solo farming, prioritize the wing vents and outer wings first. These locations provide early opportunities to search containers before committing to more dangerous areas.
If your equipment and health allow it, continue toward the upper walkways and fire room sections to increase the number of containers checked during the raid.
Best Maps for Solo Frigate Inductor Farming
Map selection can influence how quickly you reach the ARC Frigate and its breach containers.
Dam Battlegrounds can be challenging because the Reclaimers may be positioned far from some player spawns. Buried City and Pendola Pass are alternative options described for reaching the relevant encounter more quickly.
The most important factor is your starting position relative to the Frigate's arrival and the Reclaimers. Since the Inductor is a Legendary item, maximizing the number of early container checks can be more useful than spending the entire raid fighting other players.
When choosing a route, prioritize fast access, a manageable escape path, and enough space to disengage if other Raiders reach the ship first.
Best Solo Loadout for Farming Frigate Inductors
Your equipment determines how many containers you can reach safely. A minimal loadout may work for the easier wing sections, but it becomes less reliable when you encounter Hydras, fire vents, and additional ARC enemies.
Two approaches are worth considering: a full combat kit for accessing more containers or a budget setup for reducing the cost of unsuccessful runs.
Recommended Full Loadout
| Equipment | Recommended setup | Purpose |
|---|---|---|
| Primary weapon | Bettina, Level 4 or Amplified | General combat and ARC damage |
| Heavy ammunition | 4–8 stacks | Sustained combat |
| Secondary weapon | Hullcracker | Heavy ARC targets and exposed coils |
| Launcher ammunition | 2–3 stacks | Supports heavy-target engagements |
| Mobility tool | Grappling Hook | Traversal and extraction |
| Alternative mobility | Snap Hook | Backup mobility option |
| Stealth equipment | Photoelectric Cloak | Breaking enemy attention |
| Defensive equipment | 2–3 Barricades | Cover during heavy engagements |
| Medical supplies | 1–2 stacks of Stims and Shield Rechargers | Recovery during extended runs |
This loadout is intended for Raiders who want to reach the upper deck, handle dangerous enemies, and access additional containers rather than leaving after the first few searches.

The Hullcracker is particularly useful for dealing with the Hydra and destroying exposed fire-vent coils. Barricades provide temporary cover, while the Grappling Hook supports both traversal and escape.
Budget Solo Loadout
| Equipment | Recommendation |
|---|---|
| Primary weapon | Anvil 4 or Ferro shotgun |
| Defensive equipment | Barricades |
| Recovery equipment | A couple of Defibrillators |
| Mobility tool | Grappling Hook |
| Optional utility | Lure Grenades |
The budget approach is better suited to Raiders who want to limit equipment costs while focusing on accessible containers.
However, inexpensive equipment comes with trade-offs. You may need to skip dangerous sections if you cannot reliably handle the enemies guarding them.
A completely unequipped run is not recommended for this route. The Frigate encounter's equipment restrictions and hostile environment make it difficult to access all the available containers without suitable weapons and defensive tools.
How to Farm Frigate Inductors Solo: Step-by-Step Route
The following route focuses on reaching as many breach containers as possible before extracting. It does not require you to complete the entire Frigate sabotage sequence.
Step 1: Reach the Reclaimers
At the beginning of the raid, move toward the middle of the map and watch for the ARC Frigate's arrival.
Observe its trajectory and move toward the back of the ship, where the Reclaimers descend. Climb onto a Reclaimer, activate Disrupt, and use it to reach the Frigate.
The Frigate's turrets can attack Raiders who remain exposed on the ground, so keep moving while approaching the boarding point.
If the turret begins targeting you and your Photoelectric Cloak is available, use it to help avoid further attention. Recover health and shields during the ride whenever necessary.
Your goal is to board quickly without wasting ammunition or healing supplies before reaching the first container.
Step 2: Search the Wing Vents
After reaching the back of the ship, choose a wing and move into the tunnel ahead.
The first breachable container is located at the bottom of the winding wing section. Search it, collect any useful items, and continue along the route.
Either side can work, but choosing the less crowded wing may reduce competition from other Raiders.
Do not linger after searching a container. Your objective is to maximize the number of checks per raid rather than clear every enemy in the area.
Step 3: Climb the Outer Wing
Instead of moving inward toward the first Power Core, follow the extended wing toward the top deck.
Use the available vaults and climbing routes to reach the upper surface while bypassing the main fight below.
Check the outer wing for another one or two breach containers along the way.
This approach helps you reach areas that may be overlooked by players focused on the core sabotage objective. It also allows you to avoid unnecessary engagements while continuing to collect loot.
Step 4: Clear the Hydra and Search the Top Deck
Once you reach the top deck, look for the Hydra guarding the walkway containers near the fire vents.
Place Barricades to create cover, then use the Hullcracker to deal with the Hydra if your equipment and ammunition allow it.
Flying ARC enemies, including Fireflies, Hornets, and Wasps, can complicate the fight. Deal with immediate threats before committing to a prolonged engagement with the Hydra.
After clearing the area, search every breachable container along the walkway. Depending on the encounter, there may be two to four containers available.
If the area is too dangerous or your ammunition is running low, consider moving on rather than risking the gear you already collected.
Step 5: Disable the Fire Vent for More Containers
The fire vent section offers additional loot, but it is also one of the most dangerous parts of the solo route.
The vent's flames and wind can knock you off balance or push you into hazardous areas. Nearby ARC enemies can make the situation worse, so approach only when you have sufficient health, ammunition, and cover.
Follow this sequence:
1. Wait for the flames to subside before approaching the vent.
2. Breach the first coil cover on the side of the section.
3. Move back to cover if enemies begin targeting you.
4. Repeat the process for the remaining two coil covers.
5. Destroy the exposed coils with the Hullcracker while avoiding incoming attacks.
6. Once the coils are destroyed, search the newly accessible breach containers.
Disabling the vent makes the section safer to navigate and can expose another two to four containers, depending on the encounter.
If the opposite side of the ship remains relatively quiet, you can cross over and repeat the process. However, weigh the additional loot opportunities against the time and equipment required to reach them.
Step 6: Assess the Main Frigate Encounter
After clearing the wings, move toward the center of the ship and assess the situation below.
Pay attention to how many Raiders remain, whether the main sabotage objective is progressing, and whether the other players appear equipped to continue toward the Cargo.
If a capable group is close to finishing the encounter, joining them may provide an opportunity to collect additional loot.
If the remaining players are poorly equipped, or the area is becoming too dangerous, focus on preserving your haul and preparing to extract.
Remember that the solo container route is designed to work without opening the Cargo.
Step 7: Secure Your Frigate Inductor and Escape the Ship
If you find a Frigate Inductor, move it into your Safe Pocket immediately, assuming your current loadout and available Safe Pocket space allow it.
Securing the item reduces the risk of losing this important progression material if you are eliminated before extracting.
From the central section, use one of the available holes to reach the ventilated area below. Crouch in cover and wait for nearby Rocketeers and Vaporizers to lose interest before moving.
Use your Grappling Hook to descend toward the lower part of the ship, adjusting your route to avoid surviving enemies.
If a Hydra remains near the base, use your Cloak to help disengage rather than initiating another fight with a valuable item in your inventory.
Continue toward the rear of the ship and use the available traversal routes to reach the exit area.
Be cautious when moving through exposed sections. Even if the main encounter is winding down, turrets and remaining ARC enemies can still threaten your extraction.

Step 8: Reach a Regular Extraction Point
Riding a Reclaimer down from the Frigate does not count as a successful extraction.
After descending, locate the nearest available extraction point. The exit location can vary by map, so avoid assuming that the same route will work in every raid.
Use cover and your Cloak to break line of sight with hostile ARC units while moving toward the exit.
Check fallen Raiders if it is safe to do so. Players who attempt the Frigate encounter with minimal equipment may die after searching only one container, leaving valuable items behind.
A fallen Raider may have a Frigate Inductor or Frigate Diagnostic Node that you can recover. However, never risk your existing loot for a body search that is unlikely to be safe.
How Many Frigate Inductors Can You Get Per Raid?
There is no guaranteed Frigate Inductor drop from an individual breach container. The item is a Legendary loot roll, so even a successful run with several containers may not produce one.
The strategy is to increase the number of containers searched during each encounter.
| Farming metric | Expected result or guidance |
|---|---|
| Container checks per raid | Approximately 4–10 |
| First priority | Wing vent containers |
| Additional targets | Outer wings and top deck |
| Higher-risk targets | Fire room containers |
| Cargo required | No |
| Guaranteed Inductor per raid | No |
| Primary success factor | Containers searched and successful extraction |
One reported farming session involved approximately 10–15 runs over roughly 90 minutes, yielding two Frigate Inductors and one Frigate Diagnostic Node without opening the Cargo.
This is an individual result, not a guaranteed drop rate. Actual results depend on container spawns, loot randomness, competition, and how quickly you can reach the ship.
The most repeatable approach is to search accessible containers early, expand into the upper deck when your equipment permits, and extract once the risk outweighs the potential reward.
Frigate Inductor vs. Other ARC Raiders Research Materials
The Frigate Inductor shares the Frigate's breach-container loot pool with other progression materials, including the Frigate Diagnostic Node and ARC Data Module.
These items serve different purposes, so check their requirements before selling or recycling them.
| Item | Main relevance | Farming consideration |
|---|---|---|
| Frigate Inductor | Required for Research Station Level 4 | Keep at least one for the upgrade |
| Frigate Diagnostic Node | Separate research-related item | Search the same hull containers |
| ARC Data Module | Required for the Level 4 upgrade recipe | Collect three for the upgrade |
| Thermal Shaker | Required for the Level 4 upgrade recipe | Collect three before upgrading |
Before selling or recycling any rare material, check your active progression objectives. Keeping essential upgrade components can save you from repeating difficult farming runs later.
How the Frigate Inductor Fits Into ARC Raiders Progression
ARC Raiders progression involves balancing immediate survival against long-term equipment and research goals. The Frigate Inductor is a good example of an item that has a much greater value to a player who has not yet upgraded their Research Station.
Although it can be sold for 7,000 coins, its main value comes from unlocking Level 4 research and the additional weapon perk projects that follow.
Players looking for ARC Raiders Items should therefore distinguish between ordinary loot, materials needed for progression, and surplus items that can safely be sold.
The same principle applies when planning future equipment upgrades or looking into opportunities to buy ARC Raiders BluePrints: understand which progression requirements are essential before spending resources elsewhere. Blueprints and the Frigate Inductor serve different purposes, so obtaining one does not replace the need for the other.
For Raiders who are still working toward advanced weapon perks, the most practical approach is to secure the first Frigate Inductor, finish the Research Station upgrade, and then decide whether additional copies are worth collecting for their resale value.
Frequently Asked Questions
Can you get the Frigate Inductor solo in ARC Raiders?
Yes. The farming method described here focuses on breach-and-search containers across the ARC Frigate's wings, hull, and upper walkways. You do not necessarily need a squad or access to the final Cargo to find one.
Does the Frigate Inductor always spawn in the same container?
No. It is a Legendary loot item, and individual container results vary. Search as many accessible breach containers as possible to improve your opportunities to find one.
How many Frigate Inductors are required for Research Station Level 4?
You need one Frigate Inductor, three Thermal Shakers, and three ARC Data Modules.
Should you sell or recycle the Frigate Inductor?
Not if you still need it for the Research Station Level 4 upgrade. Its progression value generally outweighs the 7,000-coin sale value or the materials obtained through recycling.
Is the final Cargo required to obtain the Frigate Inductor?
No. The solo farming strategy relies on breach containers throughout the ship. The final Cargo is a separate, higher-risk opportunity and is not a mandatory step in this farming route.
What is the best solo loadout for farming Frigate Inductors?
A Bettina, Hullcracker, Grappling Hook, Photoelectric Cloak, Barricades, and sufficient healing supplies provide a versatile setup for reaching and searching more dangerous sections. A budget loadout can work for easier areas, but may limit your ability to clear heavy ARC enemies.
Build a Repeatable Frigate Inductor Farming Route
The Frigate Inductor is an important progression item, but obtaining it does not have to mean completing every stage of the ARC Frigate encounter.
By boarding quickly, searching the wing vents, climbing toward the upper deck, and checking additional containers when conditions permit, solo Raiders can create a repeatable route with approximately four to ten container checks per raid.
Prioritize the first Inductor needed for Research Station Level 4, secure it in your Safe Pocket when possible, and avoid unnecessary fights once you have collected valuable loot. With a suitable loadout and disciplined extraction strategy, you can work toward advanced weapon perk research without depending entirely on a full squad or the final Cargo reward.