Cart Empty
Continue ShoppingFor players looking for a powerful and exciting endgame setup, this Shield Wall Gemling Legionnaire build offers a fresh way to experience combat. This guide focuses on a Cast on Crit, Cast on Dodge, Chaos Ignite Shield Wall playstyle that combines huge explosions, fast movement, and impressive boss damage. With the right setup and investment, this character can clear entire screens while making one of the warrior skills in Path of Exile 2 feel much smoother.
The build has become especially popular because it can perform well even without expensive equipment at the beginning. Players who want to improve their progression and upgrade their gear over time can use POE2 Currency to gradually enhance the character. Although the showcased version uses high-end items, the core mechanics allow this build to start from a much lower budget.
Shield Wall has always been known as a satisfying warrior ability. It creates large waves of destruction that travel across the battlefield, but its slower movement and two-step activation style can make it feel less comfortable than faster meta builds. This version solves many of those problems by adding critical strike effects, ignite spreading, and powerful movement options.
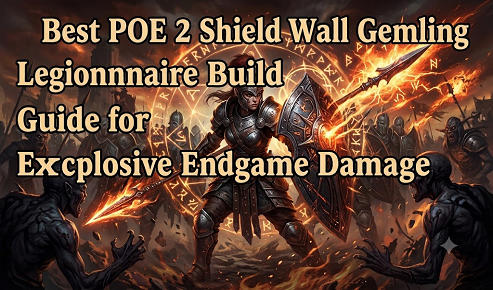
The main gameplay loop is simple but requires good timing. Players place a Shield Wall, activate their war cry to trigger the explosion, then use Dodge Roll to cancel the animation and continue moving.
The standard rotation looks like this:
· Shield Wall
· Infernal Cry or Ferocious Roar
· Dodge Roll
· Repeat
This creates a smooth rhythm while clearing maps. When traveling longer distances, players can replace the dodge movement with Pounce. This transforms the character into wolf form, providing increased movement speed and allowing faster movement between enemy groups.
The large Dodge Rolls come from the alternate quality Cast on Dodge setup. Since movement mostly happens after using war cries, the skill only needs to be active in the second weapon set. This saves resources in the main Shield Wall setup and allows players to focus on damage abilities.
One important mechanic is maintaining Endurance Charges before attacking. The Nebulock effect allows Shield Wall to guarantee critical strikes when the condition is active. Without Endurance Charges, the build loses a significant portion of its damage, so players should always prepare charges before major attacks.
The build uses several powerful combinations to increase both direct damage and area coverage.
The Cast on Crit setup is one of the key parts of the build. Since Nebulock provides reliable critical strikes, every Shield Wall explosion can trigger additional effects. Contagion spreads the chaos ignite damage across large areas, allowing the build to eliminate enemies that are outside the original Shield Wall range.
The ignite effect comes from fire damage gained through Infernal Cry and Shield Wall modifiers. These ignites are converted into chaos damage through the Loreweave chest effect, which allows Contagion to spread them more effectively.
A Frost Wall combination can also be added for players who want even more damage. This setup increases cold damage and creates impressive visual explosions together with Shield Wall. However, it is optional because the build already deals enough damage for most encounters, and Frost Wall can occasionally block movement.
Other important skills include:
· Ferocious Roar: Boosts Shield Wall damage significantly.
· Infernal Cry: Adds extra fire damage and increases area effects.
· Pounce: Improves mobility and maintains wolf form.
· Fortifying Cry: Provides an emergency option when the main war cry is unavailable.
· Arctic Armor and Scavenged Plating: Improve defensive strength.
The main weapon choice is Nebulock because it guarantees the critical strike foundation of the build. The exact modifiers are not extremely important, although additional sockets are helpful for stronger customization.
For the shield, players should prioritize high armor values. Defensive stats are more important than offensive modifiers because the character spends limited time using the shield weapon set.
Loreweave is one of the most important items because the chaos ignite conversion effect enables the Contagion mechanic. Additional useful modifiers include Onslaught effects, flask-based guard bonuses, and ignite spreading improvements.
For accessories, players should focus on:
· Life
· Resistances
· Melee skill bonuses
· Spirit bonuses
· Damage improvements
The amulet can use either a Cast on Crit or Cast on Elemental Ailment version. Expensive versions are not required immediately, and players can upgrade gradually.
For helmets, gloves, and boots, defensive stats remain valuable. Armor, life, movement speed, and elemental resistance improvements help balance the aggressive nature of the build.
The passive tree focuses heavily on critical damage, strength bonuses, war cry improvements, rage generation, and survivability. Weapon Set One mainly supports Shield Wall damage, while Weapon Set Two improves movement and war cry mechanics.
Important jewel choices include critical damage bonuses, attack speed, attack damage, and ailment scaling. Megalomaniac jewels are also useful, especially when players can obtain important passive combinations such as Paragon and Throat Seeker.
This build is not designed around a simple one-button playstyle. It rewards active gameplay and good timing. Players must manage war cries, Endurance Charges, and movement skills to achieve the best results. However, the payoff is a character that feels extremely powerful, with massive explosions and excellent boss performance.
The Shield Wall Gemling Legionnaire is an excellent option for players who enjoy aggressive warrior builds with strong visuals and high damage potential. It can begin as an affordable setup and later scale into an extremely powerful endgame character. Careful upgrades, including better equipment and optimized gems, will greatly improve its performance.
For players planning long-term improvements, managing resources wisely is important. Investing POE 2 Currency Orbs into the right upgrades, such as critical-focused equipment and stronger defensive items, can help transform this build from a strong starter into a true endgame powerhouse.
With its combination of explosive Shield Wall attacks, fast animal-form movement, and reliable boss damage, this build provides a unique experience for players who want something different from traditional warrior setups. Using POE 2 Currency Orbs efficiently will allow you to unlock the full potential of this impressive Gemling Legionnaire playstyle.
The U4N Team
Authored by elite gamers and industry insiders, the U4N Editorial Team delivers authoritative game updates, patch notes breakdowns, and expert strategies for trending titles including World of Warcraft, Path of Exile 2, MapleStory, Aion 2, and Arc Raiders.
From deep-dive guides to the latest meta shifts, our in-house veterans test every tactic firsthand to keep you ahead of the game.