If you are planning your early MapleStory Classic World Mesos, choosing the right training map can make a noticeable difference in how smoothly your character progresses. Victoria Island has plenty of hunting grounds, but they are not equally useful. Monster placement, spawn density, map shape, and whether a class can comfortably clear the area all matter.
The guide below reorganizes the original training recommendations into a practical progression path, starting with lower-level areas and moving toward stronger monsters. The exact level at which you should move from one map to another depends on your class and damage. A useful rule is to target monsters you can defeat in roughly one or two hits with single-target attacks, or around three to four hits with multi-target skills.
Early Training Maps in Victoria Island
Henesys Hunting Ground I
Henesys Hunting Ground I is a straightforward early training option located one map left of Henesys. The map has several platforms, with Blue Snails, Shrooms, and Red Snails around the lower section, while Slimes, Orange Mushrooms, Stumps, and Green Mushrooms occupy the higher areas.
The biggest advantage is its density. The map tends to be busy, so party grinding is generally more practical than trying to claim the entire map yourself. Ranged characters can also take advantage of the grassy platforms and hay bales to attack monsters from a safer position.

Perion Street Corner
Perion Street Corner sits one map to the right of Perion through the upper-right portal. Stumps and Dark Stumps appear across the map, with Red Snails also appearing on the upper platforms.
Its long ground floor gives several players room to work together. A party can divide the upper platforms between individual players while multiple players share different sections of the bottom floor.
The Tree That Grew
The Tree That Grew is particularly useful because it offers three related hunting maps. The first two feature Stumps, Slimes, and Dark Stumps, while the third replaces Slimes with Green Mushrooms.
The three versions work for different party sizes. The first is more comfortable for solo players or smaller groups, the second has more room for a full party, and the third becomes attractive once Slimes are no longer worth your time.
The map's tree holes are important to the rotation. The holes on the left take you upward, while those on the right take you downward, allowing you to move through the map without constantly relying on conventional routes.
Kerning City Construction Site
Kerning City Construction Site is another useful early party map. Most of the monsters are concentrated on the left side, with Blue Snails and Stumps near the bottom and Orange Mushrooms and Octopi on the scaffolding.
The scaffolding is the main reason to train here. Players can divide the upper platforms between themselves, while one or more players handle the lower section. Smaller groups can also move up and down the scaffolding together.
Strong Party Maps Around Kerning City
L Forest I
L Forest I looks unusual at first, but its monster selection makes it worthwhile. The map contains Pigs and Ribbon Pigs alongside Blue Snails, Shrooms, Red Snails, Orange Mushrooms, Slimes, Green Mushrooms, and Stumps.
This is primarily a full-party training spot. Players can divide the L-shaped platforms among themselves and cover different sections of the map. The Iron Hog in the upper-right area can effectively be ignored rather than forcing the entire party to reorganize around it.
Northern Top of Construction Site
This hidden street is located above the construction site area near the Thief job instructor. It contains Octopi, Orange Mushrooms, and Blue Mushrooms.
A full party works particularly well here. Two players can cover the top, two the middle, and two the bottom. Stronger characters are better suited to the bottom section because of the Blue Mushrooms.
Caution Falling Down
Caution Falling is essentially the inverted counterpart to Northern Top of Construction Site. It also contains Octopi, Orange Mushrooms, and Blue Mushrooms.
The same six-player structure works well: two players at the top, two in the middle, and two at the bottom. As with its counterpart, putting stronger characters on the lower section makes the rotation easier.
Line 1 Area 1
Line 1 Area 1 is one of the more unusual maps in the early game because it contains only Bubbleins.
That makes the map very straightforward. Rather than worrying about several monster types with different positions, players can focus on clearing the Bubbleins around them. The map is large enough to support multiple parties, although heavy player traffic can make the area chaotic.
For that reason, this is a good example of why spawn density can matter just as much as a map's visual layout.
Mid-Level Training Spots
Damp Forest
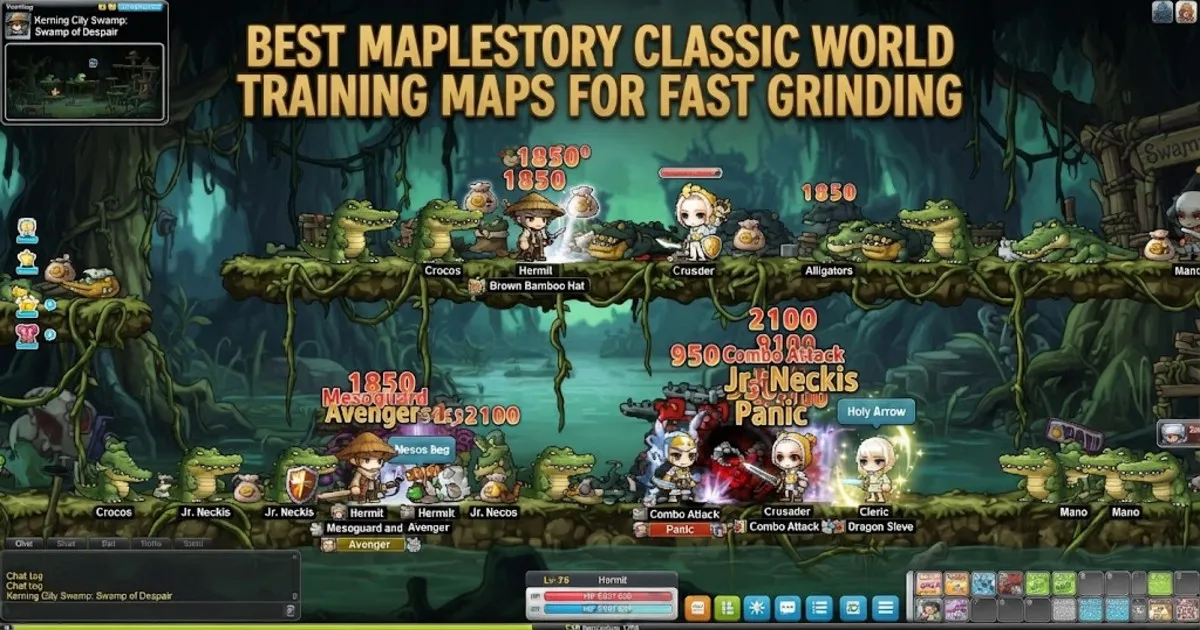
Damp Forest is a surprisingly effective party map despite its unusual appearance. It contains Slimes and Octopi, but Junior Neckis are the main reason to visit.
A party of four fits the map naturally, with one player covering the top, another taking the middle platform, and two sharing the bottom. The important requirement is being able to reliably hit the Junior Neckis. If you are struggling to deal with them, it is probably better to remain in an earlier training area.
Transfer Area
Transfer Area is another specialized map because Stures are the only monster type that spawns there. Since Stures fly around the map, this is far more suitable for ranged characters than melee characters.
A full party can divide the upper and lower sections, but players should not become overly concerned with holding a specific platform. Stures move around, so the practical approach is simply to keep attacking the targets in your area.
Dark Cave
Dark Cave provides another option for characters interested in Sture grinding. It contains Stures, Horned Mushrooms, and Zombie Mushrooms, but the Stures are the main target.
Unlike Transfer Area, Dark Cave does not require as many players. A group of three or four can divide the left, right, middle, and bottom sections. Again, ranged characters have a clear advantage because the flying Stures can be awkward for melee builds.
Ant Tunnel I
Ant Tunnel I contains Horned Mushrooms and Zombie Mushrooms and is designed around a full-party setup.
The three main sections make the division simple: two players in the top area, two in the middle, and two in the bottom-right area. Having one player cover the platforms and another handle the ground section in each area keeps the rotation organized.
Ant Tunnel IV
Ant Tunnel IV serves as an alternative to Ant Tunnel I. It is larger and has an additional section, which makes the party division less obvious.
A full party can still handle it effectively by covering the upper and lower portions. Rather than giving every player an isolated platform, some players should move between sections and help wherever monsters are accumulating.
Land of Wild Boar
Land of Wild Boar is located two maps to the right of Perion and is primarily about Wild Boars. Dark Axe Stumps also spawn here and are close enough in level that they do not interfere much with the grind.
Junior Boogies are the main annoyance. They can cast debuffs, although their relatively infrequent spawning means you generally deal with them as they appear rather than having them constantly disrupt the rotation.
A party of four works well, with one player at the top, one in the middle, and two sharing the bottom. Five players can also work if the group wants additional coverage.
The Burnt Land II
The Burnt Land II is another Wild Boar-focused option, this time featuring Fire Boars and Dark Axe Stumps.
The Fire Boars are the main target. The map works particularly well for a smaller party of two or three, with players dividing the upper and lower platforms. The bottom section can be split between two players when necessary.
Subway Maps Become Serious Grinding Options
The Kerning City Subway deserves special attention because several of its maps combine large monster populations with relatively simple layouts.
Line 2 Area 1
Line 2 Area 1 contains Junior Wraiths and Junior Neckis, with Junior Wraiths being the primary target.
The map is large enough that solo grinding is not particularly efficient. A full party can divide the area into upper and lower sections, with three players covering each side.
Line 1 Area 2
Line 1 Area 2 is similar to Line 2 Area 1, but Stures replace the Junior Neckis. The large number of Junior Wraiths still makes the map useful, although the flying Stures make it somewhat less comfortable.
The same basic six-player arrangement works here: three players cover the bottom, and three cover the upper platforms.
Line 2 Area 3
Line 2 Area 3 is one of the standout grinding locations in this guide. The map focuses on Wraiths, giving it the kind of concentrated monster selection that makes a training rotation easy to understand.
The spawn density is the major attraction. With a full party, three players can cover the bottom while three players handle the upper platforms. When your group can maintain a steady clear, this type of map is exactly what you want from a party grinding location.
Line 1 Area 4
If Line 2 Area 3 is crowded, Line 1 Area 4 offers a similar alternative. Its layout is comparable, but fewer Wraiths spawn here, so the overall efficiency is lower.
It remains a viable party map, however. A six-player group can divide the upper and lower sections in the same way as Line 2 Area 3.
Higher-Level Options Around Elinia and Sleepywood
Monkey Swamp I
Monkey Swamp I is one of the better choices among the Monkey Swamp maps because its layout is less frustrating than the alternatives.
The primary targets are the monsters in the Monkey family, while a few Junior Neckis spawn at the bottom and can generally be ignored. The map can potentially be soloed, but bringing one or two other players makes the rotation easier.
Melee characters may find the unusual platform shapes awkward. Ranged characters can make better use of the available space and attack targets while moving through the map.
Forgotten Entrance II
Forgotten Entrance II contains Glow Shrooms, Lupins, and Raffles. The glowing plant-like objects around the map function as warp points, so learning how they work can move considerably smoother.
This map is better suited to a party than solo play. A four-player setup can divide the top, middle-left, middle-right, and bottom sections.
Forgotten Entrance I
Forgotten Entrance I contains Raffles, Golden Stures, and Aquamanders. Its three-section structure makes it a natural fit for a party of three, with one player assigned to each major section.
One thing that makes this area appealing is the relatively consistent monster level range. You are not constantly jumping between monsters that feel dramatically out of place for the same training spot.
Primeval Forest I
Primeval Forest I continues that same strength. It contains Glow Shrooms, Echopus, and Aquamanders, with the monsters sitting relatively close together in level range.
The map itself is also fairly simple and mostly flat. A three-player party can place two players across the bottom and one player on the upper platforms, creating a clean rotation without excessive vertical movement.
Decayed Tunnel II
Decayed Tunnel II is a compact option for two players. It contains Zombie Lupins, Golden Stures, and Raffles, making it more appropriate for a duo than a solo player.
The strategy is uncomplicated: one player handles the left side while the other handles the right. This is a good example of a map where having a partner solves the biggest efficiency problem.
Drake and Florina Beach Grinding
Drake Hunting Ground
Drake Hunting Ground is one of the more worthwhile destinations deeper into Sleepywood. Many of the surrounding Deep Sleepywood maps are extremely large and can become frustrating to rotate, but Drake Hunting Ground is more manageable.
The main targets are Drakes. Junior Boogies and a few Horned Mushrooms also appear, but they are not the primary reason to visit.
Solo players can concentrate on the central platforms while largely ignoring less convenient monsters on the edges. A duo can divide the map between the upper and lower sections, with one player also taking care of the extra monsters nearby.
Hot Sand
Hot Sand is located beyond Florina Beach and contains Toris and Clangs. The two monster types are relatively close in level, which helps the map maintain a consistent training flow.
The main drawback is the layout. The multiple platforms make this difficult to manage alone, so a party is strongly preferable. A group of around four or five can divide the upper, middle, and lower sections, while a larger group may provide more coverage than the map actually needs.
Forest of Evil II and Another Sanctuary
Forest of Evil II
Forest of Evil II contains Zombie Lupins and Mades, with Mades being the primary target. Because Mades are flying enemies, melee characters should think twice before choosing this map.
The map's tree holes are particularly useful because they all move players upward. Understanding that movement saves time when rotating between sections.
Although the map can technically be soloed, a duo or trio is more comfortable. Players can divide the upper, middle, and lower areas rather than trying to cover everything themselves.
Another Sanctuary
Another Sanctuary is particularly well suited to a duo. The map contains Golden Stures, Rotten Mushrooms, and Sporewoods, with the latter two being close in level.
The number of Stures is relatively limited, which keeps them from becoming a major distraction. Splitting the map into left and right sides also removes the constant back-and-forth movement that makes soloing it less attractive.
How to Choose Your Next Training Map
The most important lesson from these maps is that your character's actual kill speed matters more than a fixed level recommendation. Two players at the same level can have very different grinding experiences because of their class, equipment, skills, and damage output.
| Training situation | What to look for |
|---|---|
| Solo grinding | Compact layouts and easy monster access |
| Small party | Maps with clear sections that can be divided |
| Full party | Dense spawns and enough platforms for everyone |
| Ranged character | Flying monsters and elevated platforms can be manageable |
| Melee character | Avoid overly vertical maps and awkward flying targets |
| Moving up in level | Prioritize monsters you can kill consistently rather than simply chasing higher levels. |
Simple horizontal maps with tight monster placement tend to feel better over long grinding sessions. A map with higher-level monsters is not automatically better if you spend too much time climbing, jumping, or chasing targets.
Final Thoughts
Victoria Island has far more viable training locations than any single leveling route can cover. The best spot for you will change as your damage improves, your party composition changes, or a popular map becomes crowded. Subway maps, in particular, stand out when their concentrated monster spawns line up with your class's strengths.
It is also worth remembering that this guide was based on the game's testing period, so some map layouts or monster placements may change before launch. Treat these locations as a practical starting point rather than a permanent leveling chart, and keep an eye out for alternative maps that may become competitive once the live version is available.
As you move between these hunting grounds, efficient grinding is ultimately about finding a map where your class can maintain a comfortable kill rhythm without wasting time on movement. That same approach will help you manage your MapleStory Classic World Items and other resources more efficiently as your character progresses.