
When we build a Sorcerer in Aion 2, our goal is not simply to equip the strongest spells and use them whenever they become available. Consistent PvE damage depends on how well we coordinate burst skills, cooldowns, mana recovery, and positioning. Hellfire sits at the center of this approach, but the skills surrounding it determine how smoothly we can move from one damage window to the next.
We also need to consider progression. A character's available specializations, Stigma options, and equipment will influence which recommendations are practical. Whether we are improving our existing build or comparing different Aion 2 Items for our next upgrade, we should focus on the changes that address our current weaknesses rather than copying an endgame setup without understanding its purpose.

Core Skills: Build Around Hellfire
We recommend treating Hellfire as the foundation of a damage-focused Sorcerer build. Its charged attack rewards good timing, so our priority is to create a window where we can complete the cast and deliver damage without unnecessary interruption.
| Skill | Role in the build | Our recommendation |
|---|---|---|
| Hellfire | Main burst attack | Prioritize suitable damage and casting-speed specializations |
| Firestorm | Damage and cooldown support | Consider the Hellfire cooldown-reduction option when available |
| Bittercold Wind | Area damage and control | Use when fighting groups or when its utility helps manage enemies |
| Blaze | Fire damage and resource support | Coordinate it with Fire Mark when the relevant effect is active |
| Flame Arrow | Supporting attack and MP recovery | Weave it into the rotation when additional mana recovery is needed |
| Wish of Concentration | Offensive support | Time it around your damage window and available cooldowns |
We would invest in Hellfire and Firestorm before spreading resources too thinly across every available skill. This gives the build a clear purpose: improve the main burst, then strengthen the tools that help us repeat it.
Firestorm and Hellfire Cooldown Synergy
Firestorm deserves particular attention because its relevant specialization can reduce Hellfire's cooldown. However, as explained in the Mobalytics Aion 2 Sorcerer Hellfire PvE build guide, the exact effect depends on the specialization available to our character, so we should confirm the current in-game description before committing upgrade resources.
We also need to be selective about when we charge Hellfire. Against a stationary boss, a prepared cast can be highly effective. Against a target that is about to move or launch a dangerous attack, waiting for a safer opening may produce better results than forcing the full sequence.

Mana Management: Maintain Damage Without Running Dry
MP management is part of the Sorcerer's damage plan, not a separate housekeeping task. When we repeatedly cast expensive spells without accounting for recovery, we risk losing access to the abilities that make the build effective.
Our first step is to understand the relationship between Fire Mark, Blaze, and Flame Arrow. The supplied build recommendations identify Blaze as a resource-support option when its Fire Mark interaction is available, while Flame Arrow can help restore MP. These skills give us alternatives to continuously spending mana on high-cost attacks.
A Practical MP Management Routine
- Before a fight: Check your MP and prepare the skills needed for the opening burst.
- During the opening: Use your damage-enhancing abilities before committing to Hellfire.
- Between burst windows: Weave in available supporting attacks and recovery skills instead of repeatedly using expensive abilities.
- When MP becomes low: Adjust the rotation before resource shortages begin to undermine your damage.
Passive skills also influence this decision. Robe of Flame, Fire Mark, Grace of Enhancement, and Robe of Earth are identified in the supplied build notes as relevant options for damage and mana-dependent benefits. Their precise effects and activation conditions should be checked in the current skill tooltips.
Our core principle is simple: MP is part of the damage rotation, not just a resource to watch when the bar is almost empty. If a passive depends on maintaining a certain mana level, recovery timing can influence both your ability usage and your overall damage output.

Stigma Setup and Offensive Priorities
A damage-focused Stigma setup should reinforce the skills we actually use. The supplied recommendations emphasize Elemental Enhancement, Delayed Explosion, Firewall, and Cold Storm, giving the build a combination of offensive preparation and additional damage.
| Stigma | Intended contribution | When we would prioritize it |
|---|---|---|
| Elemental Enhancement | Offensive preparation | Before the main burst window |
| Delayed Explosion | Additional damage | When it can be coordinated with the opening sequence |
| Firewall | Supplemental damage | When enemies can be affected effectively |
| Cold Storm | Additional area damage | During encounters with suitable opportunities for area damage |
| Steel Barrier | Defensive alternative | When survival is limiting our ability to complete the rotation |
We would start with an offensive setup when learning the rotation on manageable encounters. Once we understand the timing, we can evaluate whether each Stigma contributes meaningfully to the fight.
When Should We Choose a Defensive Stigma?
Maximum theoretical damage is not always the best choice. If we repeatedly lose health or have to abandon casts to survive, replacing a damage option with a defensive alternative such as Steel Barrier may improve our practical performance.
The same principle applies to character progression. We should invest in available upgrades that improve our main damage sequence, then reassess our survivability and resource needs. There is little value in copying a fully developed configuration when our character cannot yet support it.
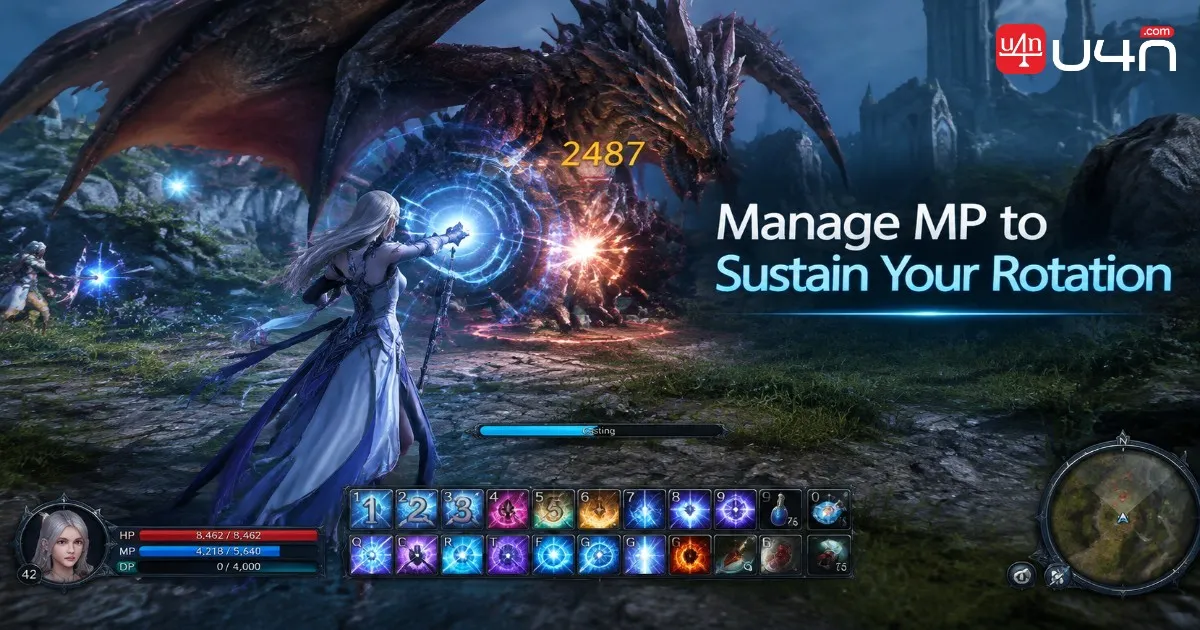
PvE Rotation: Coordinate Buffs, Burst, and Recovery
We recommend thinking of the rotation as three connected stages: preparation, burst, and recovery. This makes it easier to adapt the sequence when a boss moves, an attack needs to be avoided, or MP becomes a concern.
Stage 1: Prepare the Damage Window
Start with Elemental Enhancement and Delayed Explosion when they are available and appropriate for the encounter. Apply relevant effects such as Winter's Shackles only when your current build supports them and their timing benefits the upcoming burst.
Stage 2: Deliver the Main Burst
Charge and release Hellfire during a safe window. Follow it with available damage skills such as Firewall, Cold Storm, and Bittercold Wind, adjusting their order to suit the encounter and your equipped Stigmas.
Stage 3: Maintain Pressure and Prepare the Next Cycle
Use Firestorm to support your cooldown cycle, and weave in Blaze or Flame Arrow when their effects and your MP needs make them appropriate. Use Wish of Concentration according to its actual specialization and the cooldowns that can benefit from it.
This is a practical framework rather than a universal skill-by-skill macro. The supplied recommendations describe a level-16 Wish of Concentration specialization that reduces ongoing skill cooldowns, but we should verify that effect in-game before building our entire rotation around it.
Adapting the Rotation to Different Encounters
- Stationary boss: Prepare the damage window and prioritize a completed Hellfire cast.
- Moving boss: Avoid committing to a long cast when the target is about to leave the effective area.
- Groups of enemies: Give more consideration to Bittercold Wind and area-focused Stigmas.
- Low MP: Prioritize available recovery options and delay unnecessary mana-intensive casts.
This approach gives us a rotation that responds to the fight instead of forcing every ability into a fixed order.

Common Build Mistakes and How We Would Fix Them
Even a promising build can perform poorly when its individual pieces are not coordinated. We would check the following issues before investing heavily in further upgrades.
Using Hellfire Without Preparation
Hellfire should be treated as the centerpiece of the burst window. If we use it without considering our available buffs or the boss's movement, we may lose some of the value of the setup. Prepare when practical, but do not sacrifice survival just to complete a planned sequence.
Spending MP Too Aggressively
Repeatedly using expensive spells can leave too little mana for the next important attack. We would review the frequency of recovery skills and check whether our passive effects depend on maintaining sufficient MP.
Investing in Too Many Skills at Once
A broad collection of partially developed skills may be less useful than a focused setup built around Hellfire and its supporting abilities. We would prioritize the skills that contribute most directly to our intended playstyle.
Copying an Endgame Build Without Checking Requirements
Skill levels, specialization availability, Stigma choices, and progression can change what is practical. Before spending resources, we would compare our current options against the intended build rather than assuming every recommendation is immediately accessible.
Ignoring Defensive Adjustments
If a difficult encounter repeatedly interrupts our casting, more offensive investment may not solve the underlying problem. We would review positioning, encounter timing, and defensive Stigma options before making further changes.
For players considering cheap Aion 2 Items to support their progression, we recommend identifying the actual bottleneck first. An upgrade should address a meaningful weakness in your current character rather than being purchased simply because it appears in a popular build.
Summary
Our recommended Sorcerer approach centers on Hellfire, with Firestorm supporting the cooldown cycle and Blaze and Flame Arrow helping manage the demands of repeated casting. Offensive Stigmas can strengthen the damage window, while defensive alternatives remain useful when survival prevents us from executing the rotation consistently.
We would develop the build in stages: establish the main damage sequence, improve supporting skills, maintain MP, and then adjust Stigmas and progression priorities according to actual combat performance. Before relying on specific numerical bonuses or cooldown effects, we would verify the relevant in-game descriptions for the current version.
Ultimately, a strong Aion 2 Sorcerer is not defined by a single perfect skill order. It is defined by how reliably we can prepare a burst window, complete our major casts, sustain our resources, and adapt to the encounter.
FAQ
Which Skill Should We Prioritize First on Sorcerer?
We would begin with Hellfire because it forms the center of the supplied burst-focused PvE build. Firestorm is a major supporting priority when its available specialization improves Hellfire's cooldown cycle.
How Can We Avoid Running Out of MP?
Monitor MP throughout the encounter, use available recovery skills, and take advantage of the Fire Mark and Blaze interaction when its conditions are met. Avoid spending mana on every available attack without considering the next damage window.
Is a Full Damage Stigma Setup Always Best?
No. An offensive setup is appropriate when you can survive and complete your rotation consistently. If incoming damage repeatedly interrupts your casts, a defensive option such as Steel Barrier may be more practical.
Should We Follow the Recommended Rotation Exactly?
Use it as a starting framework, not an inflexible sequence. Boss movement, available specializations, cooldowns, and MP levels can all change the best order for your next action.