
The short answer is simple: an effective AION 2 Gladiator PvE build is not a twelve-skill damage dump. It is a resource loop. Ruinous Blow establishes the damage window, Rage Burst makes Overhead Slam available, Rending Blow fills productive gaps, and Keen Strike prevents the loop from collapsing when MP runs low. The class also creates Enmity through its attacks, so a Gladiator must learn boss positioning and block timing even when joining as damage.
How This Gladiator Guide Was Evaluated
The source build identifies the skills, Stigmas, stat families, Arcana targets, Pantheon bonuses, pet rolls, titles, and Daevanion priorities used by its contributor. U4N treated those recommendations as a build snapshot, not a universal damage simulation. We separated the information into three categories:
- Mechanics visible in the client: MP recovery, trigger relationships, Specialty unlocks, Enmity, and stagger interactions.
- Build recommendations: the suggested skill core, Stigmas, supporting systems, and upgrade order.
- U4N editorial analysis: encounter swaps, failure diagnosis, progression stages, stat decisions, and a controlled dummy-test protocol.
This distinction matters for E-E-A-T and for players. Damage numbers in screenshots reflect one character's skill level and stats; they are not base values that every Gladiator will see. Likewise, a fourth Stigma or pet roll can be correct in one party and wasteful in another. The recommendations below explain the conditions behind each choice.
The Core Damage Engine: Four Skills, Four Jobs
| Skill | Job in the Build | When to Press It | Common Error |
|---|---|---|---|
| Ruinous Blow | Starts or refreshes the Prepare for Battle damage window. | Early in a safe damage window and again when available. | Holding it so long that the buff spends more time inactive than active. |
| Rage Burst | Applies an offensive window and triggers access to Overhead Slam. | Immediately before the Overhead Slam sequence when the boss is targetable. | Using it as an isolated hit, then losing the Slam window to movement. |
| Overhead Slam | Main payoff skill and an important source of Enmity and stagger pressure. | At the front of the priority list whenever its conditions are met. | Reaching Level 16 but forgetting to equip the cooldown-removal Specialty. |
| Rending Blow | Reliable spender and filler between higher-priority actions. | When Overhead Slam and Ruinous Blow do not take priority. | Spamming it past the point where MP can support the next damage window. |
| Keen Strike | Restores MP and supports Ruinous Blow cooldown cycling. | As a recovery weave when MP or Ruinous Blow availability requires it. | Treating it as dead time instead of the action that preserves sustained DPS. |
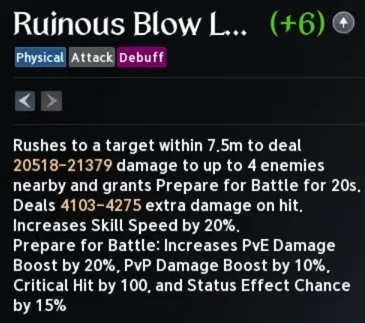
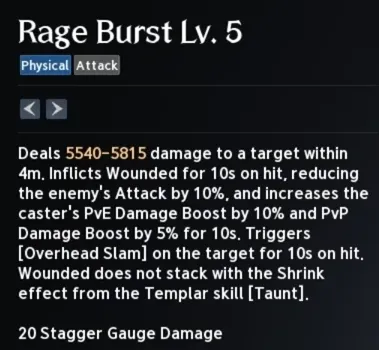
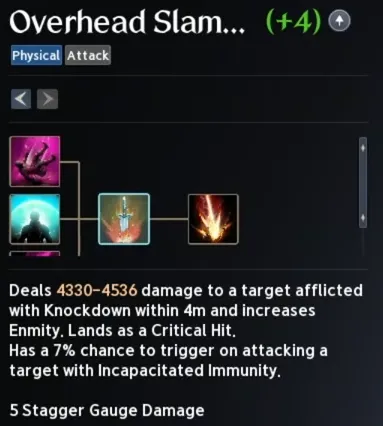
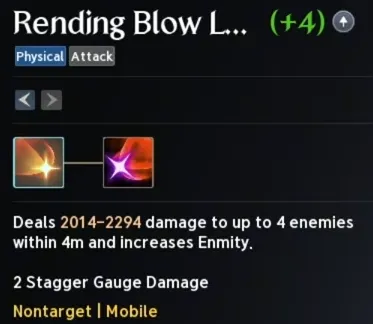
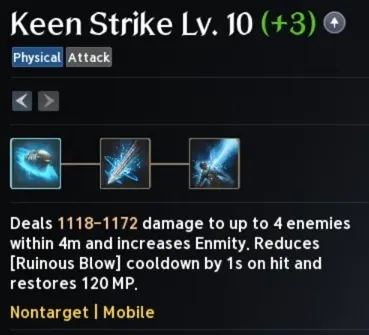
Core Gladiator PvE tooltips: Ruinous Blow creates the Prepare for Battle window, Rage Burst enables Overhead Slam, Rending Blow fills the damage loop, and Keen Strike restores MP while supporting Ruinous Blow uptime. Displayed damage reflects the source character's build state. Image reference: Mobalytics GameBase.
The biggest conceptual upgrade for a new Gladiator is to stop ranking every button by its tooltip damage. Ruinous Blow may be less frequent than Rending Blow, yet its Prepare for Battle effect improves the actions that follow. Keen Strike may look weaker than a spender, yet a well-timed use can restore the MP needed to finish the next Overhead Slam cycle. Judge each skill by the damage it enables over an entire encounter.
Passive Priority
Build the passive foundation around Attack Preparation, Impact Hit, and Experienced Counterstrike. Attack Preparation strengthens the planned burst structure. Impact Hit supports the Smite/double-chance part of the build. Experienced Counterstrike turns a successful defensive read into offensive value, which is especially important when the Gladiator is holding the boss.
That last passive explains why blocking is not automatically a DPS loss. If a block avoids displacement or lethal damage and activates a useful party-facing damage effect, it can preserve more real uptime than one greedy attack. The relevant comparison is not “attack versus block”; it is “one extra animation versus the total damage lost after getting hit, knocked away, or killed.”
Best Gladiator Stigmas—and How to Choose the Fourth Slot
Lunge Stance, Zikel's Blessing, and Rage Burst form the stable three-Stigma package in the source build. Each supports a different part of the engine: combat speed, damage and Accuracy, and access to Overhead Slam. The fourth slot should solve the encounter rather than satisfy a static template.
| Fourth Stigma | Use It When | What It Adds | Do Not Pick It Just Because… |
|---|---|---|---|
| Blade Toss | Your party can stay aggressive and benefits from Defense reduction. | Offensive group utility and better coordinated burst. | It is the “DPS option”; duplicated or poorly timed debuffs may reduce its practical value. |
| Lifestealing Blade | Soloing, learning a boss, or receiving inconsistent healing. | Recovery tied to available targets. | Your sheet damage is high; it is a sustain solution, not a default damage multiplier. |
| Focused Block | You are tanking, covering predictable boss hits, or need safer uptime. | Defensive control, MP/Stamina interaction on a successful parry, and synergy with counterstrike play. | The boss is dangerous; it only pays off when the incoming action can be blocked and you time it correctly. |
Recommended defaults: start group boss content with Blade Toss when the party has stable healing and no overlapping Defense reduction. Swap to Focused Block if you are the effective tank or the encounter has reliable blockable hits. Use Lifestealing Blade while learning, solo farming, or when survival—not theoretical damage—is ending your pulls.
Rotation: Use a Priority System, Not a Brittle Script
A fixed sequence is easy to memorize but easy to break. Bosses move, become untargetable, force a block, or enter stagger at inconvenient times. A priority system survives those changes.
- Prepare the window: activate Lunge Stance and Zikel's Blessing when the boss will remain attackable long enough to benefit.
- Add party utility: apply Blade Toss if it is your selected flex Stigma and its Defense reduction is useful now.
- Establish Prepare for Battle: use Ruinous Blow before committing the main damage sequence.
- Open the Slam condition: use Rage Burst, then prioritize Overhead Slam while its trigger is active.
- Fill cleanly: use Rending Blow when a higher-priority action is unavailable.
- Protect the resource loop: weave Keen Strike before MP starvation disables the next cycle.
- Exploit stagger: use Sword Aura Rampage during the boss's stagger window, especially with its MP-restoration Specialty.
- Respect mechanics: move, block, or disengage before a forced failure costs several seconds of uptime.
A practical opener is Lunge Stance → Zikel's Blessing → Blade Toss (if equipped) → Ruinous Blow → Rage Burst → Overhead Slam, followed by Overhead Slam/Rending Blow priority and Keen Strike recovery. This is a starting model, not permission to stand in an attack. If the boss is about to phase, delay long-duration commitments and carry them into the next usable window.
Attack Weaving Without Self-Sabotage
Weaving is useful only when it reduces empty space without clipping a stronger action or causing a missed mechanic. Learn the base loop first. Then add one basic attack at a time on a training dummy and compare a full, repeatable window—not one lucky burst. If the faster input pattern leaves you MP-starved or makes the next Overhead Slam late, it is not an upgrade yet.
Macro Setup: Automate Repetition, Keep Decisions Manual
The in-game macro can place several skill inputs under one binding, and the source demonstrates combining it with left-click Keen Strike. That is convenient, but a macro should not hide every decision. Keep movement, block, the fourth Stigma, and encounter-specific utility accessible on separate keys. You must be able to stop attacking immediately.
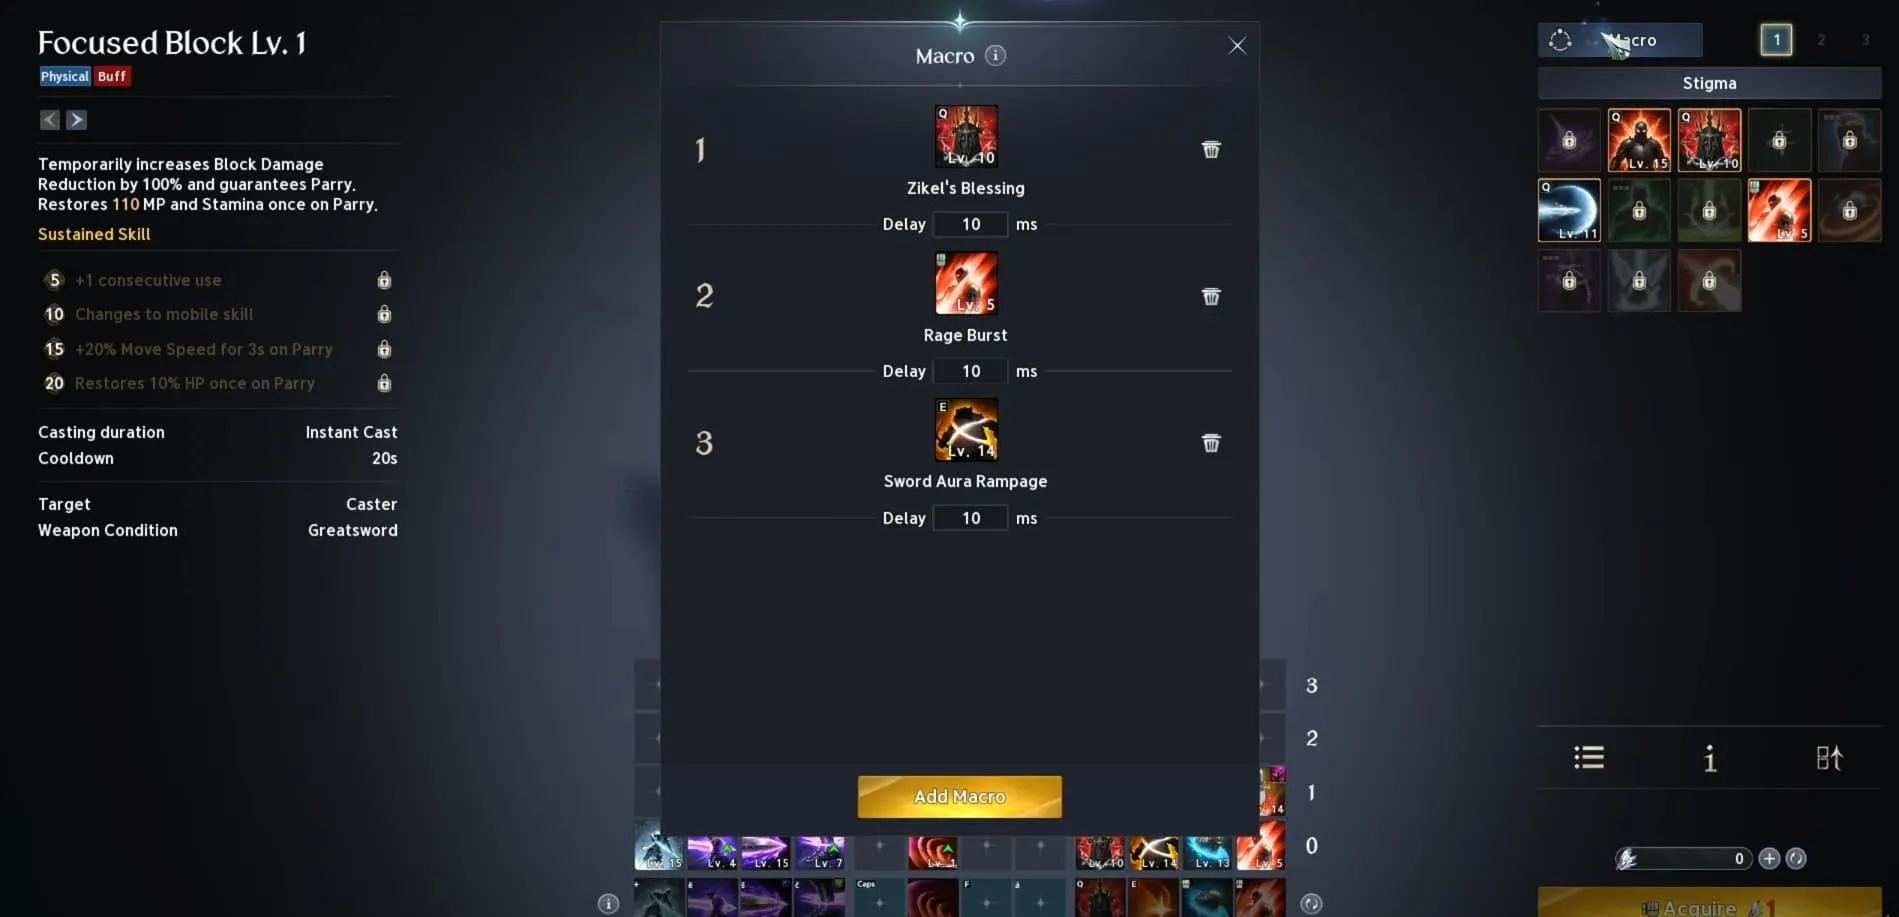
Use this four-part validation before entering a dungeon:
- The macro never delays Overhead Slam behind a low-priority action.
- Keen Strike remains available when MP drops faster than expected.
- Focused Block or another defensive can interrupt the damage loop.
- The binding behaves correctly when the target moves out of range or becomes invalid.
Skill-Level Breakpoints and the Smart Upgrade Order
Do not distribute skill resources evenly. The build changes when key Specialties become available, so a breakpoint can be more valuable than several scattered low-impact levels.
- Push Overhead Slam toward total Level 16. The cooldown-removal Specialty is the build's defining breakpoint. Unlocking it is not enough; equip it.
- Bring Rending Blow to total Level 16. Its critical-hit MP recovery option helps stabilize sustained damage.
- Develop Ruinous Blow. It is both a meaningful hit and the source of Prepare for Battle.
- Raise the three core Stigmas. Prioritize the levels that improve uptime or the benefit applied to the damage window.
- Improve Keen Strike and Sword Aura Rampage as the loop demands. Resource reliability is valuable, but do not sacrifice the two Level 16 damage breakpoints to raise every support action equally.
“Total level” can include contributions from the base skill, Daevanion nodes, equipment, and Arcana. Before spending, inspect which source provides the cheapest route to the next functional breakpoint. One well-chosen skill-level line can be more useful than a higher generic item score that leaves the skill below 16.
Mana Sustain: Diagnose the Leak Before Adding More Damage
Gladiator damage falls sharply when MP reaches zero because the priority system turns into waiting. Fix the resource problem in this order:
- Input check: confirm that Keen Strike is actually landing and that you are not overriding it with repeated spenders.
- Specialty check: select the MP-recovery options on Keen Strike, Rending Blow at the relevant breakpoint, and Sword Aura Rampage if your build depends on stagger recovery.
- Timing check: use recovery before empty, not after the rotation has already stopped.
- Stat check: add Maximum MP or appropriate MP regeneration only if the skill loop still drains the pool in a realistic test.
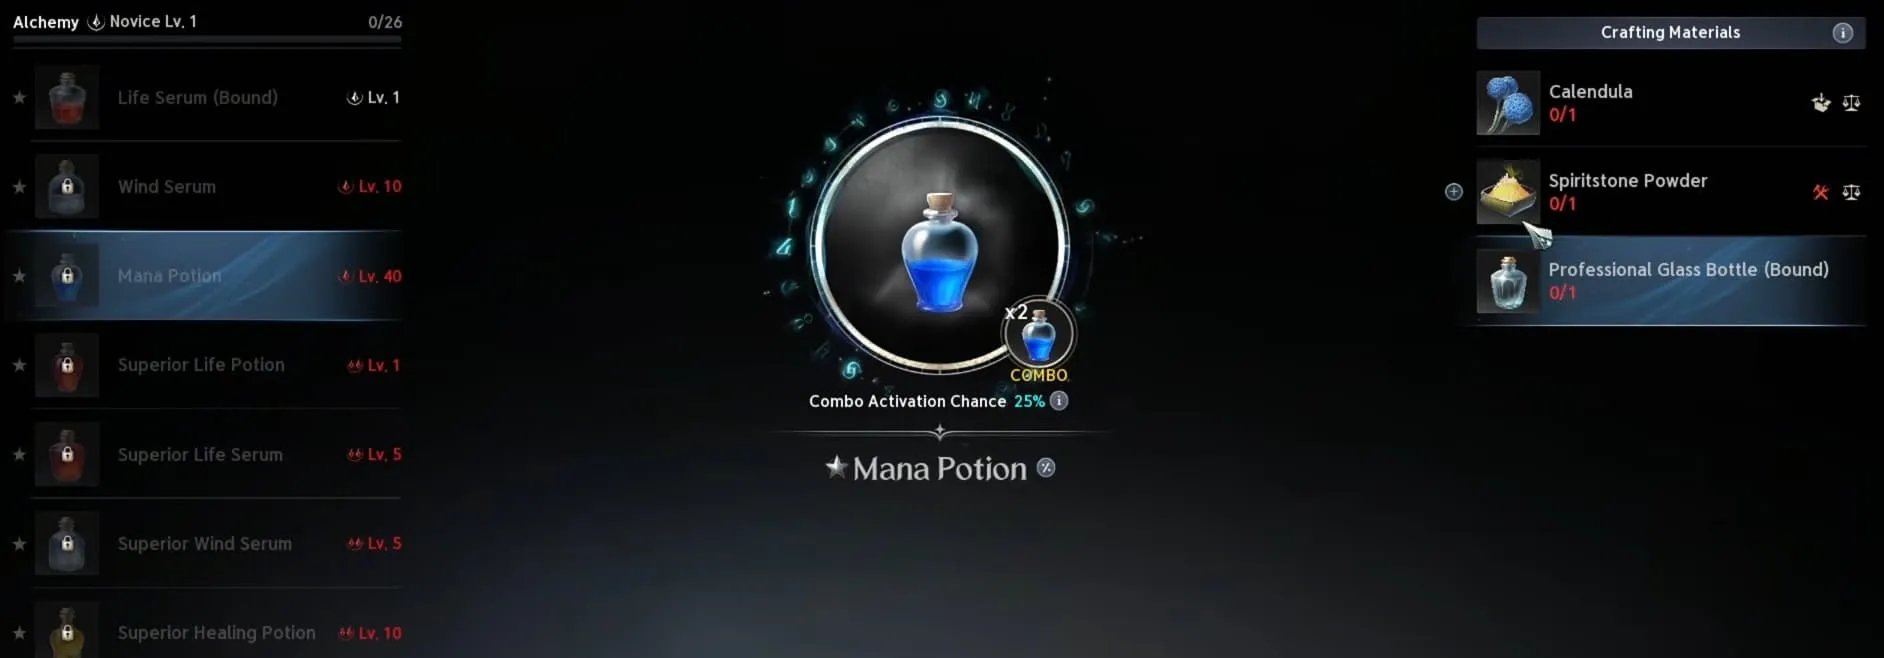
- Consumable check: craft and carry Mana Potions through Alchemy for long encounters or progression attempts.
- Board check: take MP nodes when they solve a measured deficit, not as a reflex before core damage nodes.
A 10-Minute Dummy Test
Run two five-minute tests against the same target with the same consumables and buffs. In the first, use your current rotation. In the second, deliberately insert Keen Strike before the point where the first run ran dry. Record four observations: the time of first MP failure, number of missed Overhead Slam windows, number of delayed Ruinous Blows, and total interruptions caused by your input pattern. This will tell you whether you need more MP support or simply better timing.
Stat Priority and Gear Evaluation
The source build favors Weapon Damage Boost, Damage Boost, Combat Speed, Critical Hit, Smite, and Accuracy. A rigid universal ranking is misleading because Accuracy has threshold behavior and Combat Speed changes the practical feel of the rotation. Use the following decision order:
- Fix misses first. If attacks fail to connect in your target dungeon, Accuracy is the most valuable stat until reliability improves.
- Protect animation and cooldown throughput. Combat Speed is valuable when it lets you fit more of the priority loop into real boss uptime.
- Increase the core hits. Weapon Damage Boost and Damage Boost improve the skills you press throughout the encounter.
- Scale confirmed hits. Critical Hit and Smite become more useful after the build can reliably execute its main windows.
- Compare the complete item. Do not replace a coherent set of affixes with one attractive line or a higher displayed score without checking the net result.
| System | Recommended Direction | Why |
|---|---|---|
| Weapon Soul Binding | Weapon Damage Boost, Combat Speed, Might, Precision | Supports both hit reliability and damage throughput. |
| Guard Soul Binding | Weapon Damage Boost, Combat Speed, Damage Boost, Might | Maintains offense without ignoring the slot's broader value. |
| Pantheon: Wisdom | Mana efficiency and double-chance support | Helps the sustained loop rather than one isolated burst. |
| Pantheon: Time | Combat Speed | Improves execution and usable actions inside boss uptime. |
| Pantheon: Destruction | Damage bonuses | Direct offensive scaling after reliability is established. |
| Pantheon: Illusion | Cooldown reduction as a later option | Useful only when it creates more real casts instead of idle cooldown overlap. |
Combat Power and Gear Score are not interchangeable. Pet rolls may raise Combat Power but do not satisfy a dungeon's equipment requirement. If content access is the blocker, invest in actual gear progression first. If access is solved and the rotation is stable, optimize the secondary systems.
Daevanion Board: Spend for Function Before Decoration
Start with nodes that raise Overhead Slam, Ruinous Blow, and Rending Blow, especially when they complete a total-level breakpoint. After that, the source recommends legendary damage nodes, the core passives, Attack, Critical Hit, and finally MP where the loop requires it.
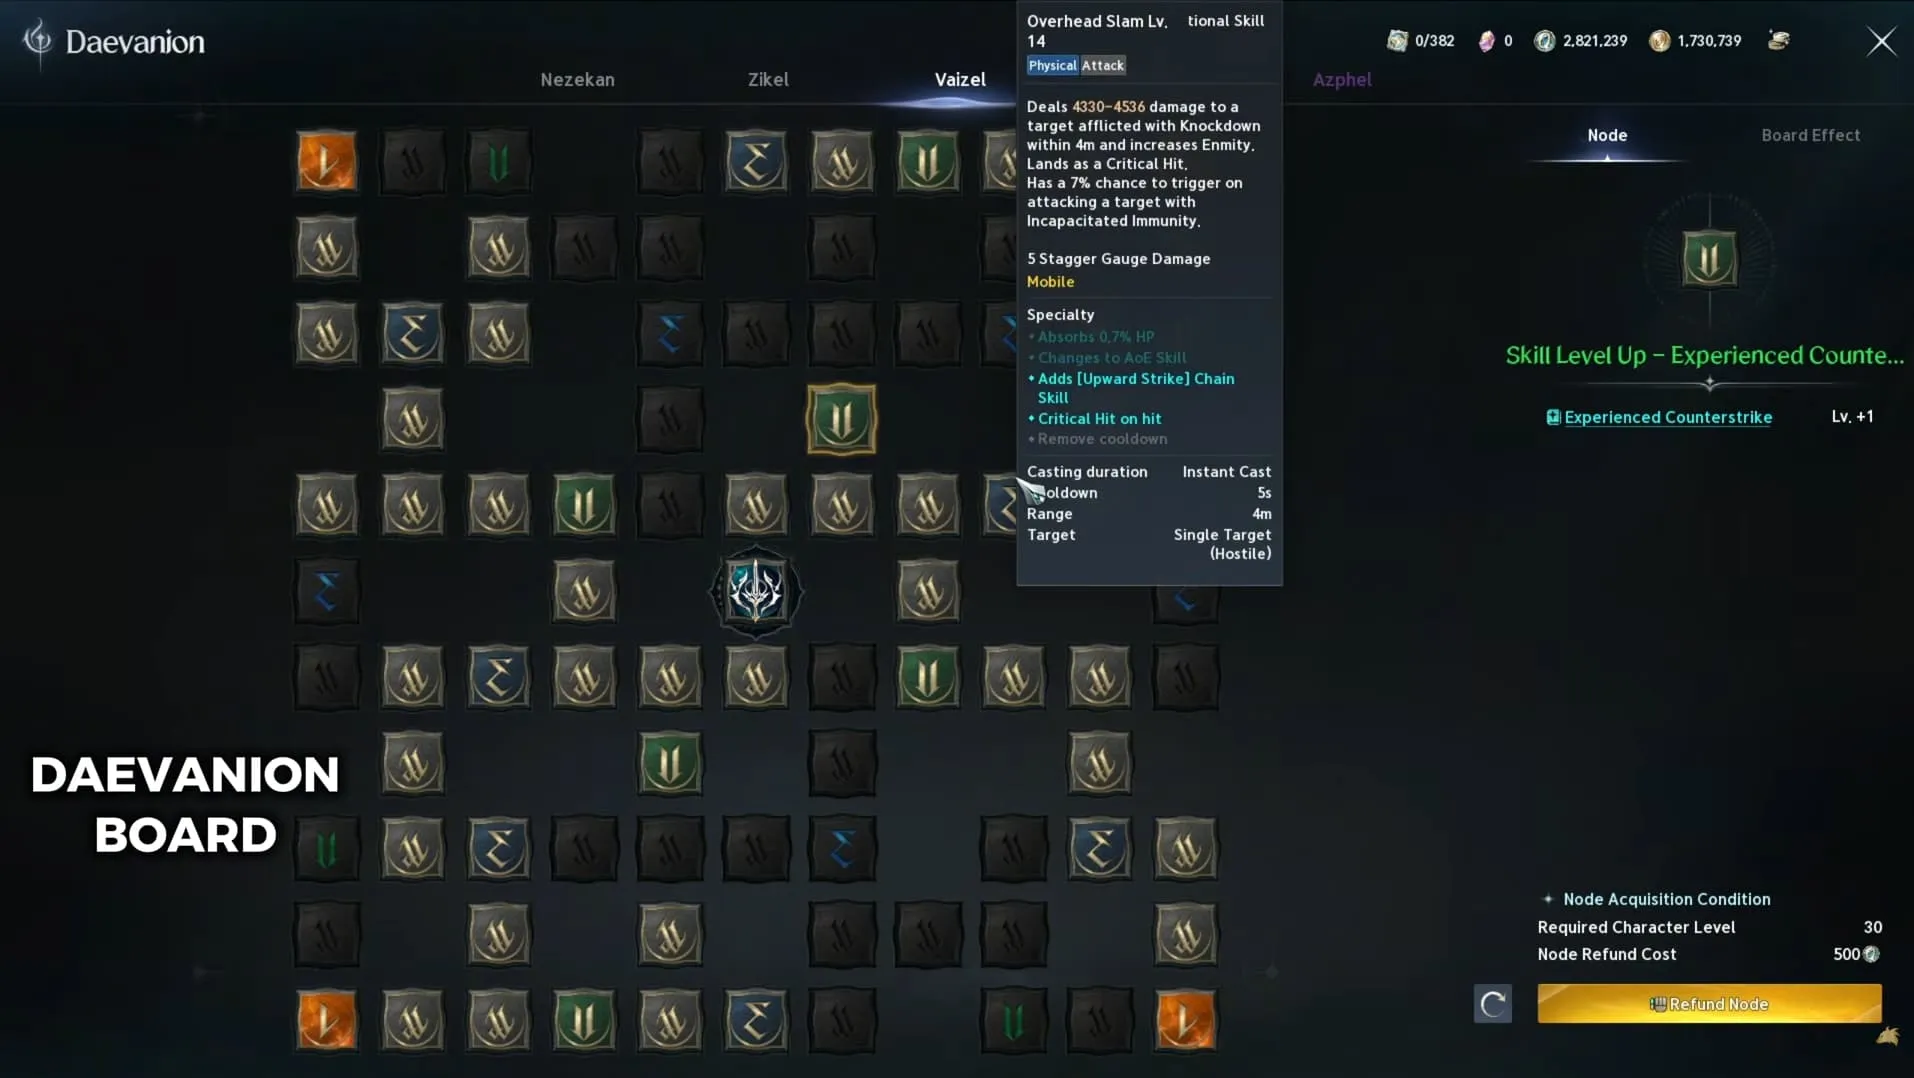
A practical priority ladder is:
- Overhead Slam and Rending Blow breakpoint nodes.
- Ruinous Blow improvement and any efficient route nodes required to reach it.
- High-value legendary Damage Boost or Critical Damage Boost nodes.
- Attack Preparation, Impact Hit, and Experienced Counterstrike.
- Efficient Attack nodes, then Critical Hit nodes.
- MP nodes only when a repeatable test shows the build is still unsustainable.
Do not copy a finished board without checking its assumptions. A high-end route may rely on skill levels supplied by gear or Arcana that your character does not own. Your best route is the one that completes the next useful breakpoint with the fewest low-value detours.
For a data-led comparison with the choices made by high-Combat-Power characters, see U4N's top-40 AION 2 Gladiator meta analysis. It is most useful as a consensus check, while this guide focuses on execution and PvE decision-making.
Pets, Arcana Cards, Titles, and Theostones
Pets
Useful general pet rolls include Max Attack, Critical Hit, and Damage Boost. Defensive HP and damage-tolerance lines are reasonable while learning or tanking. Special lines can include Critical Damage Boost, Weapon Damage Boost, Multi-Hit Chance, Perfect Chance, and double chance, but their value depends on the pet category and the rest of the build.
Front Damage Boost is context-sensitive. It can be useful while you consistently hold the boss, but a Gladiator attacking from another position should not price it as a full-time bonus. Set a reroll budget before spending crystals. A marginal pet improvement should not delay an upgrade that unlocks content or completes a core skill breakpoint.

Arcana Cards
Prioritize bonuses to Overhead Slam, Ruinous Blow, and Rending Blow, then compare the set effect. A card that completes a crucial skill-level breakpoint can outperform a card with a more impressive generic number. Recalculate after replacing gear because the value of the card may have been its total-level contribution.
Titles
Guardian of Altgard is an offensive example with PvE-related bonuses. Through Hell and Back, associated with Sealed Dungeon completion in the source guide, offers cooldown reduction. Combat Speed titles can support a faster loop. Equip the best title you actually own for the current problem; do not postpone broad progression for one title while several cheaper upgrades remain.
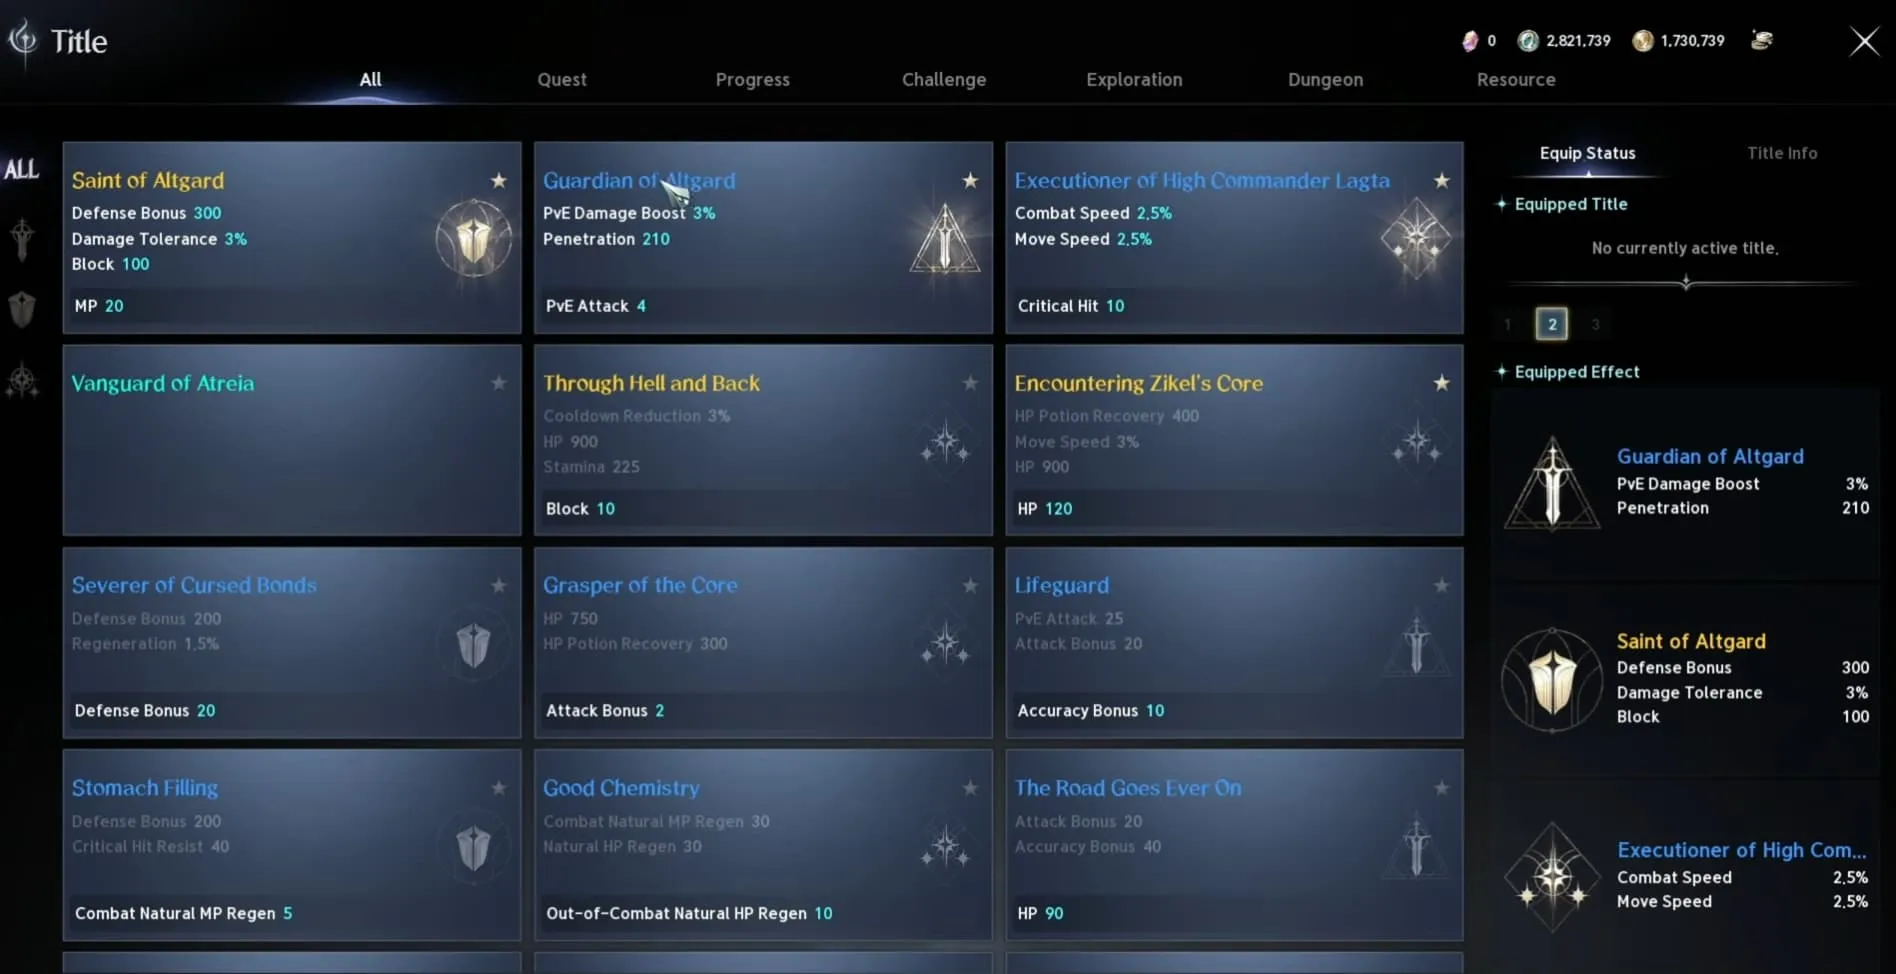
Theostones and Closet collection bonuses are secondary layers. Use helpful effects as they become available, but build the active-skill engine, Stigmas, gear reliability, and Daevanion breakpoints first.
Three Loadouts for Real PvE Situations
| Situation | Fourth Stigma | Positioning Goal | Main Adjustment |
|---|---|---|---|
| Organized group boss | Blade Toss | Stay on the assigned side and preserve safe melee uptime. | Align Defense reduction and buffs with party burst; do not overwrite mechanics. |
| Off-tank or boss holder | Focused Block | Keep the boss stable and away from vulnerable allies. | Plan blocks around readable attacks and use counterstrike value without spinning the boss. |
| Solo farming or unstable healing | Lifestealing Blade | Group safe targets without overpulling. | Trade some group utility for recovery and reset the pull before MP and HP both fail. |
| Fast open-world chain pulls | Content-dependent | End each kill near the next safe target. | Use the Leaping Slam cooldown-reset Specialty referenced by the source for kill-to-kill mobility. |
Progression Plan: Fresh Character to Stable Endgame Loop
Stage 1: Make the Build Function
- Equip Lunge Stance, Zikel's Blessing, and Rage Burst.
- Choose the fourth Stigma for the content you can clear consistently.
- Practice Ruinous Blow → Rage Burst → Overhead Slam without exhausting MP.
- Keep Keen Strike and a defensive action outside any macro that prevents manual timing.
Stage 2: Reach the Breakpoints
- Combine Daevanion, gear, and Arcana to reach total Level 16 on Overhead Slam.
- Select the relevant cooldown Specialty; the level alone does not activate it.
- Bring Rending Blow to total Level 16 and test its MP-recovery option.
- Fix Accuracy if your target content still produces misses.
Stage 3: Optimize the Whole Encounter
- Improve Combat Speed and damage affixes without breaking Accuracy or MP stability.
- Align Blade Toss and party buffs with targetable windows.
- Use stagger as both a damage opportunity and a resource-recovery event.
- Optimize pets, titles, Theostones, and Closet bonuses only after the core loop is reliable.
As you improve equipment and consumables, keep a reserve of Aion 2 Kina for planned upgrades instead of spending reactively on every small stat increase. Compare the cost of a purchase with the breakpoint or content access it actually delivers.

Seven Common Gladiator PvE Mistakes
- Copying the icons but not the Specialties. The same skill bar can behave differently when its Level 16 option is not selected.
- Opening with spenders before Prepare for Battle. This places strong hits outside the intended damage window.
- Using Rage Burst when the boss is about to leave. The trigger exists, but the Overhead Slam opportunity disappears.
- Recovering MP too late. Keen Strike should prevent the stall, not begin after the bar is empty.
- Equating higher Combat Power with better dungeon access. Pet power does not replace the required equipment score.
- Using one fourth Stigma everywhere. Party offense, self-healing, and blocking solve different problems.
- Testing only a short burst. A build that wins for 20 seconds and collapses at 90 seconds is not a sustained PvE build.
Gladiator PvE FAQ
Is Gladiator a DPS or a tank in AION 2?
It is a melee damage dealer with meaningful off-tank behavior. Its attacks generate Enmity, and the class can benefit from blocking and counterstrike mechanics. In a party without a dedicated tank—or when your damage makes you the boss target—you must position like a tank even if your build is offensive. The official AION 2 class overview describes Gladiator as a front-line warrior wielding a colossal blade, which fits this hybrid responsibility.
What are the three mandatory Gladiator Stigmas for this build?
Lunge Stance, Zikel's Blessing, and Rage Burst are the stable core in the referenced PvE setup. The fourth slot is intentionally flexible: Blade Toss for party offense, Lifestealing Blade for recovery, or Focused Block for dangerous pressure and tanking.
Why does my Gladiator run out of MP?
The usual causes are excessive Rending Blow use, missing Keen Strike recovery, an unequipped Specialty, or a rotation that ignores stagger-based recovery. Fix inputs and Specialties before sacrificing several damage nodes for MP.
Does Overhead Slam automatically lose its cooldown at Level 16?
No. Level 16 unlocks the relevant option, but you must select the Specialty. This is one of the most important setup checks in the entire build.
Should I always use a one-button macro?
No. A macro is useful for repeated inputs, but mechanics, blocking, positioning, and the flex Stigma should remain under deliberate control. Test failure cases—out of range, invalid target, low MP, and forced movement—before relying on it in a dungeon.
Which upgrade gives the best value first?
Choose the upgrade that completes a functional breakpoint: reliable Accuracy for current content, Overhead Slam or Rending Blow total Level 16, a core Stigma improvement, or a gear-score threshold that unlocks the next dungeon. Small secondary-system gains usually come later.
Final Verdict
The best AION 2 Gladiator PvE build is a controlled loop, not a collection of maxed icons. Establish Prepare for Battle, trigger Overhead Slam at the right time, spend with Rending Blow, recover through Keen Strike and stagger tools, and change the fourth Stigma to match the encounter. Once the two Level 16 breakpoints, Accuracy, and MP stability are solved, the class can convert its strong front-line uptime into dependable boss damage and useful party protection.
Source note: Core build facts and screenshots were reviewed from Mobalytics GameBase's Aion 2 Gladiator PvE DPS Build, credited there to Mobalytics-Oli with thanks to creator Ulfhednar, updated October 10, 2026. Class-role context was checked against the official AION 2 game overview. U4N added the decision tables, progression model, troubleshooting workflow, and testing protocol. Recheck the live client after balance patches.