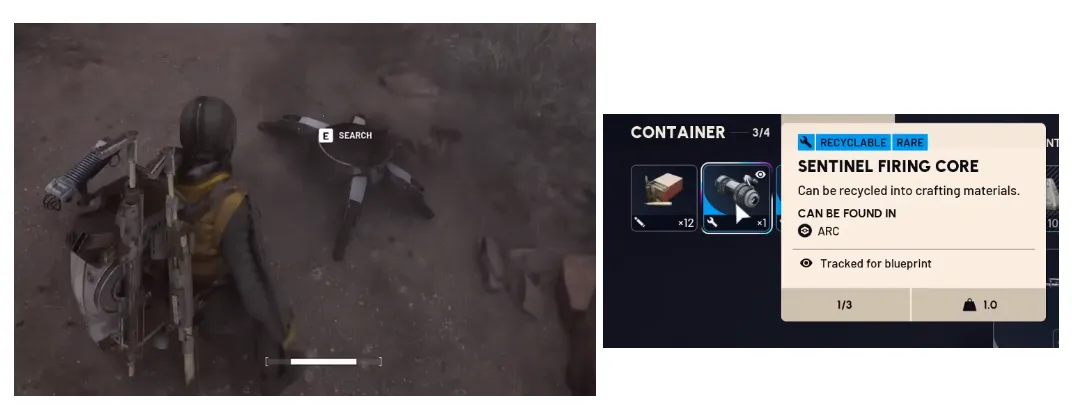
To get a Sentinel Firing Core in ARC Raiders, you must target ARC Sentinel Sniper units or loot ARC Couriers. This rare, high-tier material is non-negotiable for upgrading your Gunsmith workstation to level 3 and crafting elite weapon blueprints.
Method 1: Destroy ARC Sentinels (100% Drop Rate)
Hunting actual Sentinel units is the most reliable way to secure a core. Note that standard machine-gun turrets never drop them; you must specifically target the ceiling-mounted or stationary Sniper Sentinels that lock onto you with a bright blue or yellow laser beam and emit a loud pinging sound.The absolute best map loop for farming these is Dam Battlegrounds, checking these fixed spawn spots:
- Research & Admin Building: Look up at the ceiling right above the blue external metal staircase. This is the most consistent and easily accessible spot.
- Destroyed Dam Path: Check the structural beams overlooking the massive bridge valley between the Control Tower and the Power Generation Complex. Two different Sentinel positions can spawn here.
- Alternative Maps: If you are running other maps, check the Townhall Bell Tower in Buried City, the Container Storage or Trench Towers in Spaceport, or inside the tunnels and Pilgrim's Peak in Blue Gate.
Combat Tip: Use cover dynamically. Let the Sentinel trace its laser and fire, then quickly peek out during its long cooldown to hit it with trigger grenades, snap blast grenades, or high-caliber weapons.
Warning: When a Sentinel explodes, its physical debris containing the loot can roll down hills, fall through stairs, or glitch. Look carefully at the ground beneath where it was mounted to find the drop.
Method 2: Scavenge ARC Couriers (Passive Strategy)
If you want to avoid tough turret fights, you can breach ARC Couriers (the smoking, chest-like, UFO-shaped containers scattered across maps). While safe, the drop rate for a firing core here is relatively low.
How to Maximize Spawn Rates
To significantly boost the odds of both Sentinels spawning and Couriers containing rare cores, queue into maps during active special environmental conditions:
- Electromagnetic Storms (EMS): Drastically increases the total number of downed Couriers and probes across the map.
- Night Raids: Heavily increases the direct spawn rate of live ARC Sentinel sniper machines.
If you need a Sentinel Firing Core to upgrade your Gunsmith or want to skip the tedious farming loops entirely, you can easily secure your progression by looking for premium ARC Raiders blueprints for sale directly on our website.
ARC Raiders Sentinel Firing Core Locations
The most reliable Sentinel Firing Core spawn locations span across four major maps in ARC Raiders, with Dam Battlegrounds serving as the premier farming map due to its high density of static spawns.
Dam Battlegrounds (Top Farming Map)
This map features the highest concentration of high-probability static spawn points. You can scout multiple locations in a single run:
- Research & Administration (R&D Building): Located directly in the middle of the map. Check the southern corner, mounted directly to the ceiling structure above the blue external metal staircase. This is the most popular community spot due to the abundance of ground-level cover.
- The Broken Dam / The Breach: Two distinct Sentinel spots sit on opposite sides of the ruined dam bridge spanning the open valley between the Control Tower and the Power Generation Complex. They attach to the concrete structural beams overlooking the drop.
- R&D Overwatch Platforms: Look upward at the high, concrete walkway ceilings surrounding the upper levels of the main Research and Development district.
Buried City
Buried City offers strong alternative spawns if the Dam map is heavily contested by enemy Raiders:
- Townhall Bell Tower: Look inside the large yellow bell tower looming over the main plaza. The Sentinel clings to the interior ceiling and tracks players below.
- The Highway Bypass / Merano Bridge: Underneath the massive elevated highway structures running across the center/western edge of the map. Sentinels hang below the bypass structure, tracking the wide-open pathways below.
- Santa Maria Houses: Positioned directly on the ceiling beams overlooking the central residential courtyard block (often visited during the “Digging Up Dirt” questline).
Spaceport & The Blue Gate
These locations feature deep-zone vertical structures where sniper tracking AI excels:
- Spaceport (Trench Towers & Container Storage ): Located on the overhead metal supports in the Container Storage district, or hanging underneath the northern guard structures at the Trench Towers.
- The Blue Gate (Pilgrim's Peak & Underground): Mounted directly onto the high stone tower walls at Pilgrim's Peak. Alternatively, check the ceilings inside the subterranean tunnels accessible via the Main Head House or the Northeast Concrete Checkpoint.
Safe Courier Route: Buried City West
If you want to completely avoid hunting active laser turrets, run the Western Edge Courier Line in Buried City:
- Mark a waypoint at the Northern Station Metro Entrance (near the hospital).
- Head strictly South toward Merano Station along the western map boundary.
- Scan to your right for billowing black smoke plumes. These indicate crashed ARC Couriers. Check the spawn near the cylindrical barrels and the final container zone between the Warehouse and Grandioso.
Strategies & Tips
To maximize your efficiency and survival rate while farming Sentinel Firing Cores, use these advanced tactical tips:
1. Optimize Your Loadout for High Impact
- The Sledgehammer Approach: Bring a high-impact kinetic sniper or marksman rifle to take them down from afar. Sentinels cannot track you outside their standard laser acquisition range, allowing you to shoot them safely from extreme distances.
- Utility Selection: Always slot Snap Blast Grenades or Trigger Grenades. Throwing a single well-placed grenade directly at a ceiling-mounted Sentinel will instantly shatter it, completely bypassing a protracted gunfight.
- Shield Deployment: Carry a deployable cover shield. If you get caught in the open by a Sentinel's tracking laser, throw down the shield immediately to absorb the high-damage plasma blast.
2. Master the "Laser Bait" Movement Technique
- Tricking the AI: Sentinels take roughly 1.5 to 2 seconds to lock their laser on you before firing. Step into its line of sight intentionally to trigger the tracking, then slide or sprint behind a hard wall just before it unloads.
- The Counter-Attack Window: Once the Sentinel fires and misses your cover, it enters a strict 3-to-4-second reload and cooldown cycle. This is your cue to immediately step out and dump ammunition safely into its lens.
3. Evacuation and Inventory Safety
- Secure Container Priority: The moment you pick up a Sentinel Firing Core, open your inventory and move it directly into your secure pocket container. Because it is a small, high-tier upgrade component, protecting it guarantees you keep it even if an enemy squad ambushes you on the way to extraction.
- Clear the Area First: Never rush blindly to pick up the dropped core. Sentinel destruction noises frequently attract nearby roaming ARC grunts or opportunistic enemy Raiders looking for an easy third-party kill. Clear the immediate perimeter before looting.