Cart Empty
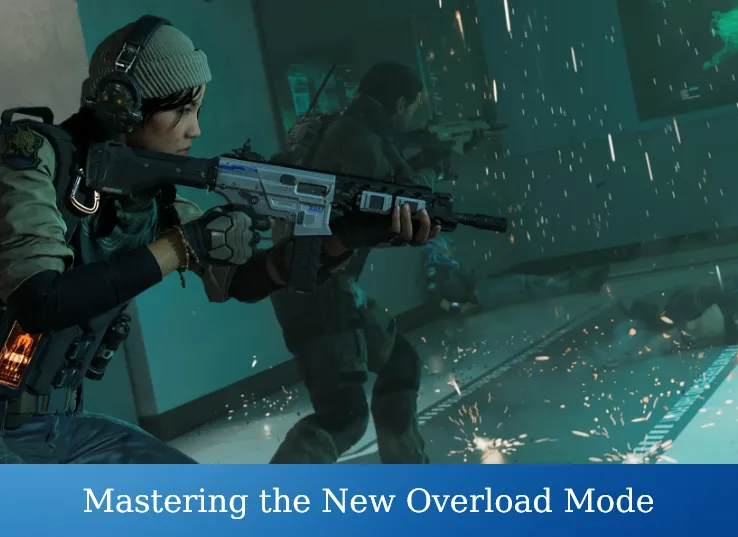
Continue ShoppingOverload is the newest core multiplayer mode in Call of Duty: Black Ops 7, and it stands out as one of the most strategic additions Treyarch has brought to the franchise in years. Unlike typical team-deathmatch chaos, Overload demands tight communication, smart rotations, and adaptive tactics. It blends the directional tension of Capture the Flag, the tempo of Hardpoint, and the spatial control of Search and Destroy—but with a constant tug-of-war dynamic that keeps both sides under pressure from start to finish.
At its core, Overload revolves around transporting a single Overload Device into one of the enemy's two Overload Zones. Each 6v6 match is divided into two halves, and teams switch sides after one reaches four points. The team that first scores eight total points wins the match.
If time runs out and both sides are tied, the game enters Sudden Death: two minutes, no respawns, and pure tension—where a single successful Overload can decide everything.
Each player's contribution matters because only one person can carry the Device at a time, making coordination and protection essential. Matches become a constant back-and-forth of attack, defense, and recovery, with no static front lines.
When a match begins, the Overload Device spawns in the center of the map. Both teams sprint toward it immediately, often clashing in brutal mid-map fights. Winning this first skirmish gives your team early tempo and positional advantage.
However, unlike domination or hardpoint, you can't simply hold mid forever—the device must move. Once picked up, the focus shifts from gunfights to escort and interception.
Once your team secures the Device, the entire map state changes. The carrier becomes the team's focal point, and their movement dictates every rotation. Your goal: escort the carrier safely into an enemy zone.
But remember, the enemy can see a HUD indicator showing the carrier's general position every few seconds. That means every push has a time limit before interception. Smart carriers will use map geometry, smokes, or Active Camo to obscure their route.
If the enemy grabs the Device, your role instantly flips. Rather than chasing them directly, anticipate their route and cut them off at choke points. The key is to position ahead of them—not behind them. Ambushing near corners, hallways, or open courtyards often proves more effective than a blind pursuit.
To score, a carrier must physically enter the enemy Overload Zone while holding the Device. It's an all-or-nothing push: if they're eliminated before crossing the threshold, the Device drops on the spot.
When dropped, the Device stays at its last position for a short period before resetting if untouched. However, if the carrier falls off the map or goes out of bounds, it resets instantly to one of the three possible mid-map spawn points.
This reset mechanic introduces a meta-strategy layer: some high-level teams intentionally reset the Device to stall time or reposition it advantageously when trapped in enemy territory. Anticipating these resets and securing the reset location early can completely flip control in your favor.
Every Overload team naturally divides into three fluid roles:
The most vulnerable but most important player. Their movement dictates the match's tempo.
Tips:
Usually 1–2 teammates responsible for bodyguarding the carrier.
Tips:
Players not near the Device must either control chokepoints or flank the enemy carrier.
Tips:
A balanced Overload squad runs a 2-2-2 split: two on defense, two on escort, and two flex players rotating dynamically depending on who holds the Device.
Mastering these three roles is what separates coordinated Overload teams from chaotic ones. Whether you're carrying, escorting, or intercepting, efficiency and awareness define every victory in Call of Duty: Black Ops 7. For players looking to sharpen their tactical awareness and refine role execution, joining structured matches or buy cod bo7 bot lobbies can be an excellent way to practice coordinated team play in a controlled environment.
In Overload, mid-map dominance is everything. Because all Device spawns are located in the center, whichever team controls this zone dictates where fights occur. Losing mid-control means your team must fight uphill just to touch the Device.
Each map has multiple traversal routes—rooftops, tunnels, side alleys—and learning them determines whether you intercept successfully or arrive too late. Players who study Tac Maps from the in-game guide gain a serious edge, as they'll know how to shortcut rotations when timers run low.
Rotating loadouts between halves or after every point is a strong strategy—Overload's dynamic flow rewards flexibility more than specialization.
Over-protecting the carrier leaves the map open for counterattacks. One or two escorts are enough; others should focus on controlling forward lanes and intercepting flanks.
If the Device is about to reset, pre-position and lock down the spawn area. Dropping equipment like Claymores or Holograms buys precious seconds when it respawns.
Overload's combat shifts constantly. Dropping Trophy Systems or Assault Packs as you move creates a trail of fallback utilities that your team can retreat into when momentum shifts.
When pushing forward, always anticipate an enemy counter-route. The instant your HUD shows “Carrier Down,” pivot back—cut off the new carrier's route before they escape with the Device.
Every Overload match has a rhythm. Aggressive teams often overextend after scoring. Use that brief chaos to retake mid-control and prepare for the next Device spawn.
As players refine their tactics, Overload is shaping into one of BO7's most competitive modes. It's a hybrid of mechanical skill and cerebral strategy:
In professional play, expect Overload to reward communication-heavy teams with structured callouts (“Carrier East,” “Reset incoming,” “Zone B clear”).
It's also ideal for ranked playlists, as it showcases individual skill expression within a team context—no single carry can win alone.
Overload captures what makes Black Ops multiplayer special: constant motion, adaptive combat, and that pulse-pounding mix of aggression and strategy. Every second matters, and victory always feels earned through coordination rather than luck. It's approachable for casual players but deep enough to become a competitive favorite.
Whether you're mastering choke-point defense or perfecting last-second sprints into the enemy zone, Overload rewards both awareness and nerve under pressure.
Overload isn't just a new mode—it's a complete redefinition of team tactics in Call of Duty: Black Ops 7. Success depends on clear roles, flexible loadouts, map intelligence, and reactive teamwork. It's an accessible yet high-skill mode where smart rotations can outplay raw firepower.
Players who learn when to push, when to fall back, and when to let the Device reset will dominate Overload. Whether you're a solo grinder or a coordinated squad, this mode offers some of the most exciting, replayable gameplay in the Black Ops series.
Overload is a 6v6, objective-based mode in Call of Duty: Black Ops 7 where players battle to deliver a central Overload Device into enemy zones. Each match features alternating halves, resets, and sudden-death finales that emphasize teamwork and situational control. By mastering map shortcuts, crafting loadouts for each role, and anticipating resets, players can turn chaotic firefights into structured victories. The mode's depth and adaptability make it one of the standout innovations in BO7's multiplayer ecosystem.
U4N is a leading online marketplace offering secure, fast transactions for in-game items, currencies, accounts and boosting services. Covering a wide range of popular games, U4N provides players with reliable services, including fast delivery and verified sellers, ensuring a smooth and safe gaming experience.