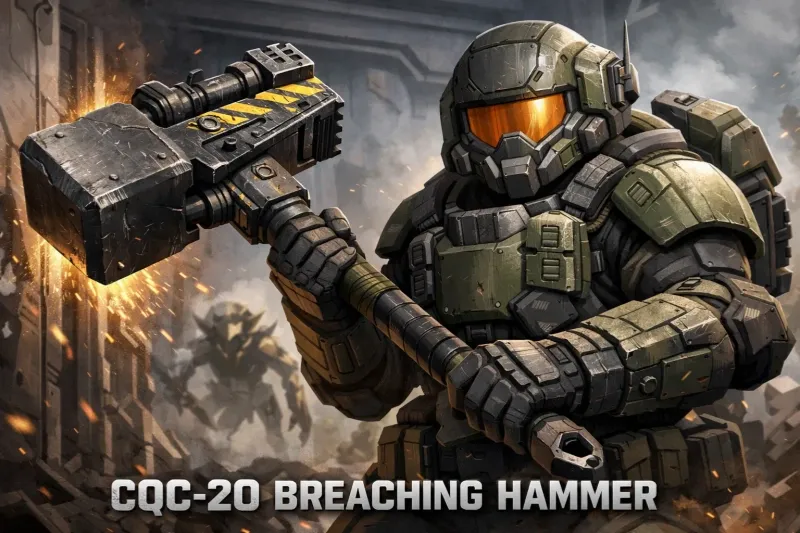
The CQC-20 Breaching Hammer is a stratagem-level melee support weapon in Helldivers 2, introduced in the Siege Breakers Warbond. It functions as a powerful anti-tank tool that uses explosive charges to deal massive damage at point-blank range.
Key Stats & Mechanics
- Ammunition: It comes with 7 explosive rounds that deal roughly 2,000 damage per hit (similar to an EAT-17).
- Ammo Efficiency: Each standard ammo pickup restores 3 explosive charges.
- Melee Option: It can be swung without charges for lower damage, which is effective for clearing small enemies without wasting explosives.
- Safety: The hammer's splash damage does not harm the wielder, though secondary explosions from targets (like Hulks) still can.
Effectiveness by Enemy
- Chargers: Kills in 2 hits anywhere, or 1 hit if striking the rear.
- Hulks: Typically one-shots them from the front.
- Bile Titans: Possible to kill in 3-4 leg strikes or a single face strike if used with a Jump Pack for height.
- Structures: Can destroy Automaton Fabricators, tanks, and even Overseers in a single hit.
- Factory Striders: Can be taken down in roughly 2 to 4 hits to the legs.
Usage Tips
- Pair with Shields: Because it requires you to be in melee range, many players recommend using it with a Ballistic Shield or Shield Generator Pack to survive the approach.
- The "Breaching" Misnomer: Despite its name, some players have noted it cannot easily "breach" certain environmental walls like C4 can.
Breaching Hammer Loadout
The CQC-20 Breaching Hammer, introduced in the Siege Breakers Warbond, is a stratagem-level melee weapon that deals heavy explosive damage. Because it requires getting close to dangerous targets, your loadout must prioritize mobility, sustain, and survivability.
Core Stratagems
- CQC-20 Breaching Hammer: Your primary anti-heavy and objective-clearing tool. It can one-shot Automaton Fabricators and heavily damage Chargers or Tanks.
- Supply Pack (Recommended): Essential for providing more explosive charges for the hammer and extra stims to survive close-quarters combat.
- Mobility Options: Jump Pack: Best for verticality and jumping behind heavy enemies like Chargers. Warp Pack: Offers consistent distance closing, though it is "louder" than the Jump Pack for stealth approaches.
- Orbital/Eagle Support: Use Orbital Smoke or Gas Strikes to blind enemies, allowing you to close the distance safely before striking.
Recommended Armor & Passive
- Siege Ready (Passive): Often found on new armor in the Siege Breakers Warbond, this passive enhances the hammer's efficiency, though some players prefer Fortified Heavy Armor for the explosive resistance when fighting bots.
- Experimental Infusion (Booster): Highly recommended to increase movement speed and damage reduction while using stims.
Primary & Secondary Weapons
- Primary: Use something for crowd control or range to cover the hammer’s weakness. The Sickle or Trident are popular for clearing light mobs.
- Secondary: The Ultimatum is a strong choice when paired with a Supply Pack to manage its high ammo consumption.
- Grenade: Thermite Grenades help soften up heavy targets that are too dangerous to approach immediately.
Recommended "Clanker Spanker" Build
To maximize the hammer's potential, use a loadout that compensates for its limited charges and high-risk playstyle:
- Backpack: Supply Pack. Essential for refilling the hammer's 7–8 explosive charges.
- Armor: Heavy Armor with Fortified or Siege Ready. Fortified provides explosive resistance to help survive your own hammer blasts and incoming rockets. Siege Ready (or other melee-buffing passives) increases non-explosive swing damage, though recent patches have adjusted these values.
- Primary Weapon: SG-8P Punisher Plasma or R-36 Eruptor. Staggers enemies to let you close the distance for a hammer strike.
- Secondary/Grenade: P-11 Stim Pistol & Gas/Stun Grenades. Use Stun Grenades to freeze Hulks in place before a finishing blow. Gas Grenades provide crowd control for smaller units.
- Stratagems: Eagle 110mm Rocket Pods & Gatling Barrage. Rocket Pods handle structures the hammer can't reach, while Barrages clear chaff so you can focus on elite targets.
Combat Tips
- Dive Swing: Diving forward while swinging increases your reach and can help you avoid a Flame Hulk's reach.
- Charge Management: The hammer has two modes. It uses an explosive charge by default; once empty, it functions as a heavy melee weapon with lower damage.
- Ragdoll Warning: Killing a large enemy with the hammer often triggers a 10-meter explosion that will ragdoll you.
About the Author: U4N
U4N is a leading online marketplace offering secure, fast transactions for in-game items, currencies, accounts and boosting services. Covering a wide range of popular games, U4N provides players with reliable services, including fast delivery and verified sellers, ensuring a smooth and safe gaming experience.